|
THE D.I.Y. VAN
CONVERSION
THE
CEILING
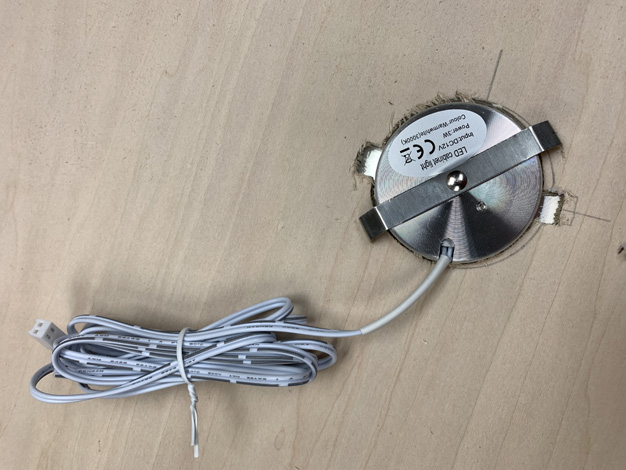
Cedar Plywood Panels 48” x 48” x 0.25”– 4 @ $44 each ($176) Varathane Polyurethane – Glossy Finish -- $0 (already had a quart) Anypowk puck lights – 6 for $30 EZ-cool silver foil insulation -- $0, left over from previous steps Styrofoam slabs -- $0 – saved from packaging Sometimes, I need to wrap my head around a job before I can attack it. At work too. If a customer comes in and wants something out of the ordinary, I might have to set it aside and glance at it out of the corner of my eye – give it dirty looks, even scowls -- for a couple/few days before I get my revelation. It always comes (almost always anyway): that moment of clarity, where I know I can take it and run with it. Blue Maxx’s ceiling was like that. I looked at it every damn day for months, from this angle and that angle and plenty in between, giving it a thorough head-wrap. How could I attach the panels over the doors? How much insulation could I use? Did I want more lights, or should I go without? If so, where would I put the dimmer switch? What did I need to do with the front section? How could I secure it around the fan? Could I relocate the slider door light? How? Did I need to add more slats? Eventually, a couple of ideas stepped up and said, “hey, try me, dumbass,” and I knew it was time to have at it. First: beef up the insulation. Those ceiling crossbeams get mighty hot under the tropical summer sun.
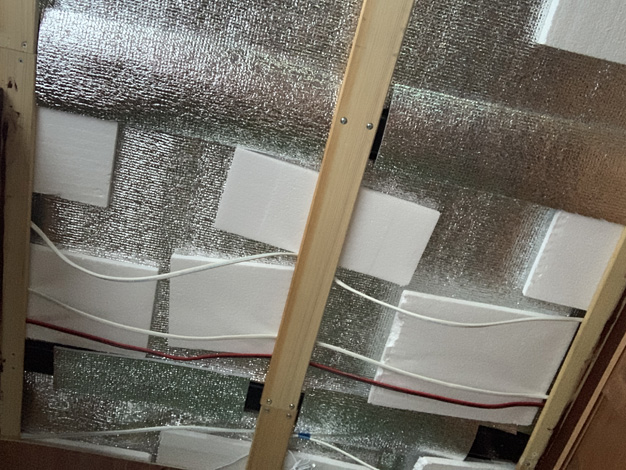
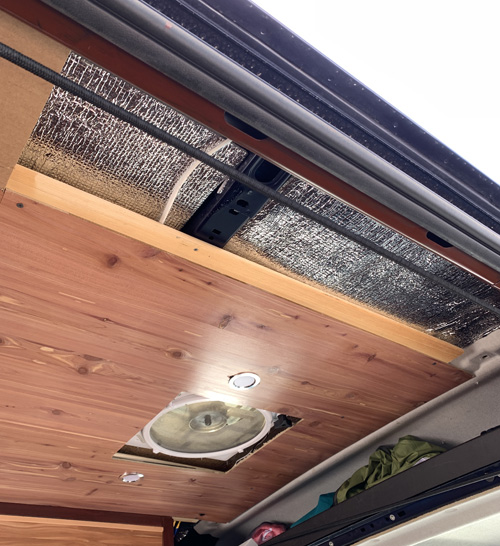
But, as a just-in-case, I had run six 12AG wire sets across the ceiling from one wall to the other, with a little extra. Figuring there might be a gadget or two that I would come across in the future, it would behoove me to have wires there and ready. If I never use them, so be it. Better to have and not need than to need and not have, right-right? So, time will tell if that was a good plan or a WOW (waste of wire), but for now, those puppies were ITW (in the way). If all I had to do was spray that stringy 3M-90 adhesive on a wide slab of EZ-Cool and slap it up there, it would have happened. But trying to negotiate up and over the wires would’ve gotten messy, and it just wasn’t as easy as Plan B was. Hence, I had been saving Styrofoam slabs (i.e., Plan B) from all the deliveries at work. The ceiling itself was all EZ-cooled already; I just needed to cover those beams, which was cake. Then I jammed styro slabs on top of the cabinets and over the center slats, and every place I could make one stay, till plenty of the ceiling was covered. (Note: 3M-90 eats Styrofoam, so don’t try it. I did. It failed. Badly.) Second: The
Cedar Panels Would it be overkill to use cedar on the ceiling too? Nahhhh. I mean, if cedar doesn’t go with cedar, what will? Four 48” x 48” panels would do the trick. The two rearmost ones – labeled R and M (for “rear” and “middle”, duh) -- would only need a few inches cut off. The gap between the cabinets was 41.25”. The frontmost panel would be a lot more complicated. We’ll talk all about that later. I didn’t even bother to use the worktable. I stayed outdoors and put each panel on the sidewalk beside the van – using Blue Maxx’s big body for shade -- with about 8” hanging over the curb. I measured it and marked a cut line at 6.75”, then ran the cordless Ryobi Circular Saw with its slick 20-tooth blade smoooothly across it. I lifted it up to do a test fitting. It was pretty awkward -- I couldn’t really get under it because of the bed – but it was gonna work. In faaaact… I came up with a terrific idea. More on that later too. =) Third: More Puck Lights
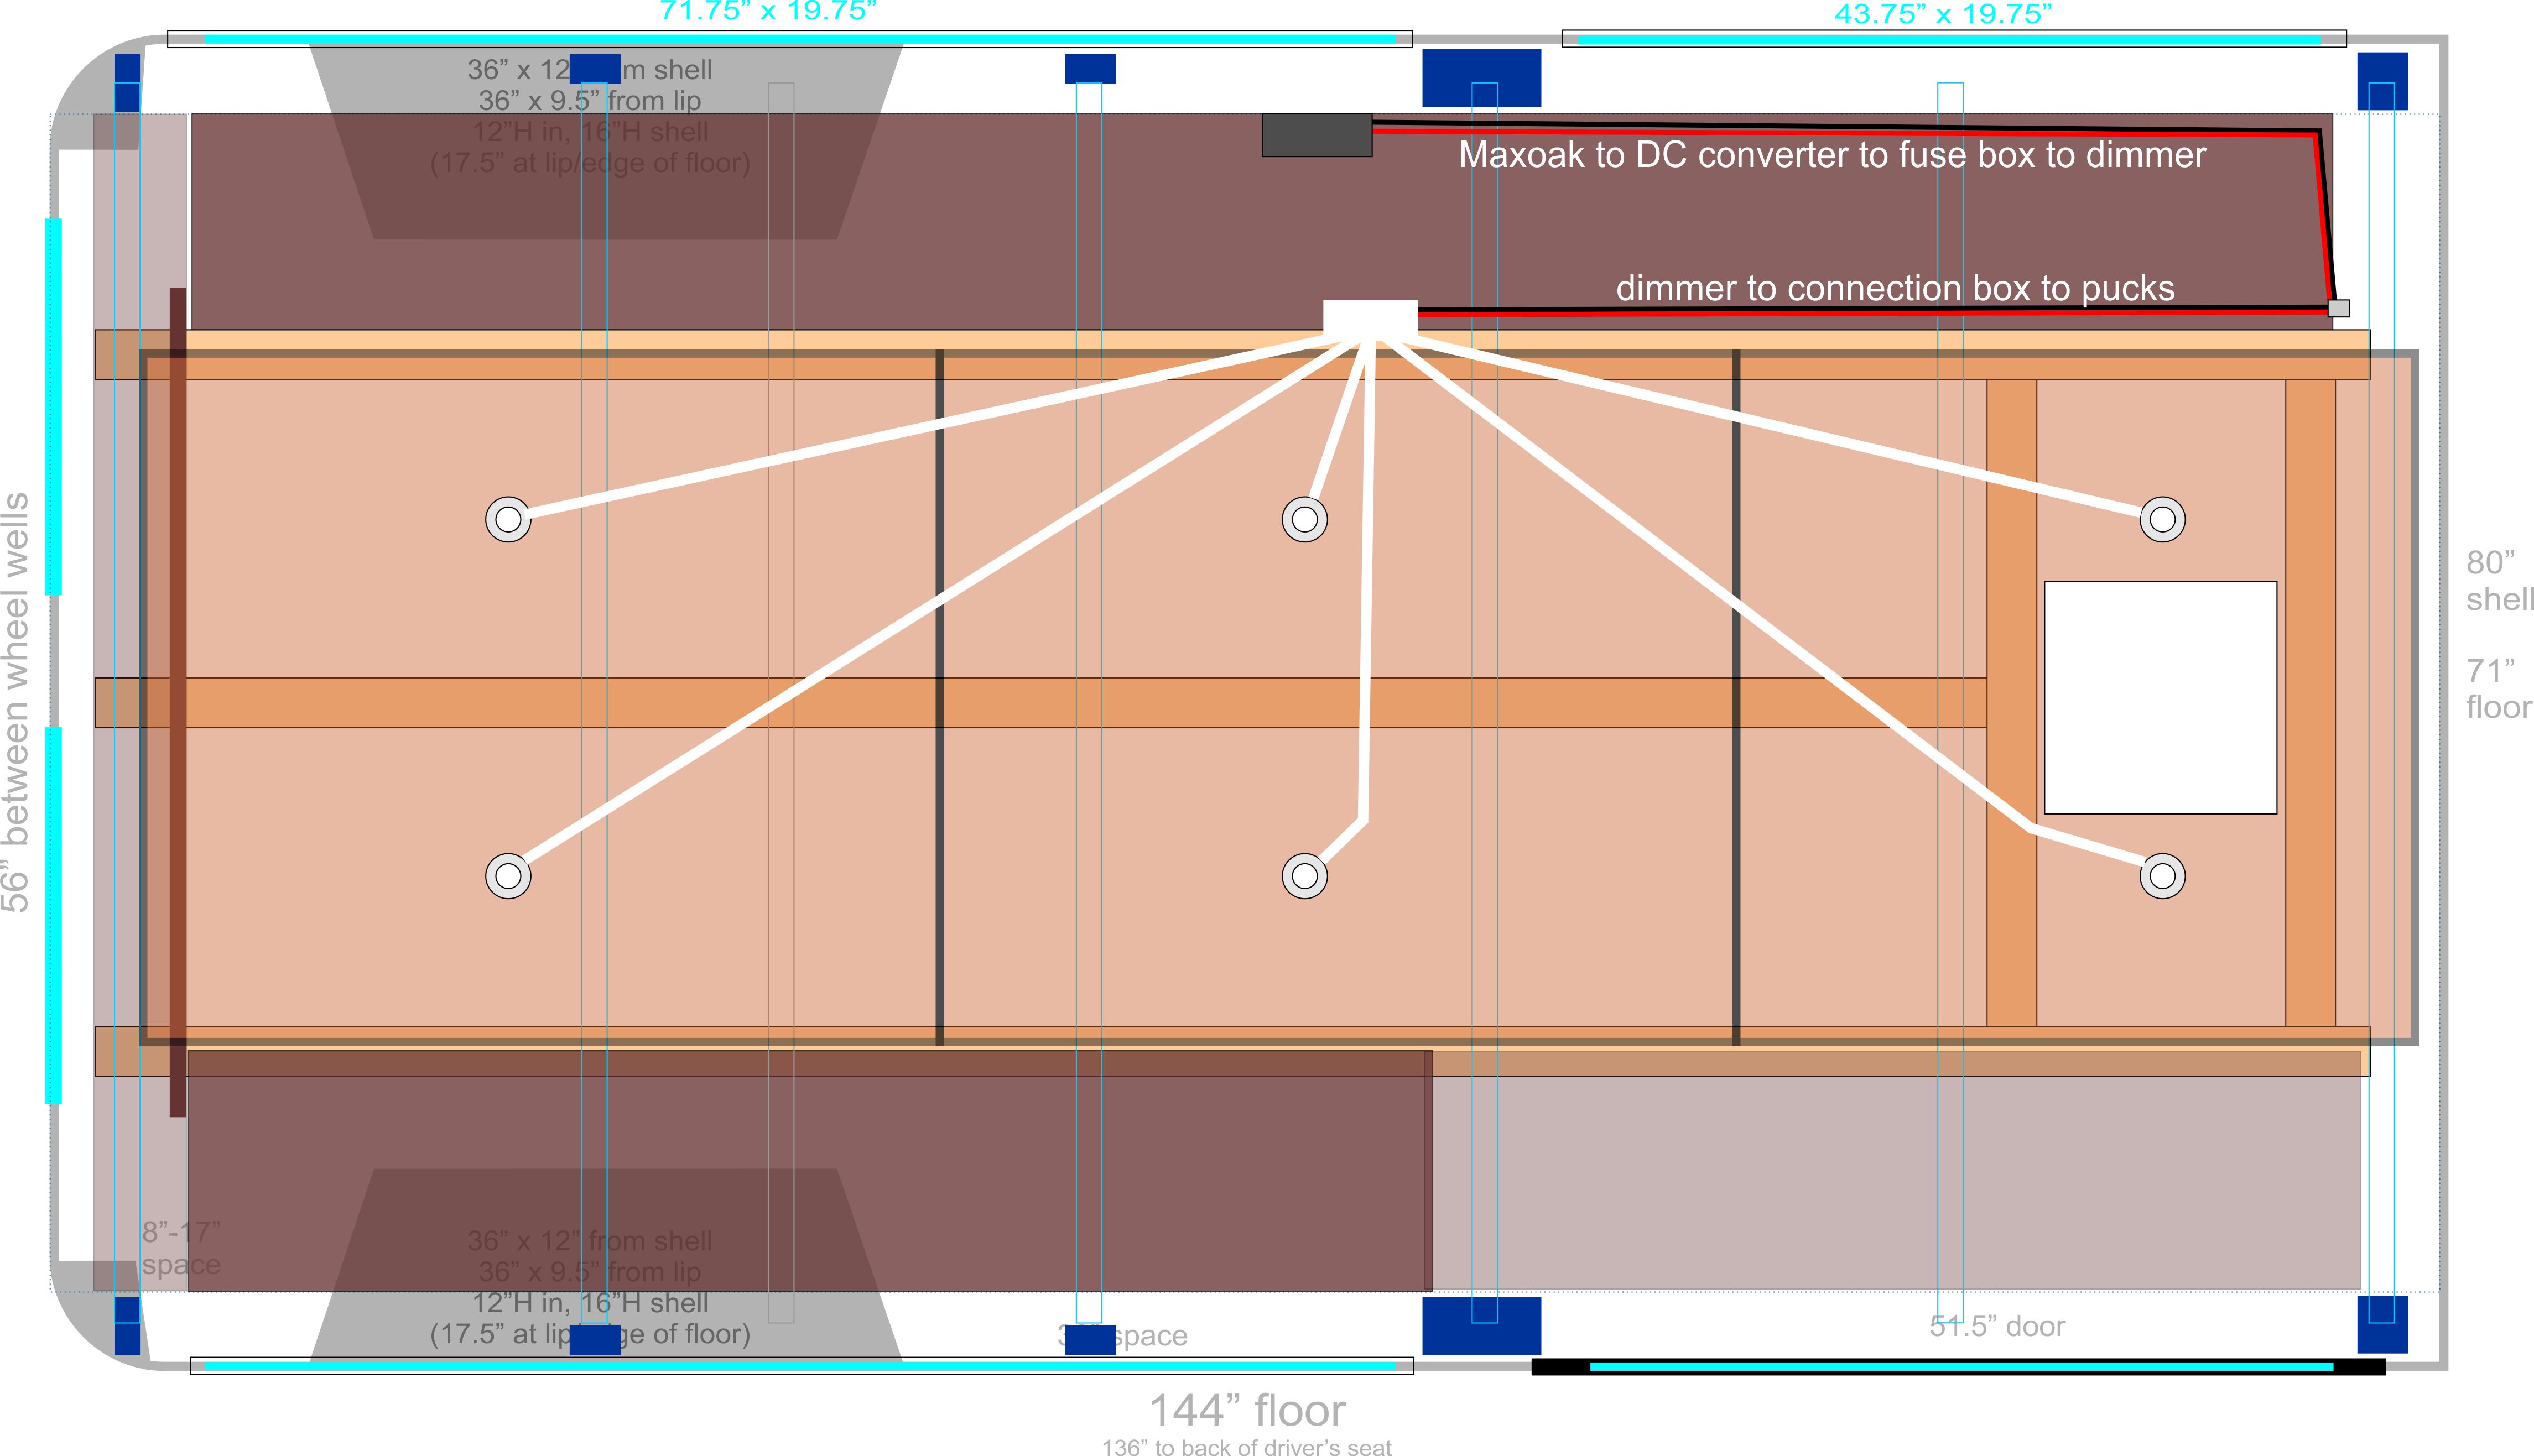
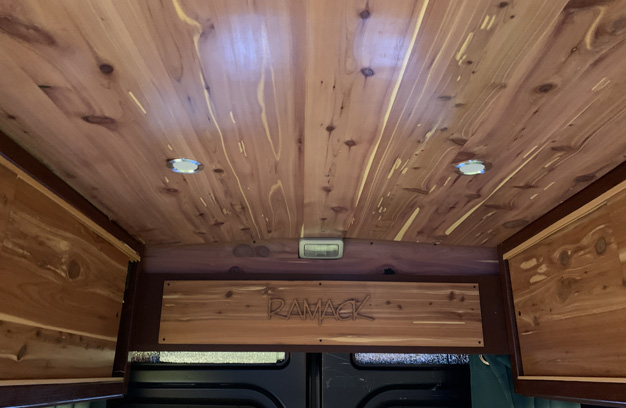
With the wooden slat running straight along the spine, there would be no way to do the lights in the center, so I opted for pairs: rear, middle, and straddling the fan in the front. I mounted the small white connection box, which comes with the set, on the inside of the top beam of the center cabinet. The 7’ wire from the back-right puck would barely reach. That box needed to be reasonably removable, so rather than screwing it in, I used Velcro. And, just to be sure that the “cro” would not come loose from the cabinet frame, I staple-gunned it in place. These lights probably won’t even get a real lot of use, either. If I need to see into the cabinets at night, I’ll use them, or if I need to see the whole floor. They can be useful as I leave the driver seat to head back into the belly of the whale for the night. Or if I need to take a quick look backwards for something. In either case, right behind the driver’s head is a good spot for the switch.
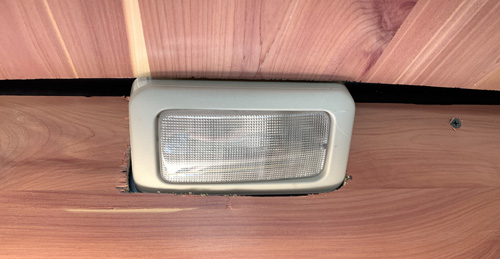
If one ever needs to be replaced, well, we’ll cross that bridge when we have to. Fourth: The Garage Light So, with panels polyurethaned, pucks mounted, wires unfurled and taped down, it was back into the van. I had thought about moving the back interior light, the factory-installed one right above the back doors. The guys in the ProMaster Forum refer to it as the “garage light”. It is wired to the starter battery and turns on when you open the door. You know, every car has that kind of light. It looked like it was going to be blocked by my ceiling panel, so I considered taking it out, cutting a space in my R panel and having it shine straight down. It seemed like a lot of work that I really did not want to do. Not only was the garage light not being relocated, it was turning out to be the keystone to the installation of the cedar panels. As I first lifted up the panel for the test fit, I got an idea. Why not use the light itself as my anchor? So, as I pressed the panel back as far as it would go, I pushed the middle upward, arching it somewhat to match the curve of the metal ceiling. As I did, I shoved it straight back above the light fixture and – viola! – it wedged in there perfectly and stayed nicely in place. Jackpot! Fifth: Installing the Panels What was especially key here was that now I had a fighting chance of installing this panel without assistance. And since I had no assistants to offer assistance, this was a good thing. I had not been prepared for that eventuality, though, so I had to take the panel down and get my tools ready. Moments later, with drill/screwdriver standing on the counter and a handful of drywall screws within easy reach, I was psyched to do the install. And here was where I really wrapped my head around it! I re-inserted the panel into its over-the-light position. I needed one hand for the drill and the other to get the screw in position. How was I going to hold the awkward 48” x 41.25” cedar panel? With my head, Ned! One of the original shopping points of a van was the ability to stand up in it, and the PM afforded me that. My cedar panels were going to create a 75” ceiling, a tidy fit for my 74.5” height. Hence, all I had to do was raise up on my forefeet a little to hold the panel firmly in place with my cranium. I zoom-zoomed the mid-panel screw right into that slat-spine and the panel was secure. Easy-freaking-peasy. Another screw near the front end and a third just in front of the light stabilized it. Three more on each side and the R panel was permanently in!
I lifted it into place, stood under the center point and tried to jam the rear edge of M against the front edge of R. With the panels aligned and pressed firmly together, I applied strong head pressure and reached for the drill. I got the rear-center screw in, then spun around without lowering my skull and got the front center screw in. Bingo. The remaining seven screws took about ten seconds each and I was done!
Well, not completely done.
The lights weren’t connected to power
yet, and I still had that complicated front
panel to do.
But I was done with everything
that I had planned for the day … and more!
In the meantime, the blinds that I ordered arrived. Installing those seemed to be pretty straightforward, so I decided to pause this and go do that. It would give be a fine sense of progress and it would buy me some much-needed head-wrapping time for the rest of the ceiling.
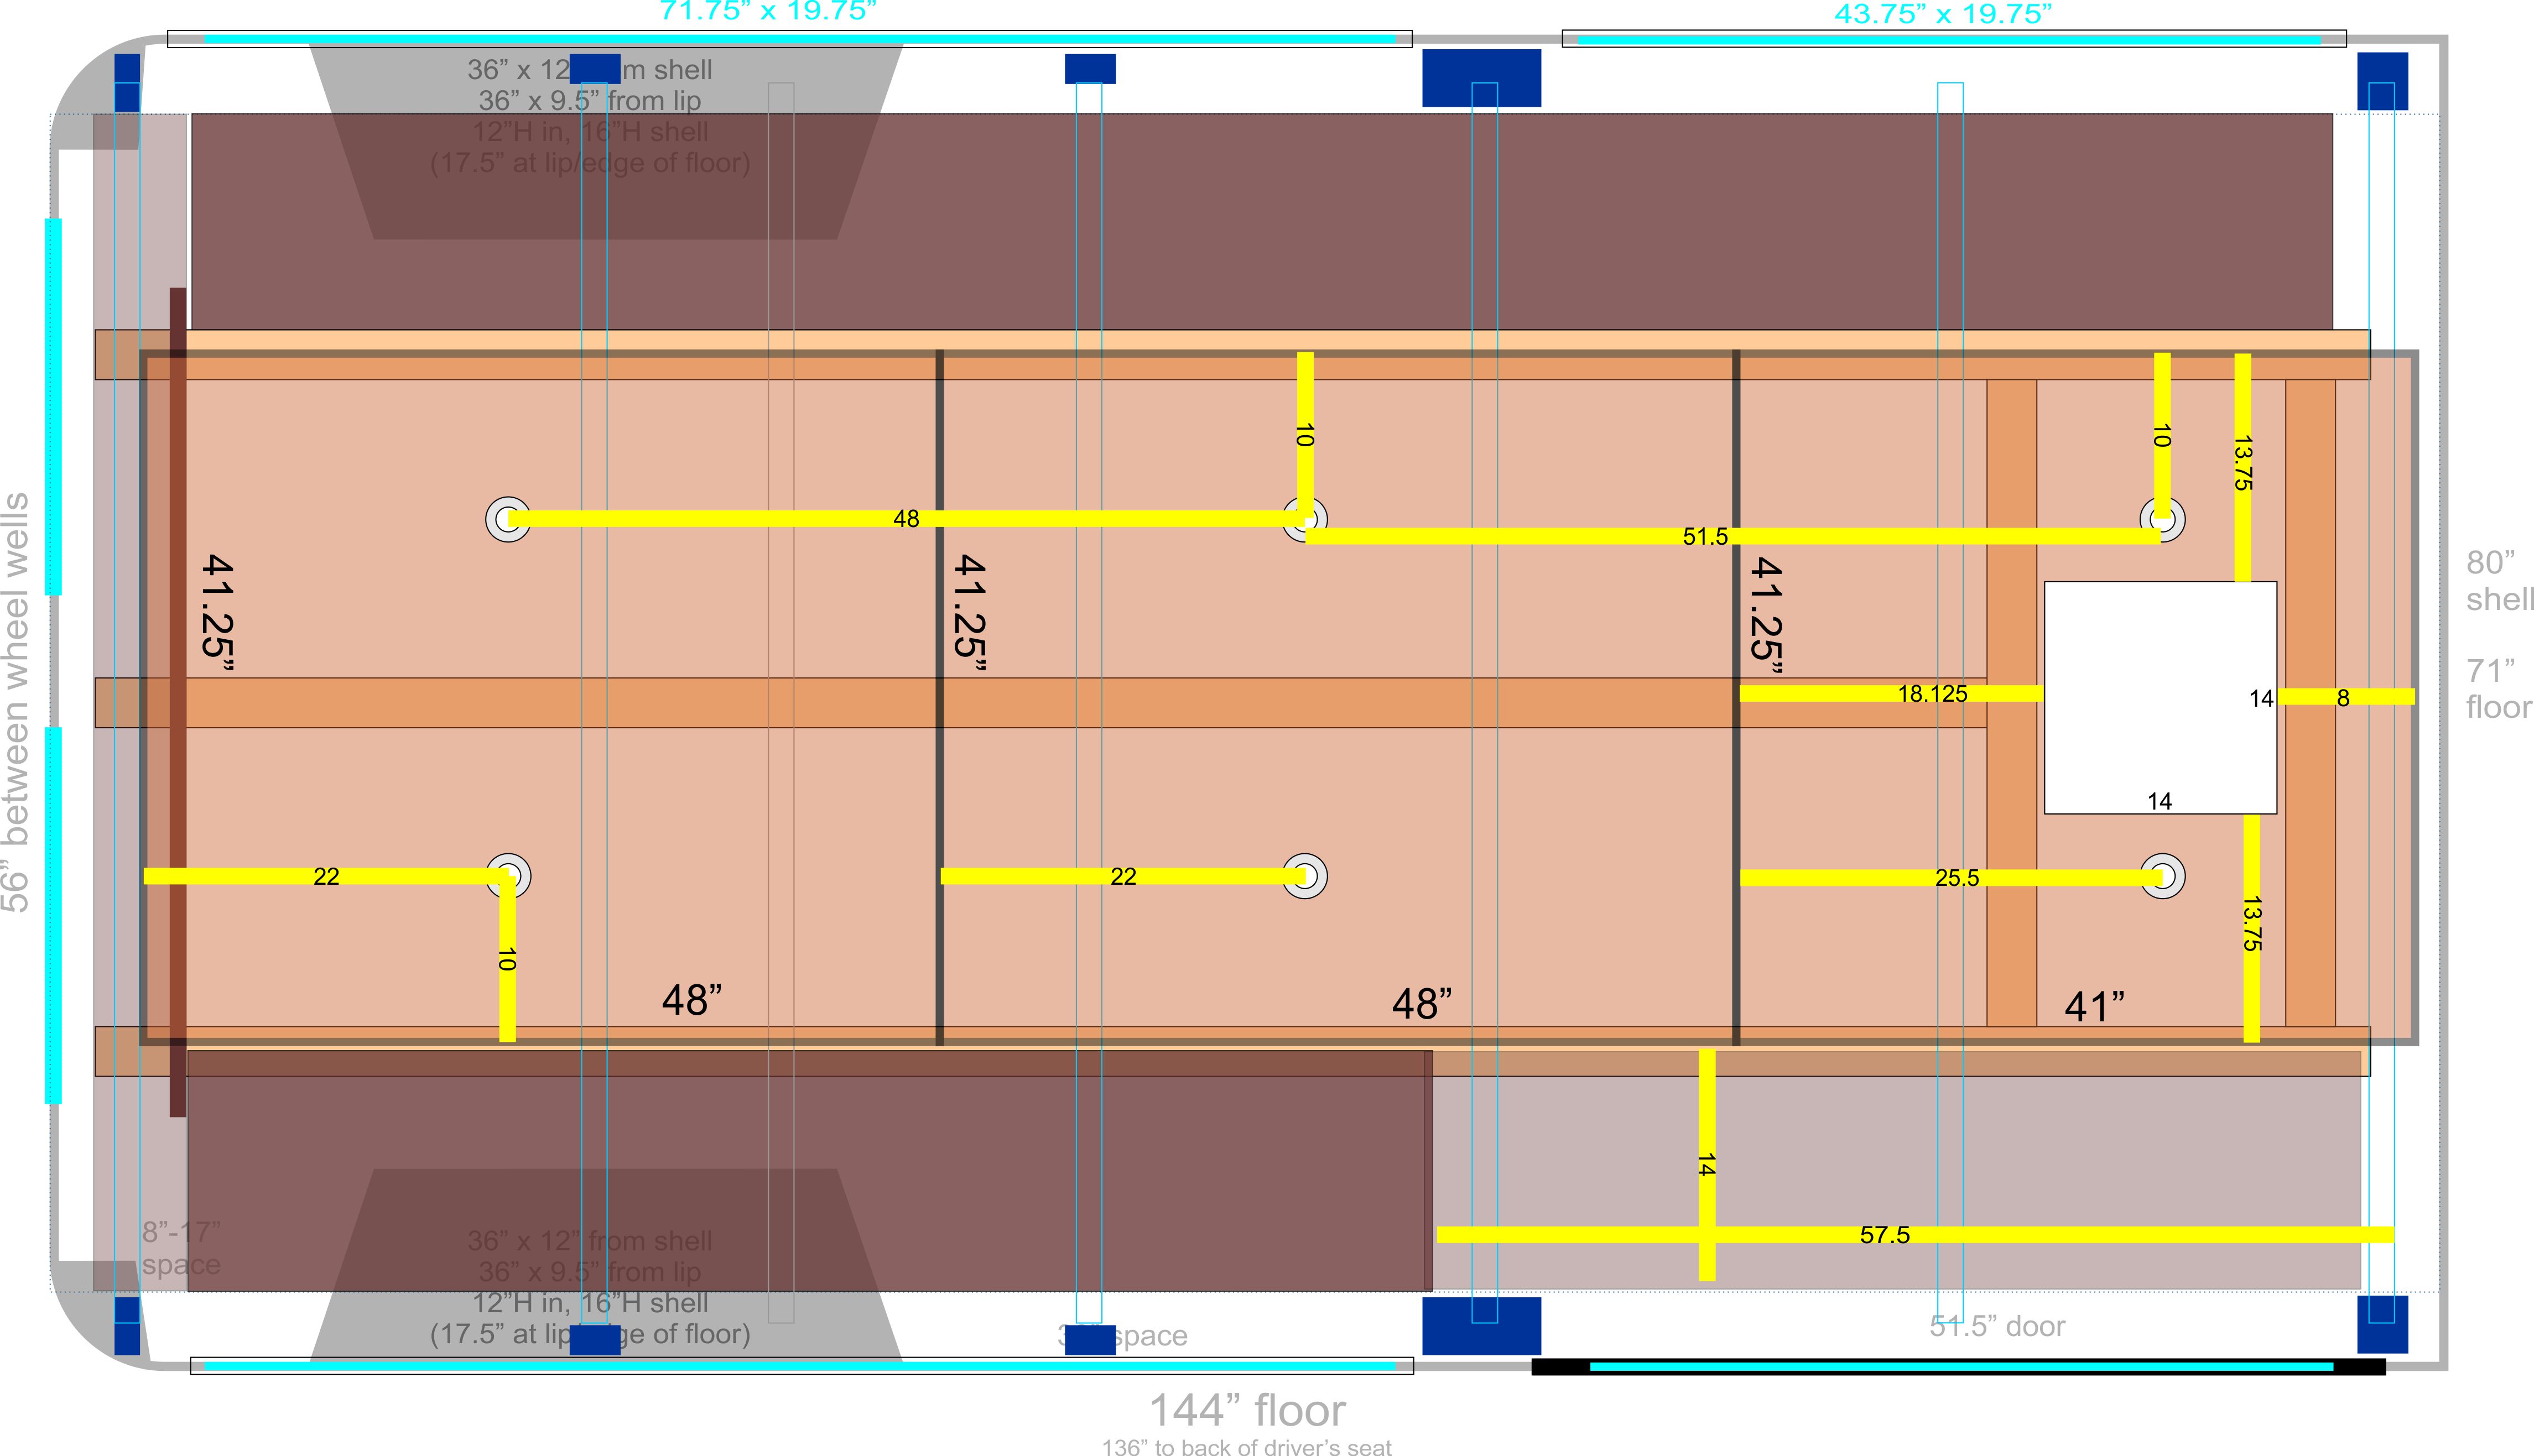
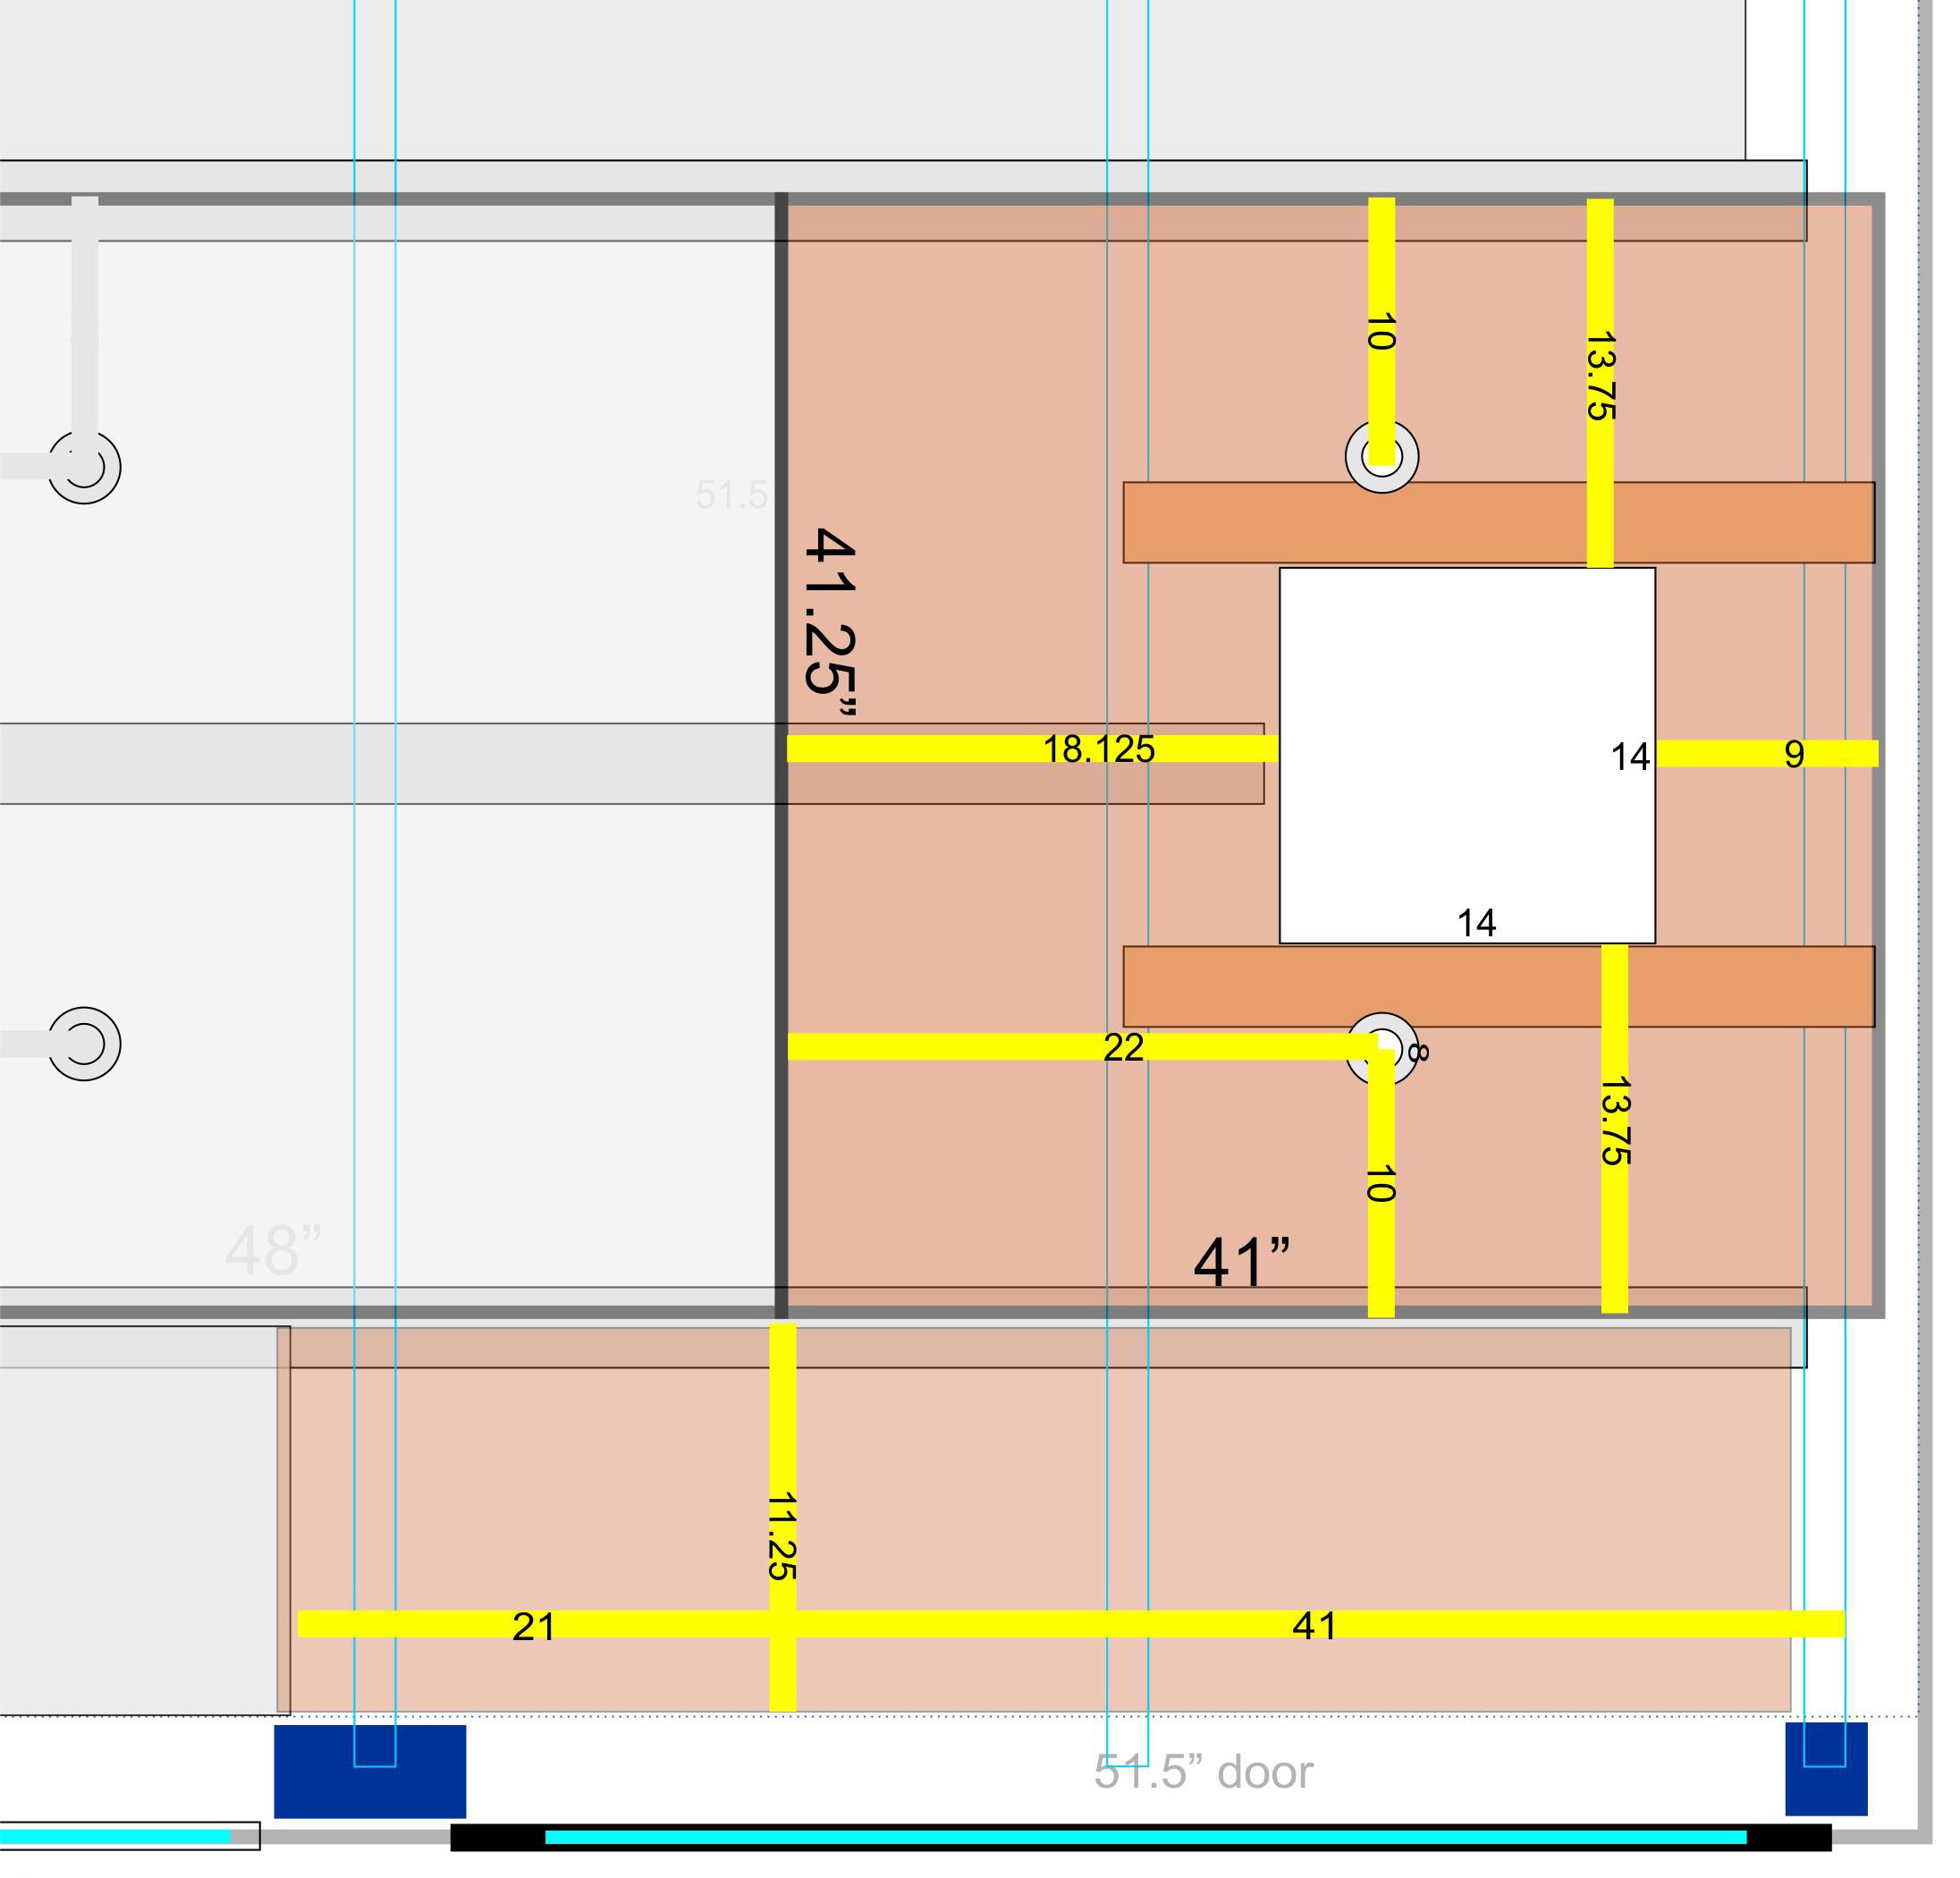
So. Couple weeks later. Back now to get the front panel(s) done. This part is far more complicated than the middle and rear panels. For one thing, there’s that fan just about in the middle of the front one. Of course, it’s not in the exact middle. That would be too easy. And there are two more puck lights to install and wire up. Annd, while the other two panels readily anchored into the three long slats that run most of the length of the room, those slats do not reach all the way to the front, so something was going to have to serve as the front-end attachment point for this panel. Annnd, the fan had a plastic flange that had to be cut and attached. Annnnd there was still an 11.25” wide space above the slider door that was going to need doing. Ah, more probs to solve. Gotta love it. The very first step was to go to CorelDRAW and make a scale drawing that includes all those aspects. Like so:
Next, I got a 48” x 48” cedar plywood panel and hit it up with a few coats of polyurethane on both top side and underside. That protects it from water, but it also is necessary to tint the new panels to match the older ones. Then I took two of my remaining three primetime 3x1slats – the last of the batch I found by the dumpster 18 months ago – and cut them to fit from the final rib (about 6” behind the fan) to the ledge of the storage compartment over the cockpit. The upper ledge is made of some weird fabric and HD cardboard combination (WFHDCC) and it shapes around a support rib for that compartment. The WFHDCC is not attached directly to it; there is about a centimeter gap. Nonetheless – or maybe nevertheless – that support rib was my target.
Well, as luck would have it, I actually have one! I bought it over a year ago because the same kind of rivets secure the sturdy, dark-grey, plastic panels to the side and back doors. I needed to remove them to install some EZ-Cool insulation in the recesses of those doors. So, they popped out easily enough and I came upon hoop #2. The rib that the WFHDCC conceals is not just a solid plate. Oh, no,no,no. It has holes. Quite a few holes. And depressions. And some sort of terminals with wires that run up to the rooftop lights. There is precious little flat, accessible metal that might receive a screw. Yeesh. Hmmmm. Well, reattaching the WFHDCC and taking my choice of spots to plant my screws didn’t seem like it would work. Instead, I found a couple of places that would work and aligned my slats rearwards from those. They weren’t exactly snug up to the sides of the fan, as had been the plan, but they were going to have to do. This was certainly not the first Plan A to bite the dust. Then I took my boxcutter and sliced a couple of 3” wide gaps in the front lip of the WFHDCC. They looked a bit hack, but the cedar panel would cover them anyway.
To secure the slats, I simply drove pointed-tip
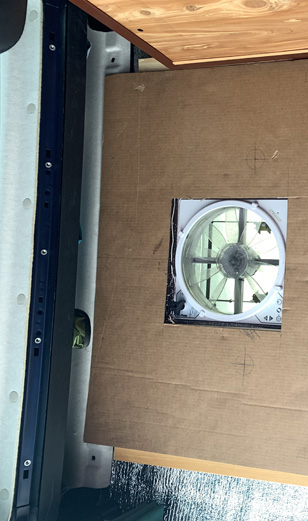
1” drywall screws through both If you’re surprised that a drywall screw would easily penetrate steel, you’re not alone. But the little sucker chewed right through the wood, paused only briefly to get a grip in the metal, then pushed right in. Sweet. So, the first part of problem #1 was solved. Now, for the panel itself. Just like a few other steps in this project, it seemed that a practice version would be a good idea. I had saved the 54” x 54” x 2” cardboard carton that the cedar panels came in, so I cut a 41.25” x 41” rectangle (almost a square) to use as a test panel. The measurements for the fan and lights took some time. I wanted to place the pair of lights with the same spacing as the other two pairs: 48” apart back-to-front, and 21.25” apart side-to-side. The passenger side puck light wire was long enough to reach the connection box, so that all looked good. The 14” square for the fan was 9” from the front of the panel, 18.125” from the back, and 13.75” in from each side. Once again, I found myself lamenting America’s shunning of the metric system. I mean, anytime you’re talking about 16ths of an inch, come onnnn. I get it. You got your inch. You cut it in 2, and you have halves. Cut them in 2, ya gut kwortahs. Cut them: 8ths. Again: 16ths. So it makes sense in that simple-minded kind of way.
But, then, of course, you have to convert it
to a damn decimal (0.063”) for any
calculations, so why not just start with one
in the first place?
That's what metrics are! Some tape measures do give you the option of 10ths of an inch, and I do use that sometimes. But you’re still dealing with 12’s and 36’s instead of 10’s and 100’s. Maybe it’s unpatriotic to call that dumb, but, hey, it’s dumb. If you’re old enough, you remember the lame-ass attempt the U.S. made back in 1975 with the Metric Conversion Act. Relics of it still endure on some highway signs. When you see something like “Chicago 100 Miles” with a smaller line “161 kilometers” under it, well, that’s about as far as it got. Changing every sign would have cost a fortune, but the real issue was the outright rejection of it by the American public. It was going to be done in phases, but not much else got done. You have KPH in small numbers on your car’s speedometer (if you still have that analog dial). One of the few things to catch on was the 750ml bottle in the liquor industry. Liters (33.81 oz) are bigger than quarts (32 oz), so rather than make their bottles an imperceptible 5% bigger and face outrage about a price bump – and, no, they were not going to give you an extra 1.61 ounces for free -- they scaled ‘em down to 750ml (3/4 of a liter, so barely more than ¾ of a quart) and made a marginal price cut, figuring they could tell people it was “about a quart”. Since figuring out 750ml in your head is way too much ciphering to do in line at a liquor store, everyone just shrugged, said “ok…” and paid up. Liquor bottlers have been laughing all the way to the bank ever since. But I digress. Again. (Not sorry.) =P Anyway, I took my big 41.25" x 41" cardboard test panel and staple-gunned it to the slats. It was a perfect fit. Bravo. Next, I brushed a good coat of cognac stain on the remaining blue metal around the slider door. That stuff takes a good while to fully dry – despite the “dries in 1 hour” claim on that can – so I did that after work in midweek to be sure it would be ready. I did not yet know how I'd be approaching that piece of ceiling, but I wanted to be ready if inspiration ambushed me.
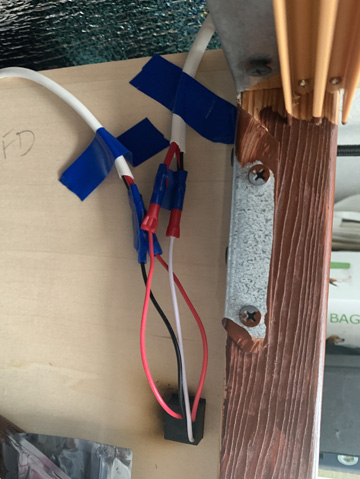
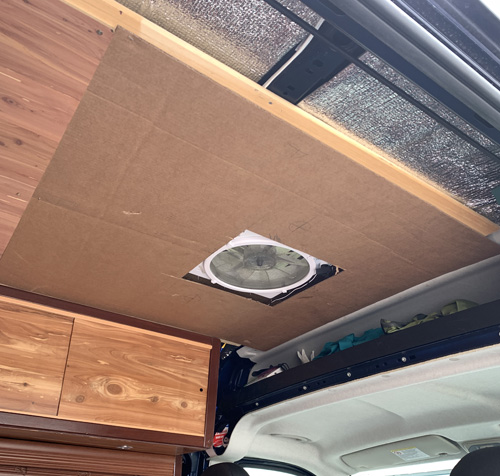
Gotta love those Ryobi cordless tools. Pop the battery out of one, slap it into the next one and fire away. I tidied up the cutting area and took the panel inside the van for final prep. Being more than three feet wide, the panel easily spanned my “hallway” between the sink and dresser. This was even better than a worktable would have been since I needed to get under as well as over the cedar to install the pucks. The wires for these lights presented yet another hoop. With the previous two, all I had to do with the wires was hang them off the front and then deal with them once the cedar was in place. With this front panel sealing off all access to the connector box, I had to plan out a way to get the wires into the general area of the box, keep them out of the way for the panel install, and do both with no “third hand” to assist. So, with the panel still spanning the hallway, I unfurled the wires towards the drivers/rear corner and used painter’s tape to lay them flat on the topside. The slack that dangled off the side was going to have to somehow get over the top of the cabinets and down inside. I twist-tied the two wires, tied a six-foot string around the very ends, passed the string over the top bar of the cabinet assembly and pulled it through and down till it rested on the desk and the wires were tugged gently in that direction. I had already stood the drill on the desk, with a Phillips-head bit locked in and a bunch of drywall screws standing at the ready, all in easy arm’s reach. Content, though not fully confident that I had not forgotten anything, I lifted the panel up and almost into position, supporting it with my left hand and the top of my head. Using my free hand (thanks, head!), I pulled the string to lift the wires up and through, and shifted my weight to align the panel butt-up with the one behind it. It settled in place just fine, so I reached for a screw, put it between my lips, reached for the drill, got up on my toes to hold the panel firmly in place, took the screw in one hand, the drill in the other, lined them up at the rear-middle position, and zoom-zoomed it right into the center slat.
With the front of the panel resting on top of
the bungee cord “curtain rod” for the cockpit, I
could drop to my heels and easily put the
remaining screws in place, including the two
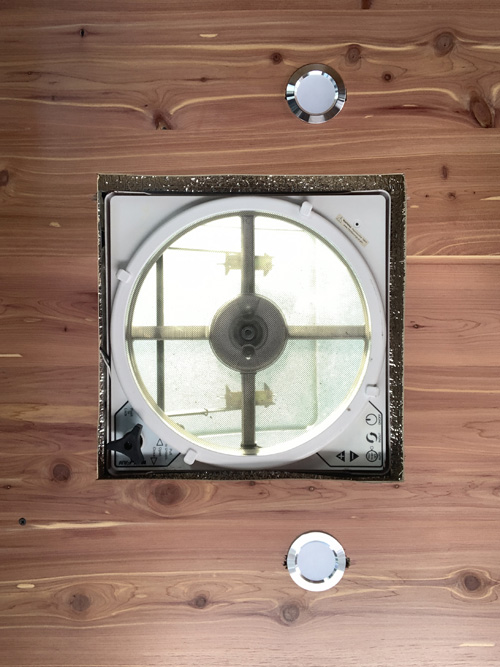
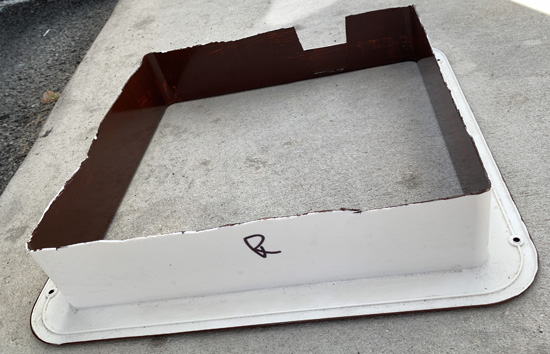
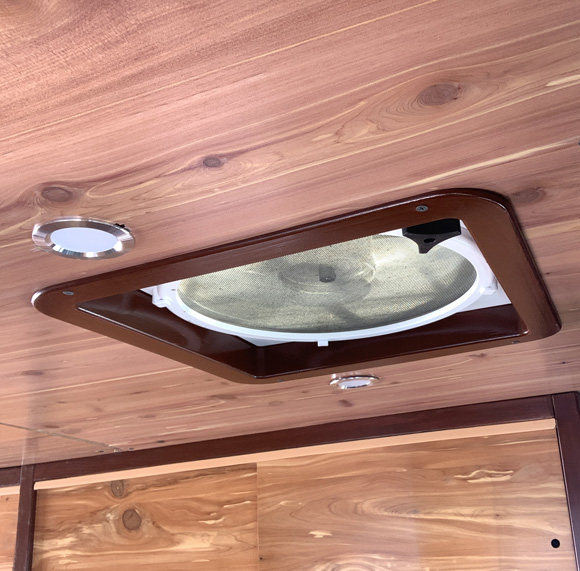
very important ones in the WFHDCC gaps. So, that brought me to that damn flange. This white plastic thing was a 14” square that was 6” high, and had a 1” wide, flat, slightly textured frame extending outward along the bottom. It’s more aesthetic than functional. It had been sitting on the dresser on my porch at home for well over a year. MaxxAir is a popular fan in RV’s – not just vans – and the spacing between an RV ceiling and an RV roof is generally larger than the spacing between a van ceiling and a van roof. The sleeve is extra-long to accommodate that. Well, that thing was too dang tall, so about half of it had to go. But nowhere could I find any advice on how to cut it. The few installation videos that I did find just said “cut it to the size you need.” OK, using what? It’s hard plastic. One just said, “you might not even need it.” Thanks, Ace. We had an odd pair of scissors at work – the size of scissors but worked more like a sheer – so I attacked it with those, chopping off a chunk at a time until I had a very ragged 3” high sleeve. I had painted the visible parts with the cognac stain. That seemed like a better fit for my décor than white woulda been.
So, technically, it took me 16 months to fully install my MaxxAir MaxxFan. I wonder if that’s a record. That left just the small side panels over the door. I could have done it with one 62” x 11.25” piece of cedar plywood. Trouble was, I had nothing longer than 48”, and I did NOT feel like dropping another $44 just so I wouldn’t have one short seam visible. Yes, it would’ve looked better, but that $44 was much better spent on those new Red Sox head covers for my golf clubs. Instead, I went with a 21” piece and a 41” piece, which would match the length of the Front Panel that I’ve just been telling you all about. If you’re gonna have seams, best to have them line up. I guess. The 21” piece was simply a rectangle, so it was easy peazy. The 41” piece had to be trimmed to allow for the bulky protrusions of metal just in front of the door. It was a pretty significant trim-out, and I had to keep putting the jigsaw back in action to cut it down right.
Once I had that done, I was faced with a
still-unsolved problem.
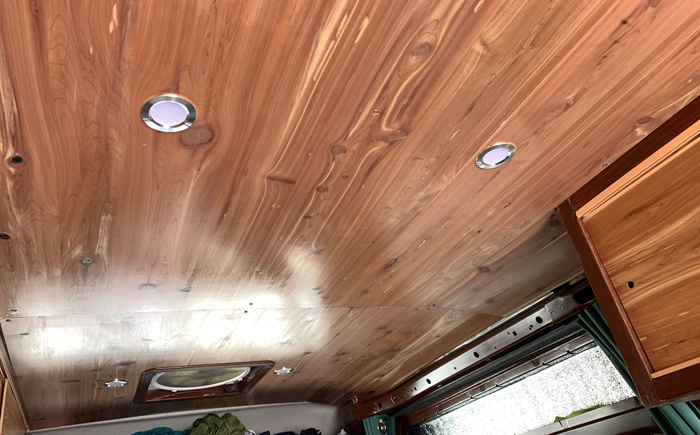
The inner edge of the There is a big fat beam there, but it angles downward too steeply to be a help. I finally opted for Velcro strips, with the vel adhered to the metal and the cro stuck on the cedar side of the plywood at the very edge. I set it up, with paper in between the vel and the cro so they wouldn’t go at it prematurely. I held the 21” panel in place and drilled in a couple of drywall screws. When I let it go and pulled out the slip of paper … nothing. The panel did not lower down onto the vel. WTF? Then, I thought: This is a good thing. It’s snug up against the wall on that side, screwed in on this side, and it’s firmly in place. Success! Same thing with the 41” panel, which actually felt even more secure. I stood back, looked it over, decided that it (a) it would’ve looked better with fewer seams, and (b) it looked good enough for me. I cleaned everything up, put the tools away, and took Maxx for a ride. The side panels did not rattle at all. And all the lights work. Yee-freaking-ha! Hence, the ceiling is d-o-n-e done. And there was great rejoicing…
|


