|
THE D.I.Y. VAN
CONVERSION
THE
"TRUNK" AND BED
Part
1: Framing the Wells
5 pine 2x4’s, 8’ lengths -- $40
4” screws and 2.5” screws -- $22
With that much of the electrical aspect in place, it was time to turn my attention to carpentry, another field which I have no right entering.
Well, maybe that’s not fair. I have more right messing with woodwork than I do with electric power. And I did do a decent amount of hammering and sawing and nailing in The Roadhouse and The Moose and Spuds. Nothing since then, though, so I’m a tad rusty after, what, 34 years? Pshaw.
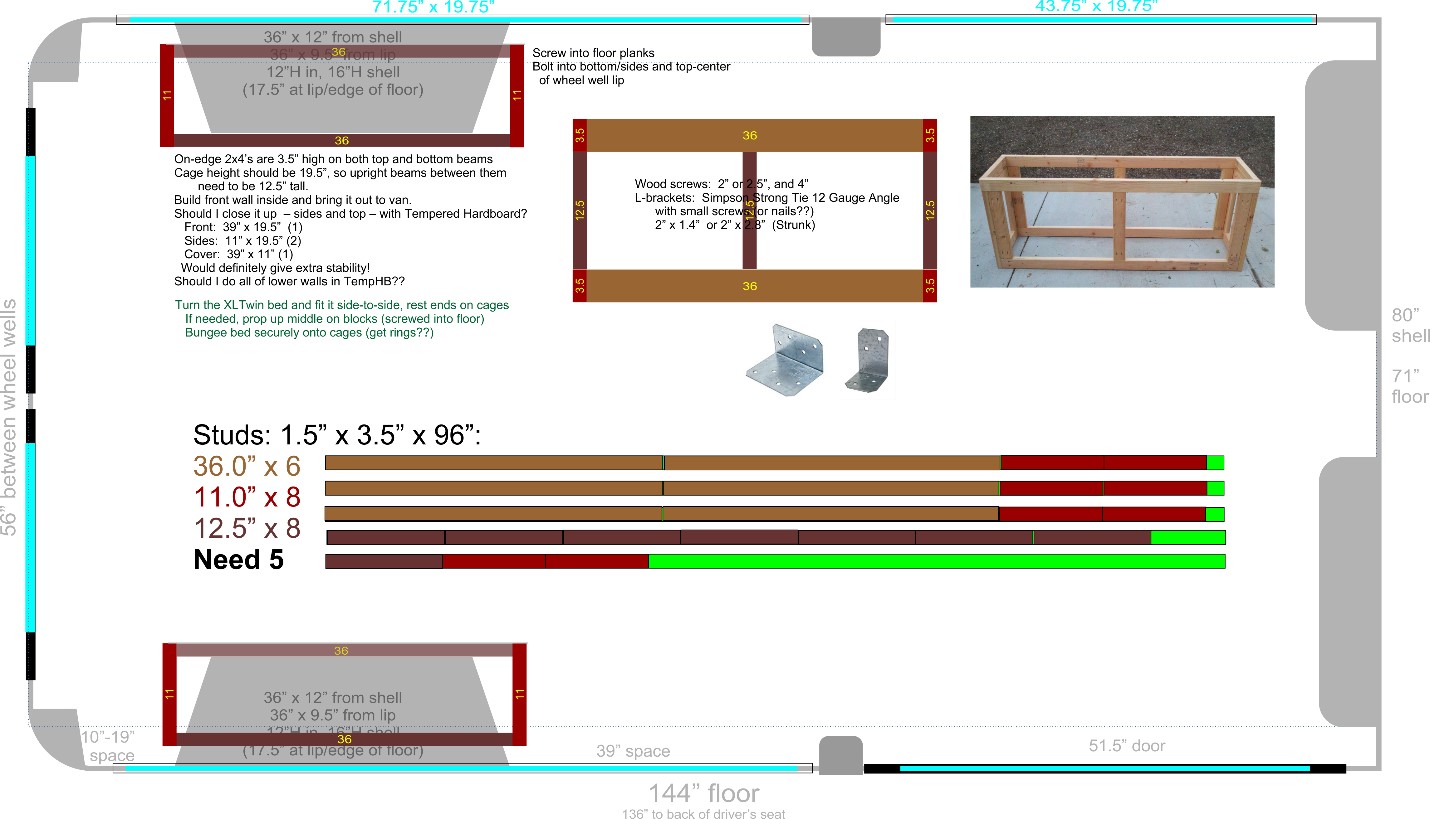
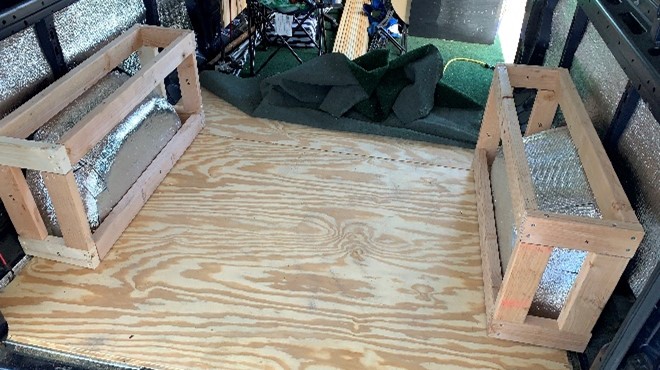
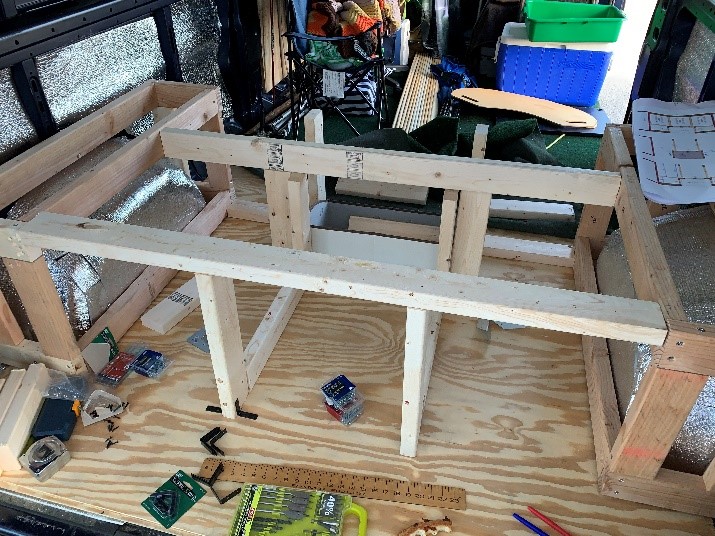
The first things that needed to be built were some kind of cages or boxes or frames around the wheel wells, something that would turn those awkwardly sloping protrusions into functional, sturdy supports. All of the many options and variations of layouts that I had dabbled with so far depended, first, on those two bumps being enclosed, or at least, surrounded.
I had my CorelDRAW schematic all drawn up, with its precise 10:1 scale, but even that had a few things that needed to be sorted out.
For instance, did you know that 2x4s are not 2” by 4”? Turns out those are their “nominal” measurements, meaning they are named that because they start out at roughly (literally) that size before they get smoothed and planed down at the mill. Plan on 1.5” by 3.5” for those puppies when you measure your project. I kinda knew that before, but it never really mattered to me until now.
My schematic took just about everything into account, even how many of which lengths I could cut out of each eight-foot-long stud.
So, simple question: how do you make a box? Ha. Easy, right? Well, slow down. Might be child’s play for Woody Woodworker, but for the novice (i.e., me), it was adult’s work. So, I sought guidance. And once again, thank you, Internet, and more specifically, thank you, YouTube.
I entered this phase with confidence, though. Too bad I didn’t enter it with long enough drill bits. Drilling and screwing the short (1.5”) way through the studs was easy, but going the wide (3.5”) way was a battle. My longest bit was less than 3”, so my pilot hole could only go that deep. For the rest of the way, I had to rely on my power screwdriver to force that zinc screw to eat its way through that tough pine.
I eventually did prevail -- but in wayyyy more than the “two hours, tops” that I had told myself -- and I had two very sturdy backless box frames ready to install.
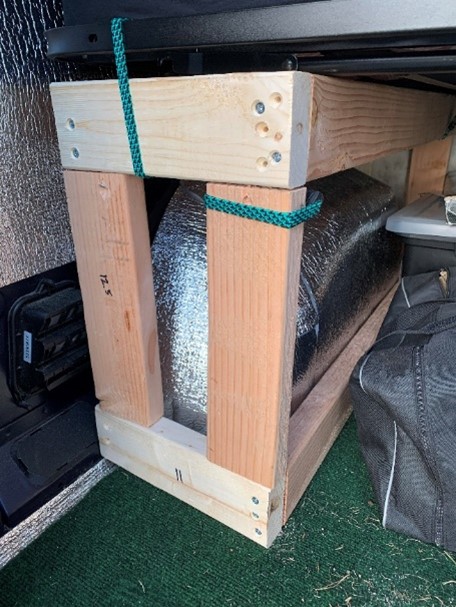
Fortunately, the install was as easy as I hoped it would be. The wheel wells had thin metal plates protruding about 2” all around right where a panel wall would be, and I was able to bolt my frame onto them, as well as screwing them into the wood floor.
That’s when I lost my mind.
Instead of just putting things back in the van
where they had been and heading home, I started
getting what-iffy.
Almost all of my proposed layouts had a
narrow bed (24” x 78”) along the passenger side
wall, under where the six-foot-long window will
be. Ya,
just 24" wide. A bed that I'll be sleeping
in every damn night. Hmmm.
So, I folded up the end legs of the steel bed frame and bungee-corded it really tight onto my well boxes. The frame’s middle legs did not reach the floor, but I rallied by tool zeal, screwed a couple of scraps of wood into the floor right where the legs would sit and made it work.
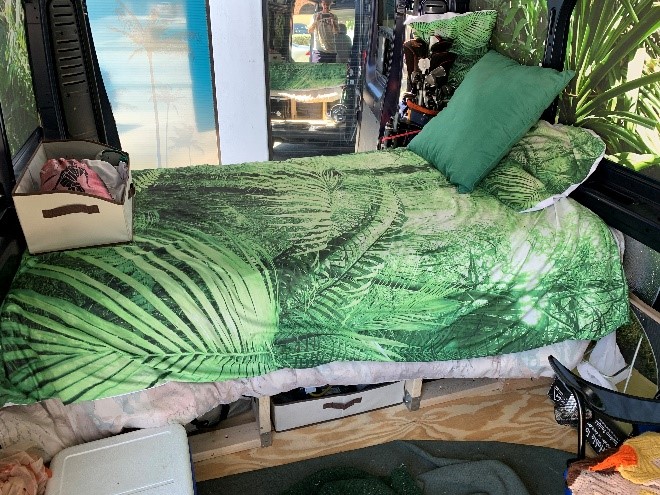
It was like wrestling an alligator to maneuver that XL Twin mattress into place. It did not seem to like the idea one bit. I’m just glad it couldn’t scream for help. Anything that size is awkward, especially when it needs to be turned around in a space only an inch bigger than its bulky self is. I eventually scrunched the end and forced it under the wall’s center rib (which is only a 72” space). It unscrunched back out into place and sprung snugly into its new spot. It might never come out, but it’s in there now.
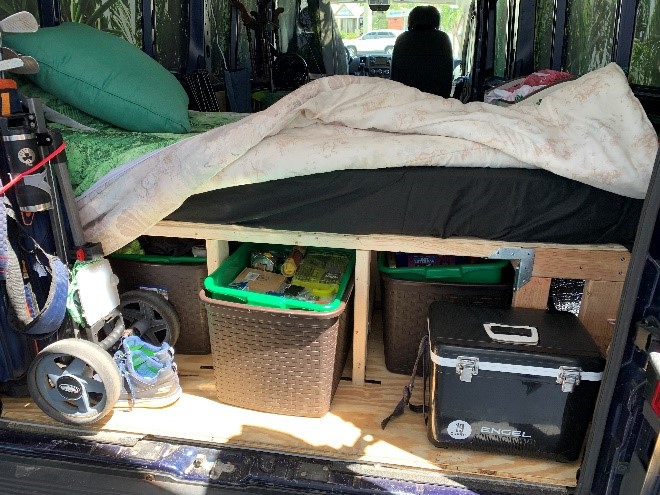
I relocated six cartons and tubs of my stuff under the bed. Much of it had been stored under there before, but now I can access it from both sides. As a plus, there is room for both my bike and my golf clubs between the bed and the back doors.
And
I have a LOT more space in here now.
There is still a ton to do, but Maxx is
starting to feel like a real room, and I
am definitely digging that.
 THE
"TRUNK" AND BED
Part
2: Making The Bed
Sande Plywood panel, 48” x 96” x 0.5” -- $36
Pine Whitewood Stud, 2” x 4” x 96” nominal – 6 for $18.50 2 in. x 2 in. x 8 ft. Furring Strip Board Lumber -- $2 Simpson Strong Tie galvanized steel ZMAX brackets, various -- $60 Simpson 1.25” wafer-head screws –100 for $11.50 Bus tubs, green, 5” height – 3 for $46 StorageWorks fabric storage bins, beige – 3 for $36 Sterlite 17-gallon tote, brown – 4 for $27 (purchased in 2017)
Yeah, you’re right. A van doesn’t have a trunk. That’s why it’s in quotes. What I’m talkin’ about is the area designated for all the stuff, crap, and junk that you’d put in the trunk of your car.
This van is gonna be my home, but, unlike your
home, there is no basement, no garage, and no
closet to throw it all into.
So, just like in my home
(where none of the above exist either), I’m
gonna put it under the bed with all the
monsters.
That’s pretty much where it all was anyway I "Framed The Wells" (above), but it was all chunky-munkeyed under there just to stash it out of the way. If this was to be for the long haul, some order would have to be restored.
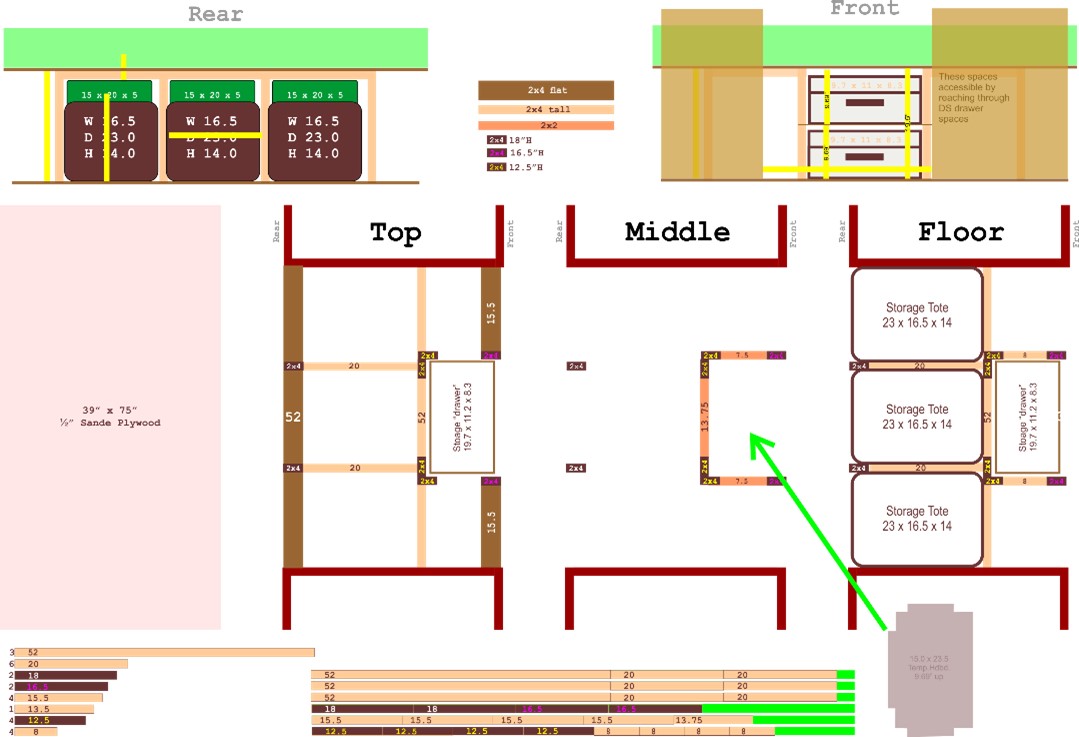
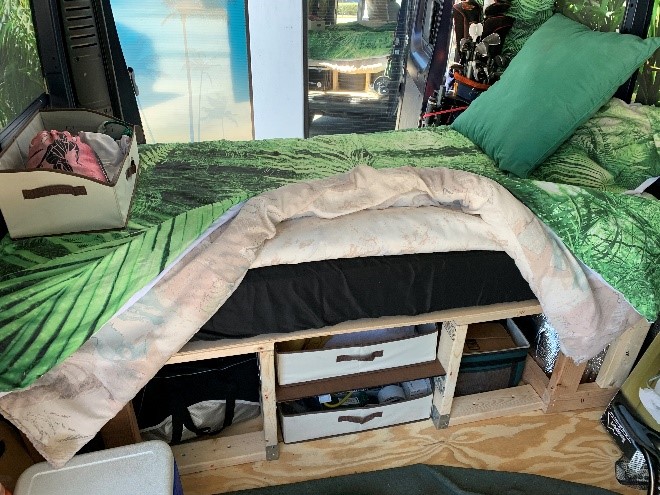
After much gnashing of teeth, I opted for three brown 17-gallon totes (which I already owned), three green 5.5-gallon bus tubs (which I didn’t), and a couple of the beige and brown fabric storage “drawers” that will be filling most of my yet-to-be-built cabinets.
The brown totes would get filled with the The Big Stuff: saws, drills, buckets, long cords, wrenches, automotive fluids, jumper cables, and plenty of things that I hope I’ll never use, but might be glad someday to have handy.
The green lugs, being just slightly smaller in width and length, will just sit on top of all that brown-tote stuff. Two of them will hold the hand tools, hardware, adhesives, bungees, my extensive supply of batteries, knives, and a bunch of other small hoo-ha’s.
The third is reserved for my golf goodies: bag-o-balls, extra gloves, spare head covers, 6-can koozie, and various other secret weapons.
The two “drawers” are for my cache of casual summer apparel. Whenever a change of clothes is required or desired, I’ll have some clean-n-dries to climb into.
All of that was cake: just a matter of sorting my stuff. What made this officially a “Step” was the construction of the spaces that would make it all work. If you’re going to have “Every Thing In Its Place,” your Things need to first have a Place to be In.
It certainly would have been easier to do this Step when I “Framed The Wells” (above). Trouble was, at that point I was still planning a different final configuration that would put the bed along the starboard side, under the big six-foot-long window, which would leave this whole area as a clear walk-through space to the back doors. Once I took a few minutes, though, to slow down and fat-ass on the bed for the first time in quite a while, I began to reassess things.
If I’m going to live in Blue Maxx, one of my top priorities ought to be sleep. Though it would be great to be able to lie on my bed and gaze out the window at the sights, scenes, sunrises, sunsets, or moonlit nights that the future will hold, that would mean cutting my bed width almost in half. And, as I lounged on that big extra-long twin mattress, I began to think, “yeahhhh, but this is so damn comfortable.”
So, I’m not 100% set on this being “it”, but I’m gonna give this rear-bedroom layout a year, maybe even more. If I decide in 2021 or early 2022 that those window views are just not to be missed, and/or that climbing over the bed to get in or out the back door requires too damn much athleticism, then I can re-do it.
Hence, this “trunk” space would be built to be
sturdy, but disassemblable, if that’s even a
word. Everything
is connected with screws:
no nails, no wood glue.
It could all be taken apart in an
hour or less.
The now-familiar Framed Wells would remain
in either case.
An eleventh-hour find at The Home Depot proved
to be huge.
Instead of drilling so many long
tedious holes through those 3.5”-wide studs, I
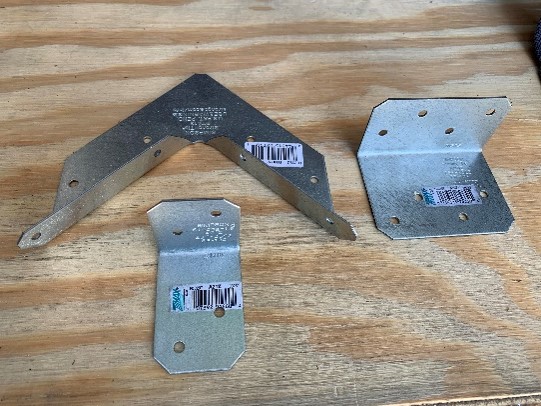
used a variety of Simpson Strong Tie brackets
and matching self-tapping screws.
Mannnn, these things are truly the
bee’s knees!
No drilling at all is necessary with
these. The
wafer-top screws have a double-depth Philips
head to give the power-screwer an even better
grip, so you simply hold the bracket in place,
position the screw, and zoom-zoom-kaboom
it’s on to the next one.
The frame is solid as you please, and
it took way less effort
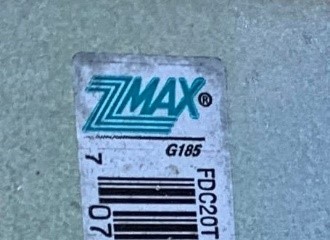
As a double-bonus, I found out when I looked at the receipt that these things are called ZMAX brackets! Destiny, baybee! That means we have the MaxxFan on the roof, the Maxoak solar generator channeling the sun power to the PowerMax converter, and now the ZMAX brackets holding the furnishing together. Good stuff.
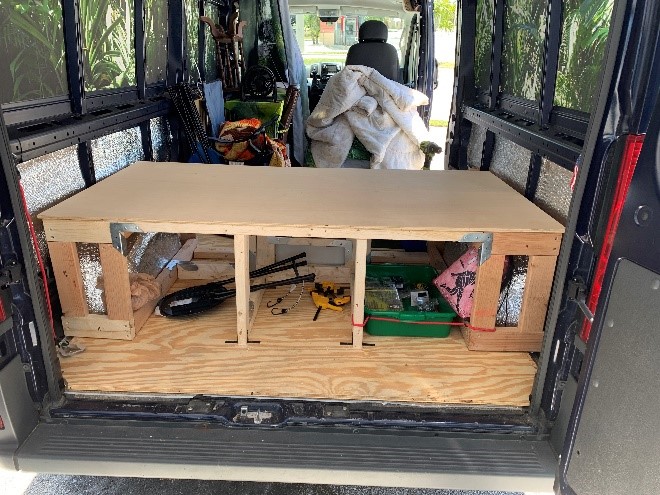
So, yeah, anyway, the irregular corners on the tempered hardboard shelf gave me a little trouble, but nothing the ol’ laser engraver couldn’t handle. (Nice to have one of those at my beck and call.) I rested the 75” x 39” plywood panel onto the frame and swiftly secured it with eight 2.5” screws to complete the construction phase.
Getting the mattress back into place was every bit as much of a pain as I knew it would be. I had the foresight to hit the laundromat with the comforters, and I did the sheets and pillowcases in the washer at home so everything would be clean when I squeezed and jammed and forced everything back between those van walls. I’m in no hurry to deal with that ultra-tight mattress fit again just to do a freaking wash.
All the totes, lugs and drawers were slid and slotted into their new homes, and Step 11 was done.
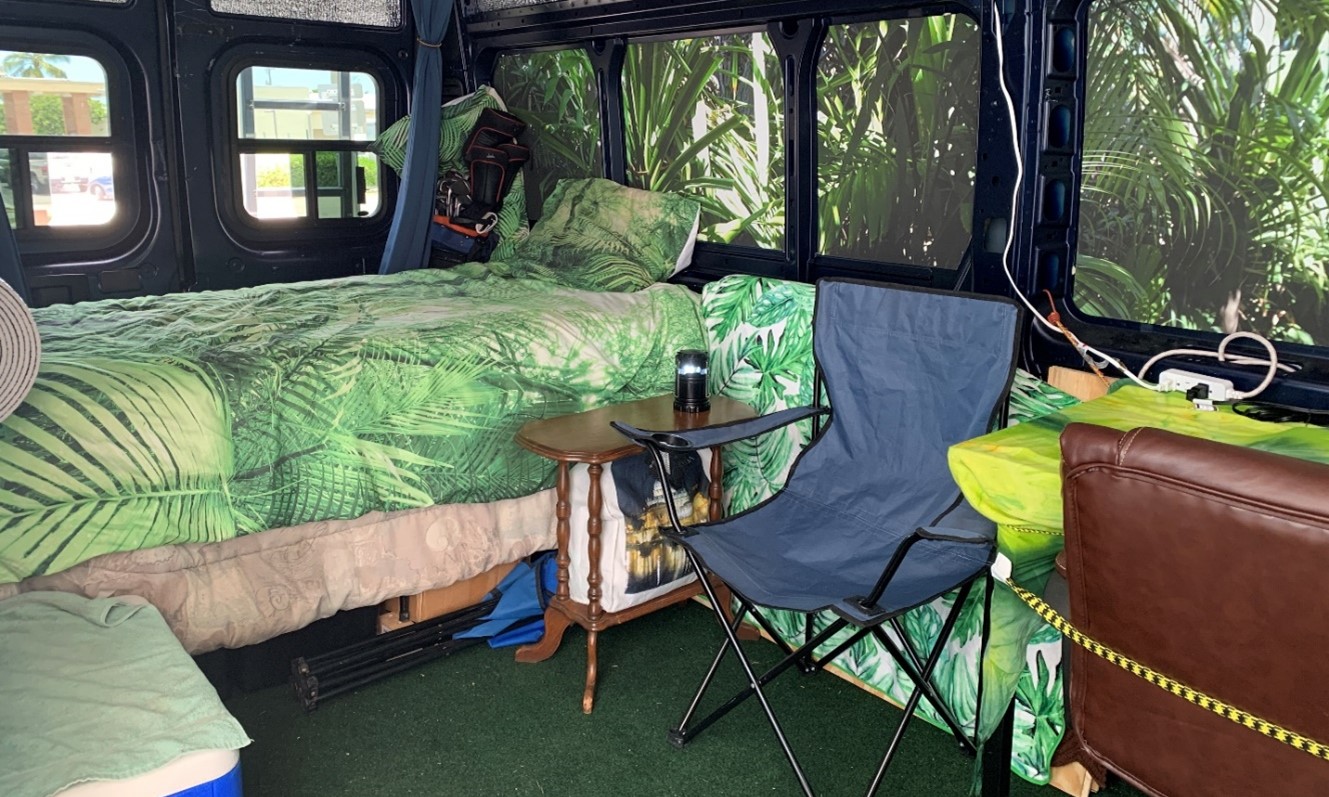
When I stood by the front seats and looked back at what I had accomplished, I was a tad chagrined that it looked no different. Sigh. I’ve done a lot of things in this project so far, but it still looks like I just threw a bed and a table into a cargo van.
No worries, though; structure and function
come first, aesthetics later.
A couple of very big steps are up
next.
|


