|
THE D.I.Y. VAN
CONVERSION
THE
OFFICE DESK
4
Aluminum Recessed Drink Holders 3.5” diameter
- $28 for 10 3”
Recessed
Grommet Outlet with 2 AC Outlets and 2 USB
Ports – 2 @ $23.99
T
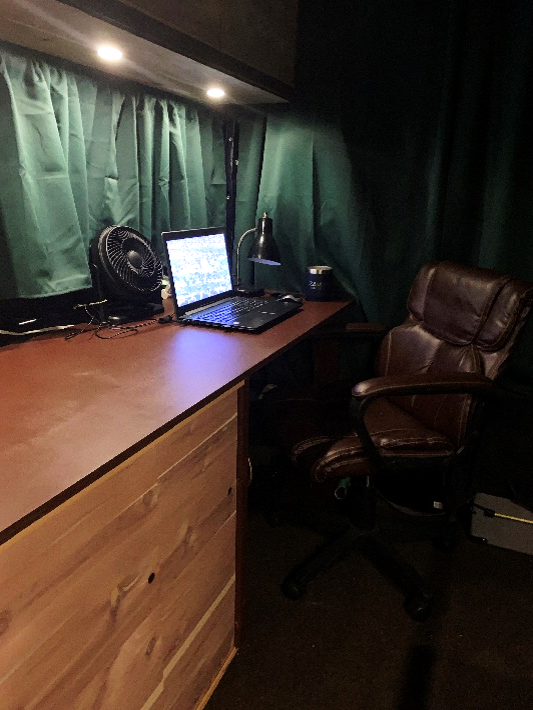
But, while the dresser needed shelves, drawers, and doors, the desk had to have a few features of its own.
First, having a desk chair on wheels -- in a van the moves, sometimes dramatically -- called for a way to secure the chair.
The first ploy was to attach a 1” stainless steel, screw-in ring on each upright, just under the desktop, and hook a bungee cord behind the chair and into the rings. Perfect.
Well, again, not so perfect. Those little rings got to be awfully hard to locate in low light, so I soon changed them out for black cabinet handles, about 3” high and 1” wide, plenty big enough to hook with a blind swipe.
So, the dresk was almost done. At first, I thought it was done, but after a week or two it was clear that the desktop needed a few things in order to be fully functional – AC outlets, USB ports, drink holders, a shelf -- and I concocted an idea of how to do them all in one.
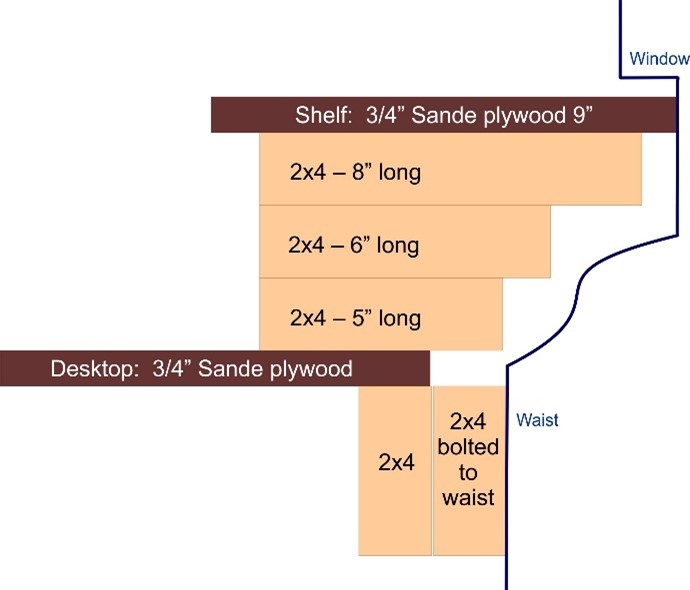
It took a while to figure out how to secure a shelf under that window. Finally, it became obvious that it would be much easier to secure it to the desk, using an inverted step setup in such a way that it extended right up to the steel wall under the window flange.
There are 4 such sets, in pairs, with a 7” space inside each pair, and an 18” space between the 2 inner steps. A 14” x 4.5” cedar panel adorns the front of each pair, with a 3.5” recessed grommet AC/USB outlet in the center. The panel on the left pair also accommodates the driver side dimmer switch for the puck lights.
My original plan had these outlets just lying flush on the desktop, but that was flirting with disaster. I knew that, at some point, I would leave the window open and a deluge would strike, flooding and shorting the outlets. I also knew that, at some point, I would spill my drink all over the desktop, flooding and shorting the outlets.
With this arrangement, though, the vertically-oriented outlets should be safe. I even have a slight overhang above them, so if any rainwater does come in, it will drip harmlessly past them.
The dotted lines on the diagram below show the locations of the 2 black aluminum recessed drink holders that I barely fit in the shelf. That took some precise measuring and almost became a significant screw-up, but, hey, we’re talking drink holders here, well worth the extra effort. Including the Driver’s Desk, I now have 12 drink holders throughout my van. That oughta be enough for one guy, right?
I didn’t think the desk could be considered complete until the floor under it looked acceptable. I had not been careful while staining the frame, so there were plenty of cognac-colored splotches on the sub-floor which warranted covering up.
It looked like a scrap, which wasn’t so bad when everything else was rough too, but now that things were coming together, I definitely needed an upgrade. I wasn’t ready for the final vinyl tile floor yet, though, so I bought a crappy, cheap brown indoor/outdoor carpet.
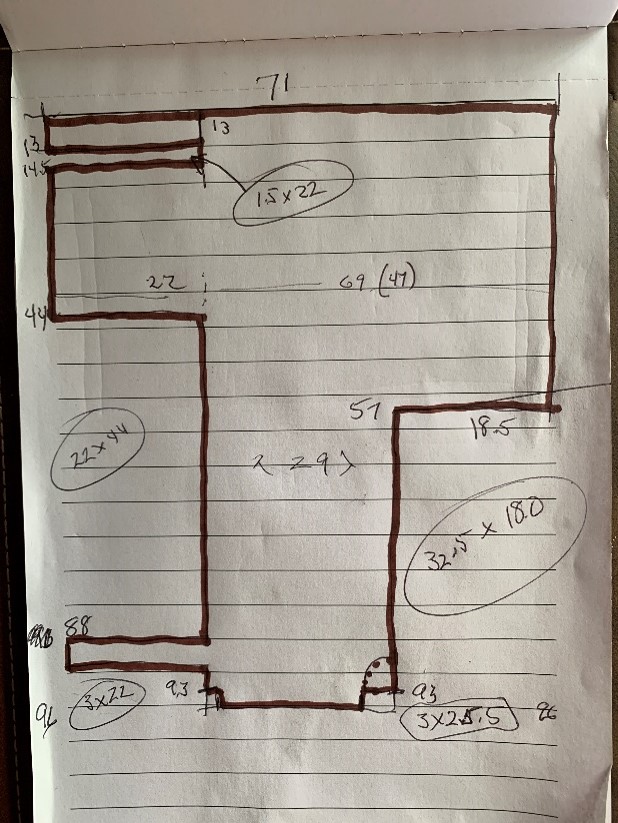
I laid out the full rug on Brian’s garage floor and carefully measured and marked out the chart in Sharpie. There were a couple of moments of confusion, though, since I had started marking it opposite of the direction the van was facing. AND, I had to keep reminding myself that I was marking it in mirror-image, since I was looking at the underside of it.
But I had a chilled pale ale to calm my nerves and unthink the overthinks and made all the proper cuts. I wanted the rug to be easily removable, since my final tile version figured to be just a few months away, so I installed it with screws, zzzmmming one in every few feet all the way around. And this time it was perfect, right down to the wraparound-down-and-under at the side door. |


