|
THE D.I.Y. VAN
CONVERSION
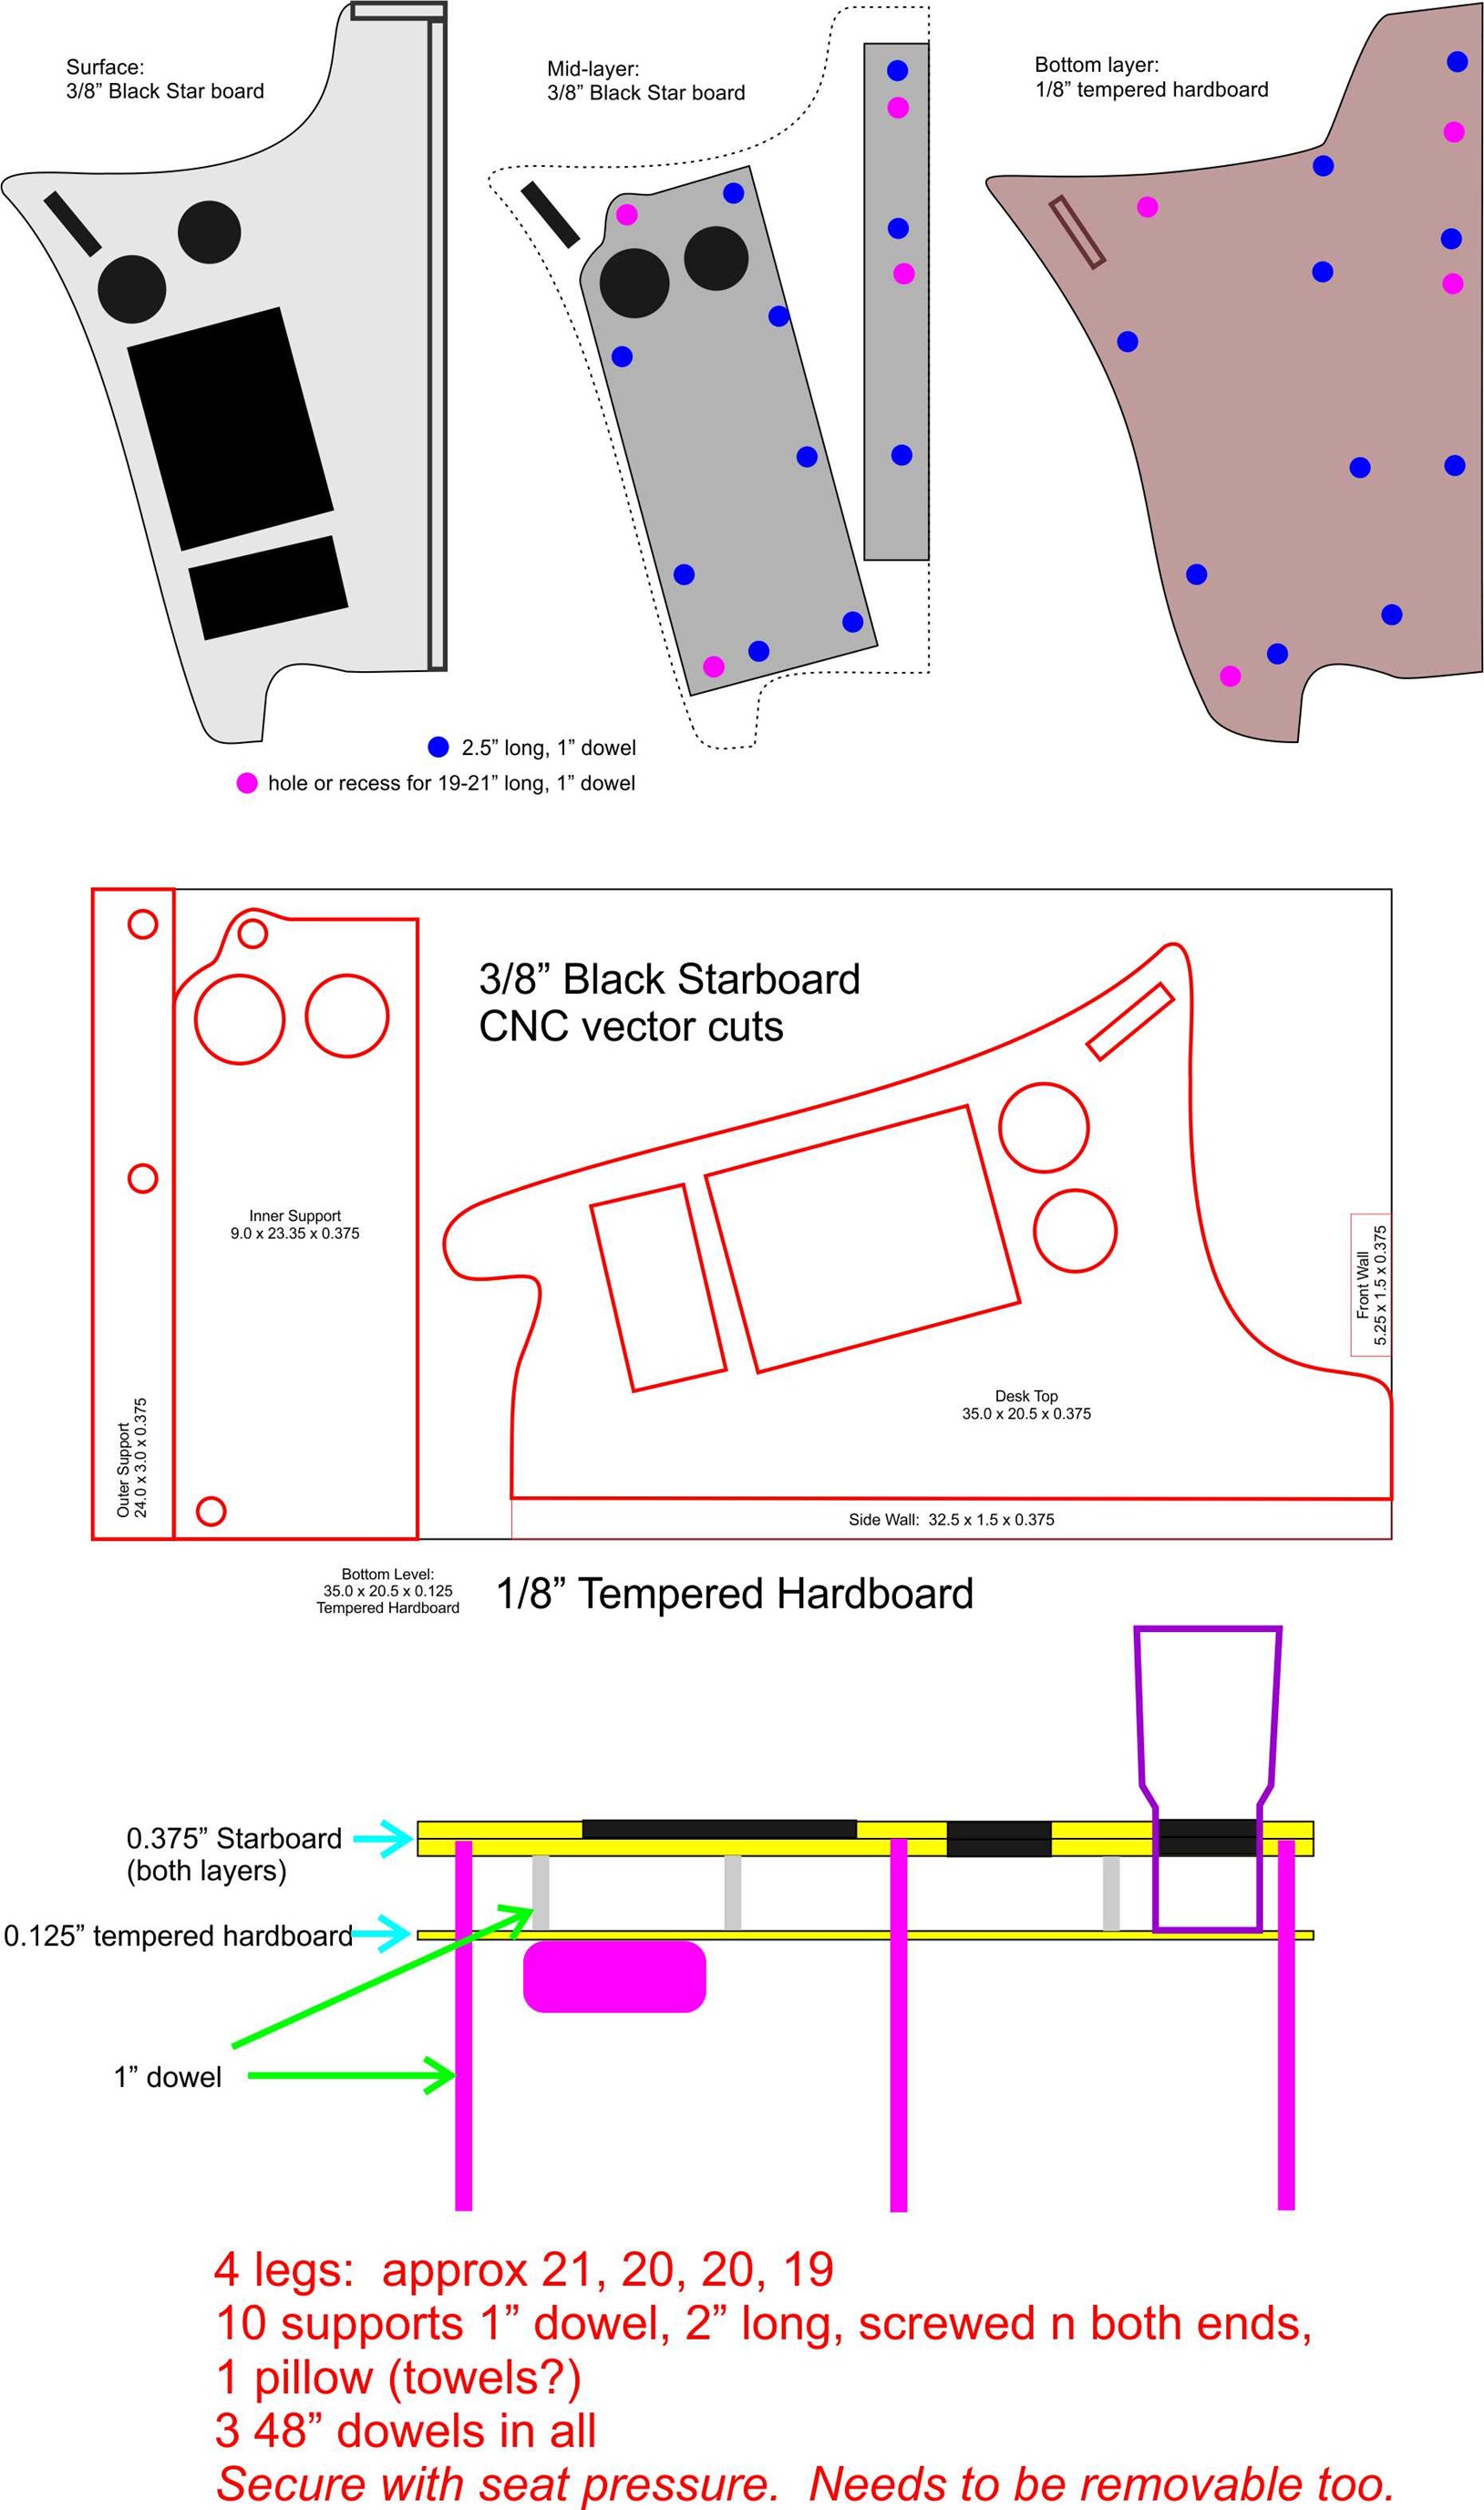
THE DRIVER'S DESK King StarBoard, 24” x 48” x 0.375” Black High
Density Polyethylene Plastic Panel - $42
(Custom cut on CNC machine: $20) Tempered Hardboard 24” x 48” x 0.125” - $5 Rounded Pine Dowels, 1 diameter, 48” length – 5 for $20**** MAJOR ADDENDUM BELOW
****
 So, what the heck is a “driver’s desk”?
Well, most cars have consoles between
the seats where you can put your miscellaneous
crap. Many
of my vans have had some kind of area sticking
out from the dash with drink holders and a few
niches for various stuff.
Well, Maxx really didn’t.
So, what the heck is a “driver’s desk”?
Well, most cars have consoles between
the seats where you can put your miscellaneous
crap. Many
of my vans have had some kind of area sticking
out from the dash with drink holders and a few
niches for various stuff.
Well, Maxx really didn’t.
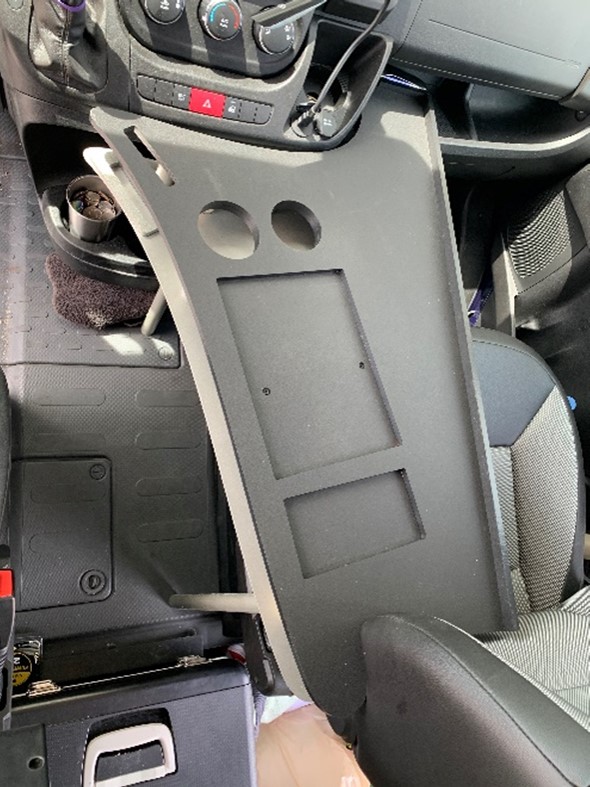
There was something there, but it was way down by my shin, so it was hard to reach, and, other than cups, there wasn’t much room for practical things like phone, iPad, wallet, snacks, etc. All that stuff had to go in a recess by the passenger’s knees where the driver can’t reach it, or on the passenger seat where it would go flying to the floor if I had to stop short. Bah.
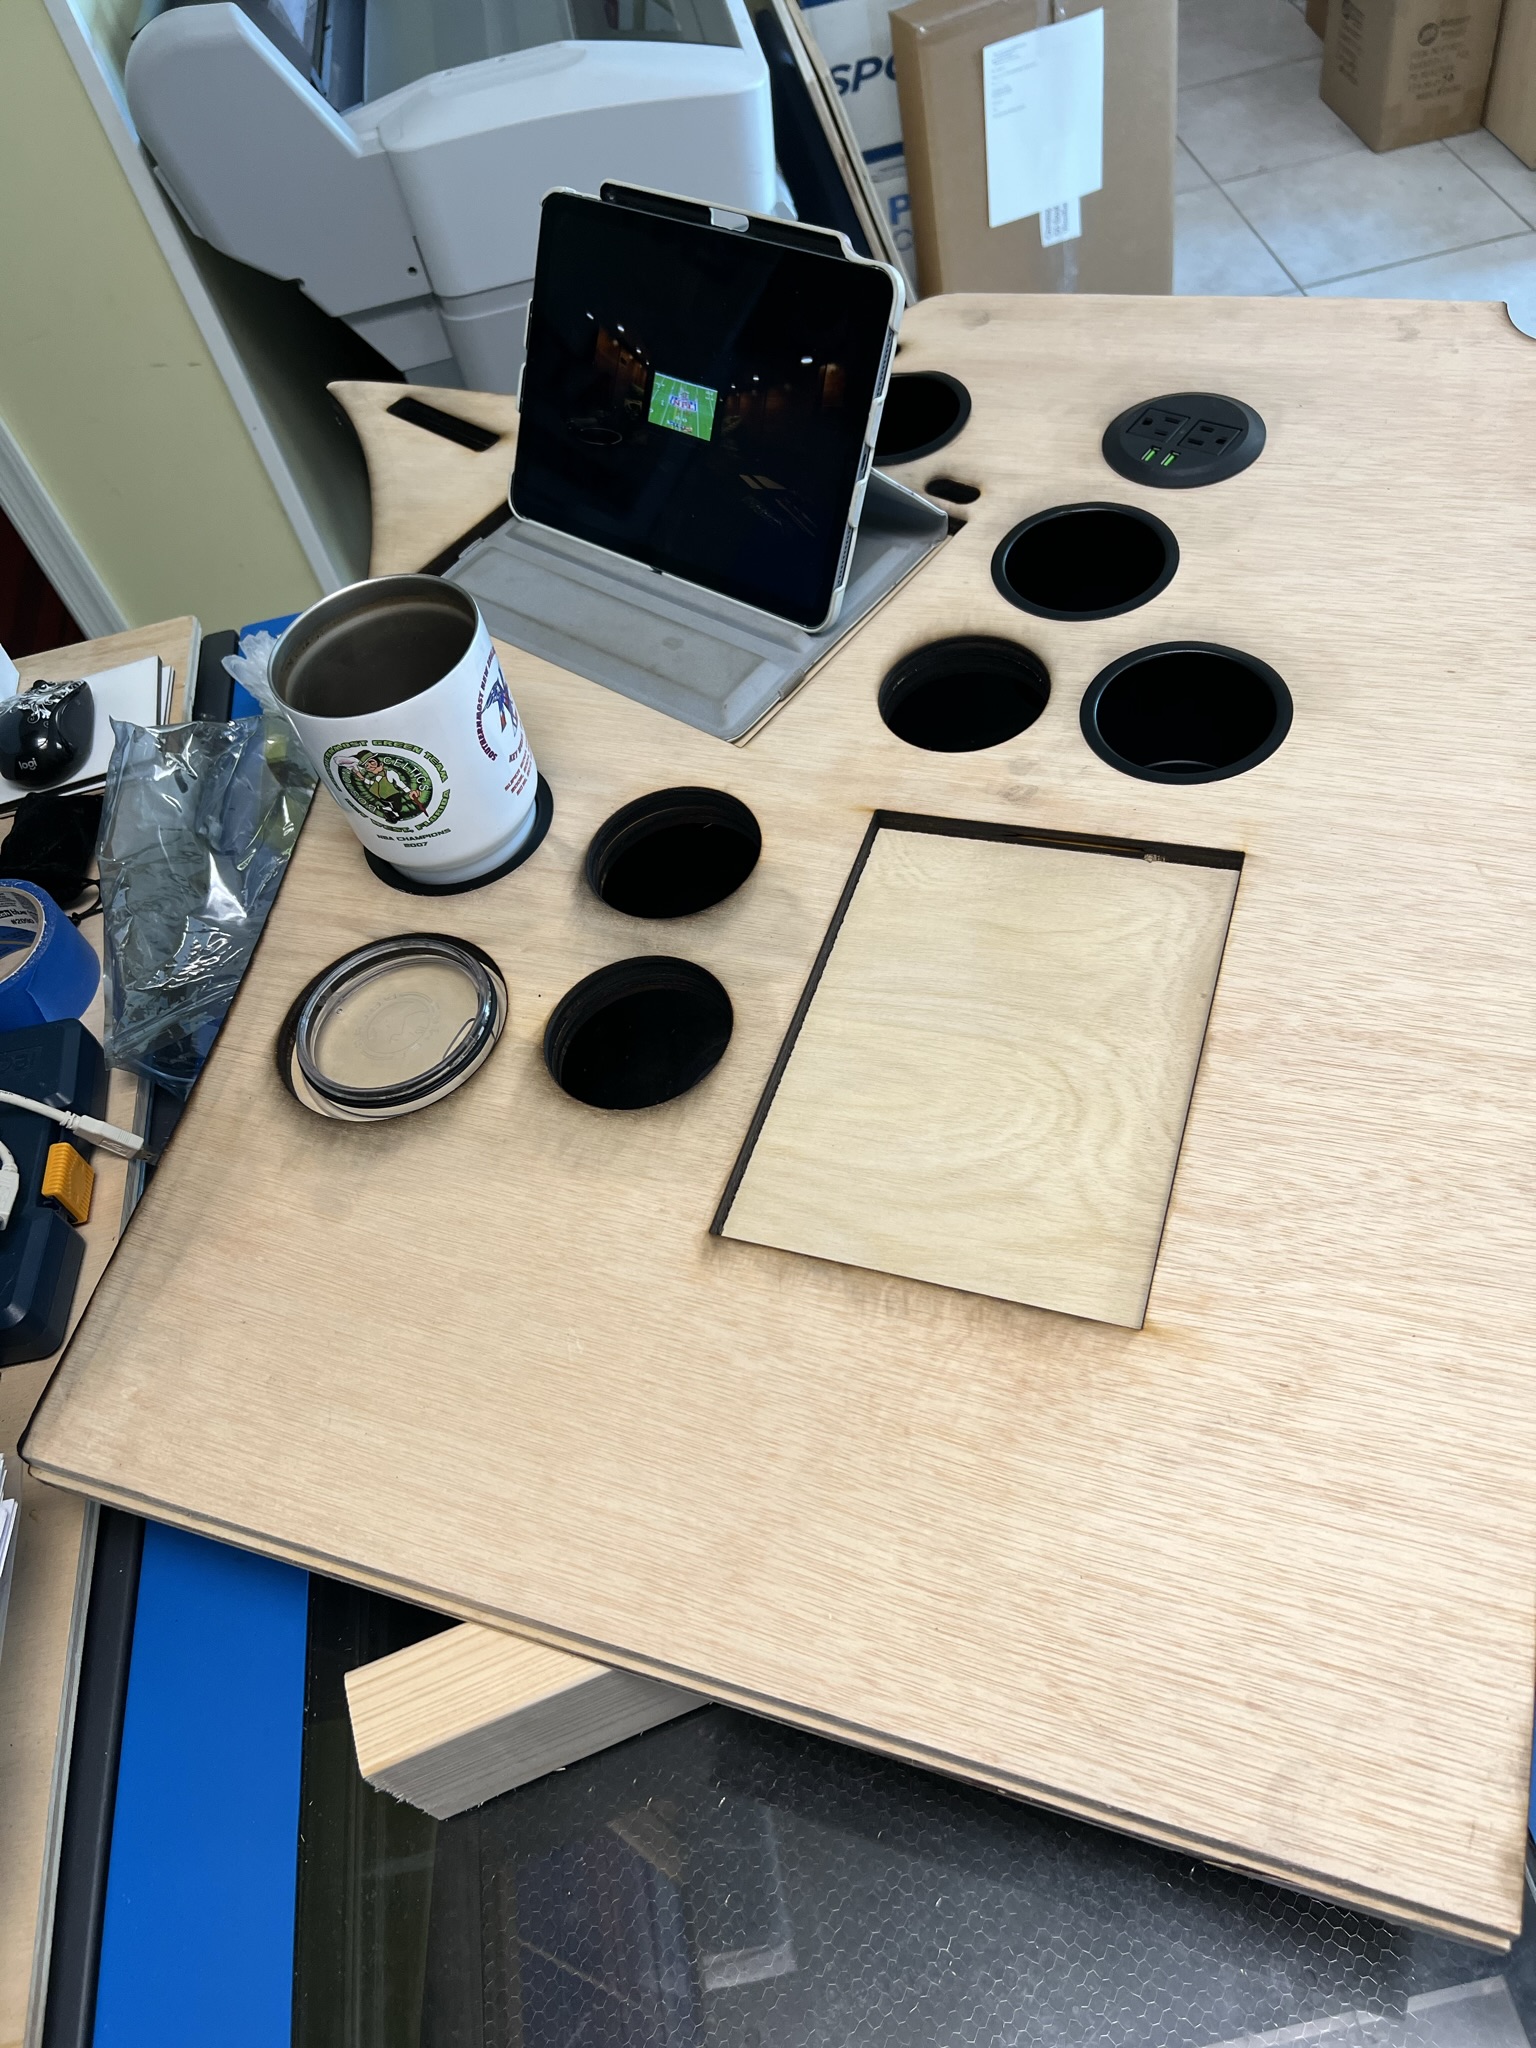
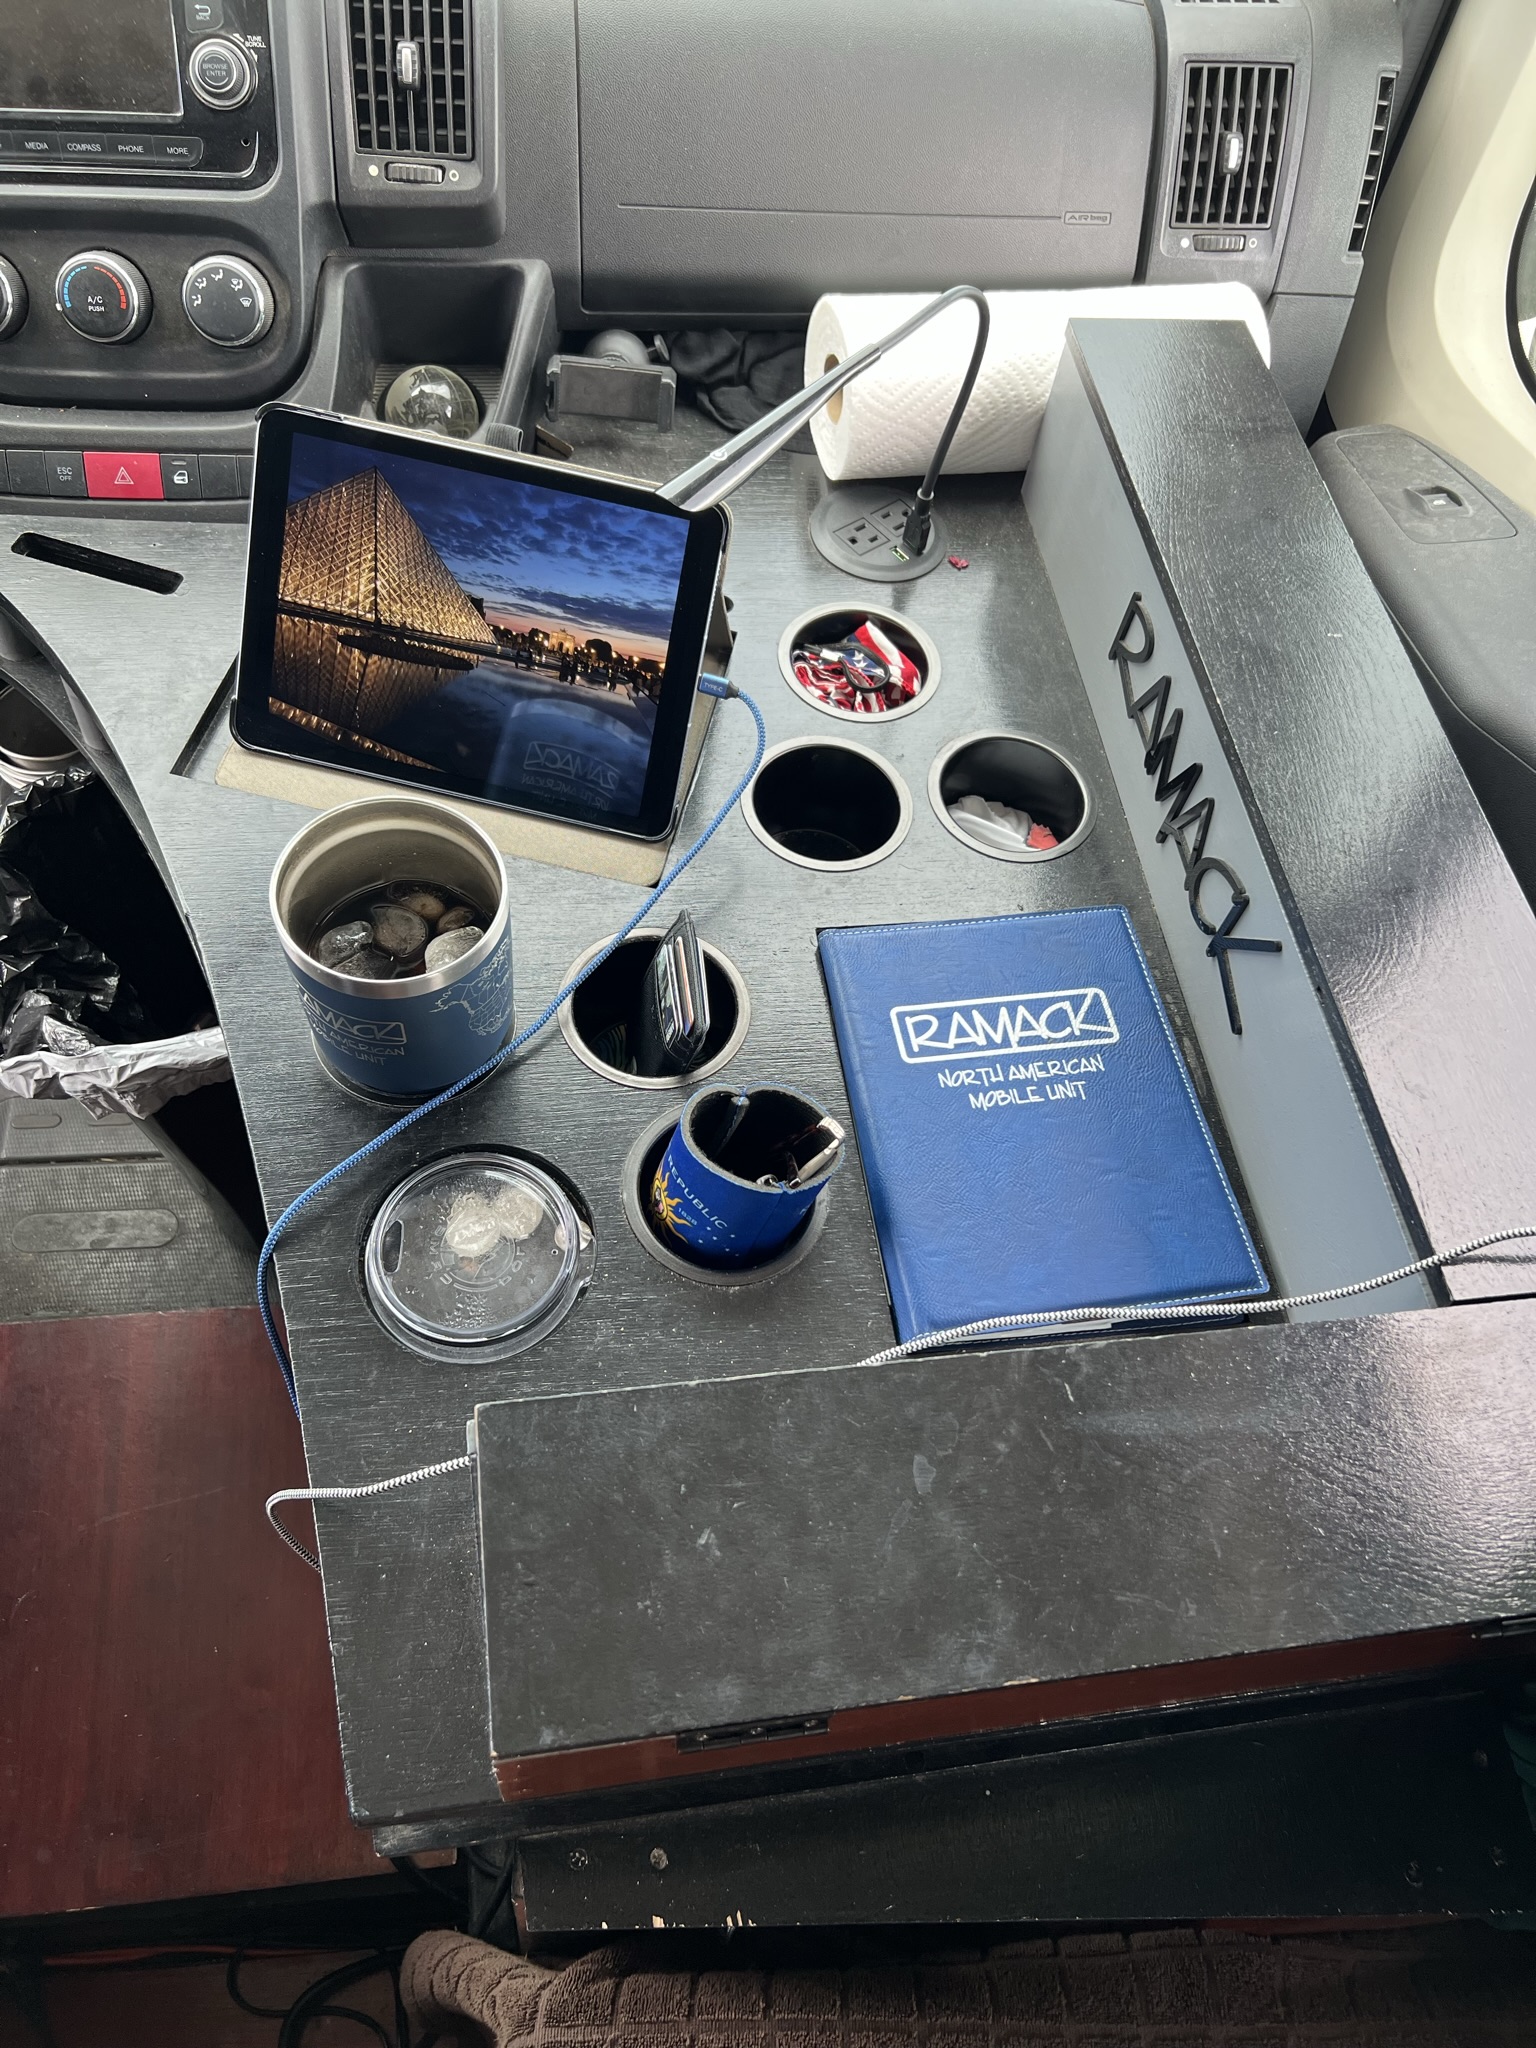
So, I had a notion and I put it in motion. I planned my two-level Driver’s Desk in detail on my laptop and selected materials. StarBoard was chosen because it’s friendlier with water than wood is. Also, I thought I could cut it with my laser. Wrong. The laser’s heat did more melting than cutting. No worries, though; I sent the cut file to our colleagues at SoMo Signs and their CNC machine cut it precisely. I did cut the bottom level’s tempered hardboard on the laser, then painted it silver.
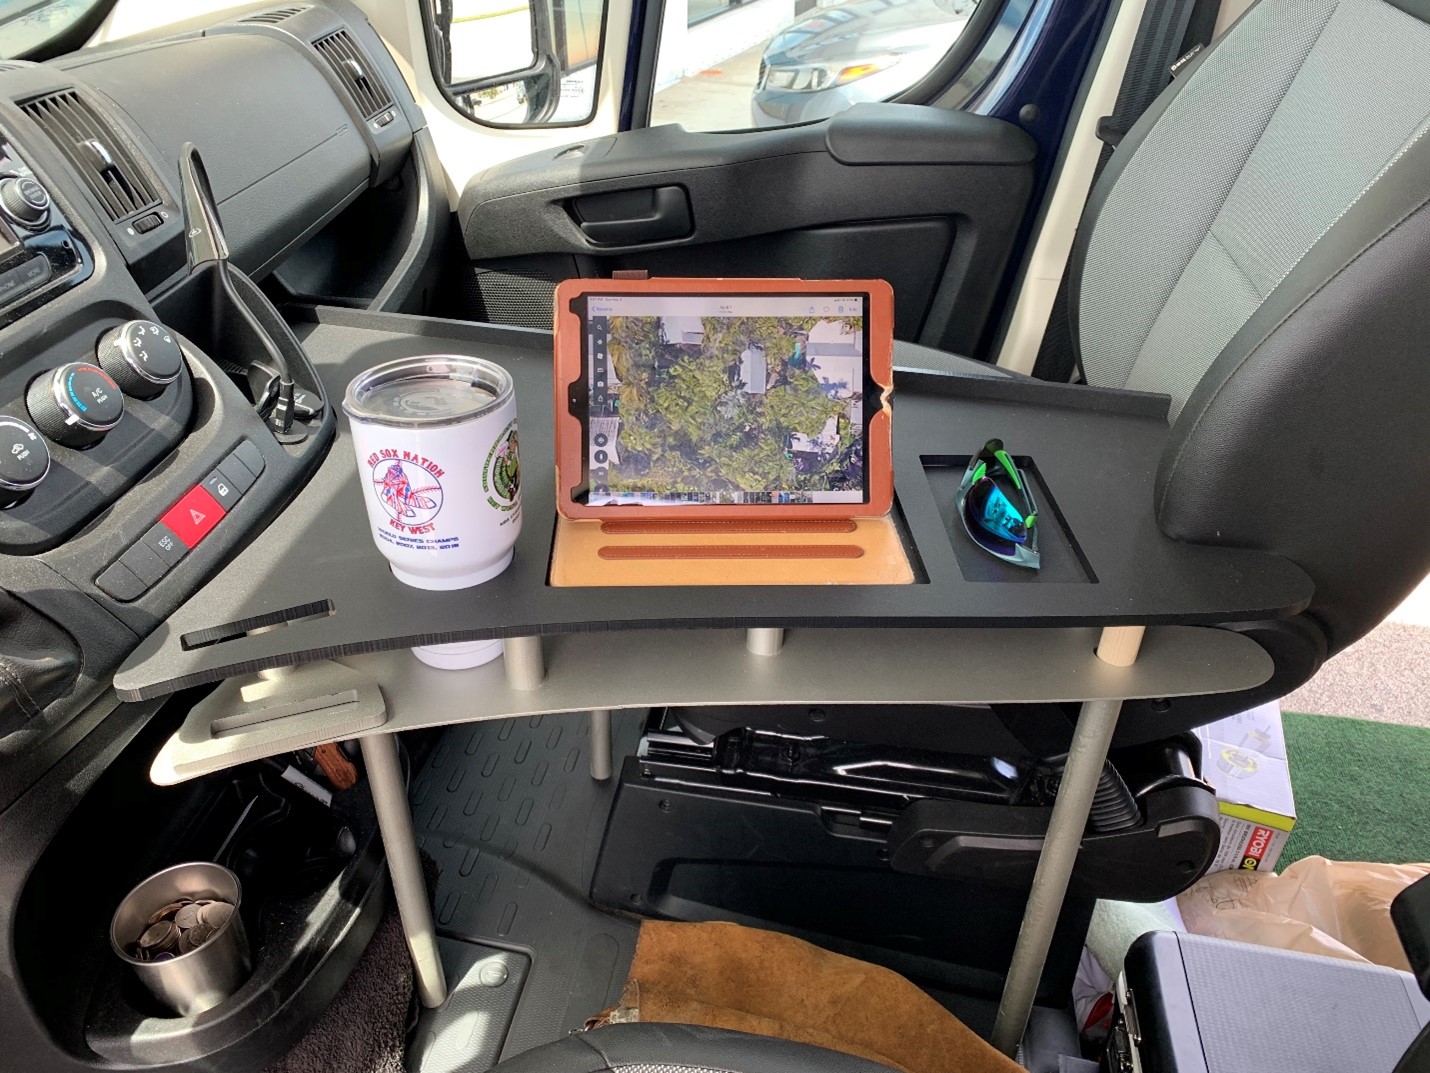
A hole specifically-sized for a 30-ounce stainless steel tumbler was Priority One. Then, what the heck, how about a smaller one to hold a can or bottle? And a slot for my phone (with a cradle below). All of those were cut-throughs, with the items resting on the lower level.
In addition, two rectangles were cut through the top board of the upper level only, creating recesses for the other necessaries. The far edge was fortified with a wall, so nothing would slide off. Finally, 4 round legs were attached, secured with screws and set in down-facing recesses under the surface plank and passed through snug holes in the tempered hardboard.
The passenger seat itself wedges the desk in place, so when I do have a guest, I simply recline the seat a few inches and lift the desk out.
This is an unusual conversion item, to be sure. Couples ain’t gonna do a Driver’s Desk: only us solo dudes.
Still, I am pretty freakin’ proud of this thing! Ha.
-----------------
ADDENDUM -----------------
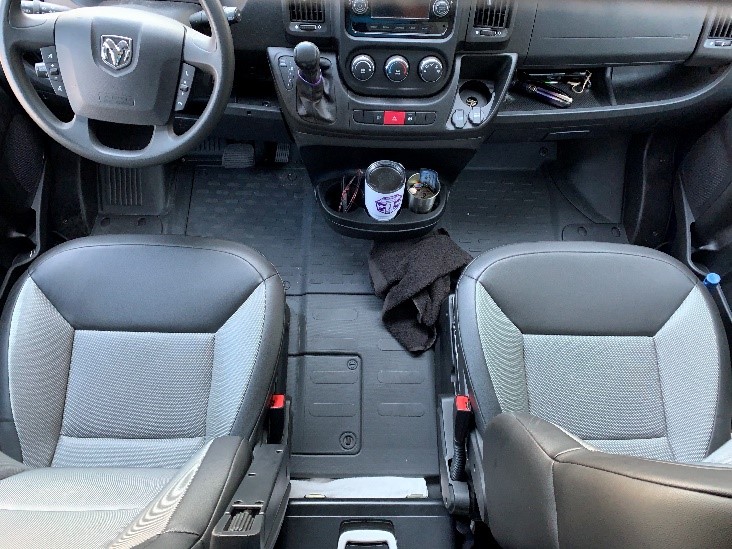
Driver’s Desk Maximus Deluxus The Driver’s Desk was such a good idea, and it was working so well, that I took the concept and ran with it. I freaking sprinted with it. I took everything good about it and made it better, then added a pantload of more good stuff. And I committed to it! "Removable" was no longer a trait.  So, anyway, here's what this coolo contraption became. STEP 1: REMOVE PASSENGER SEAT
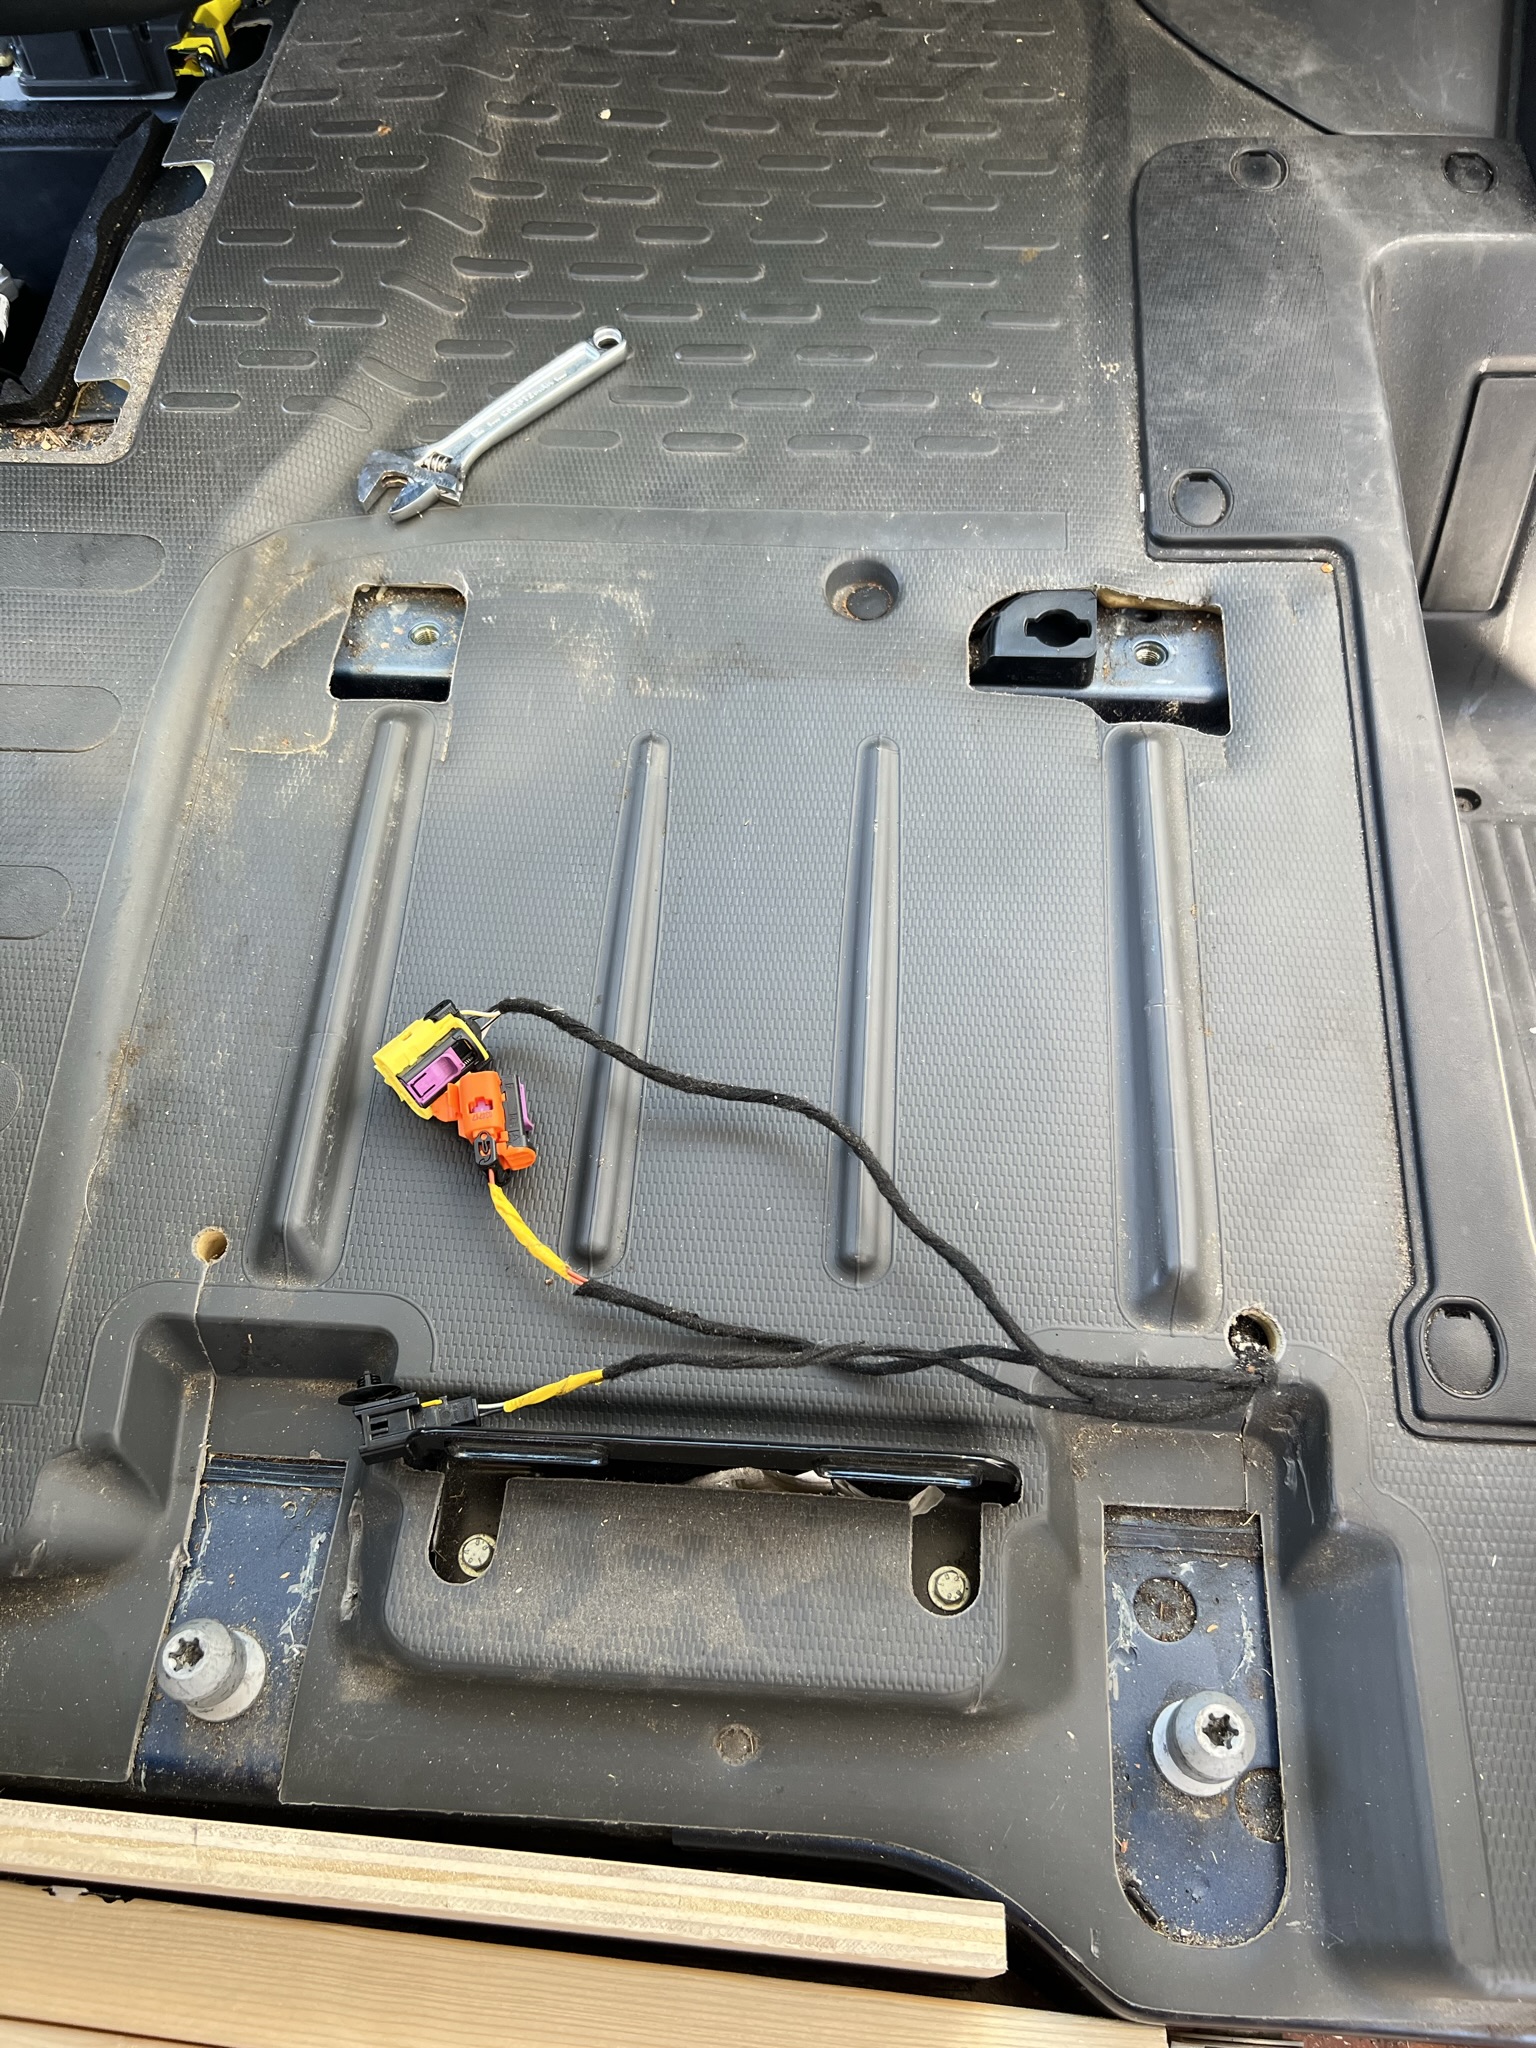
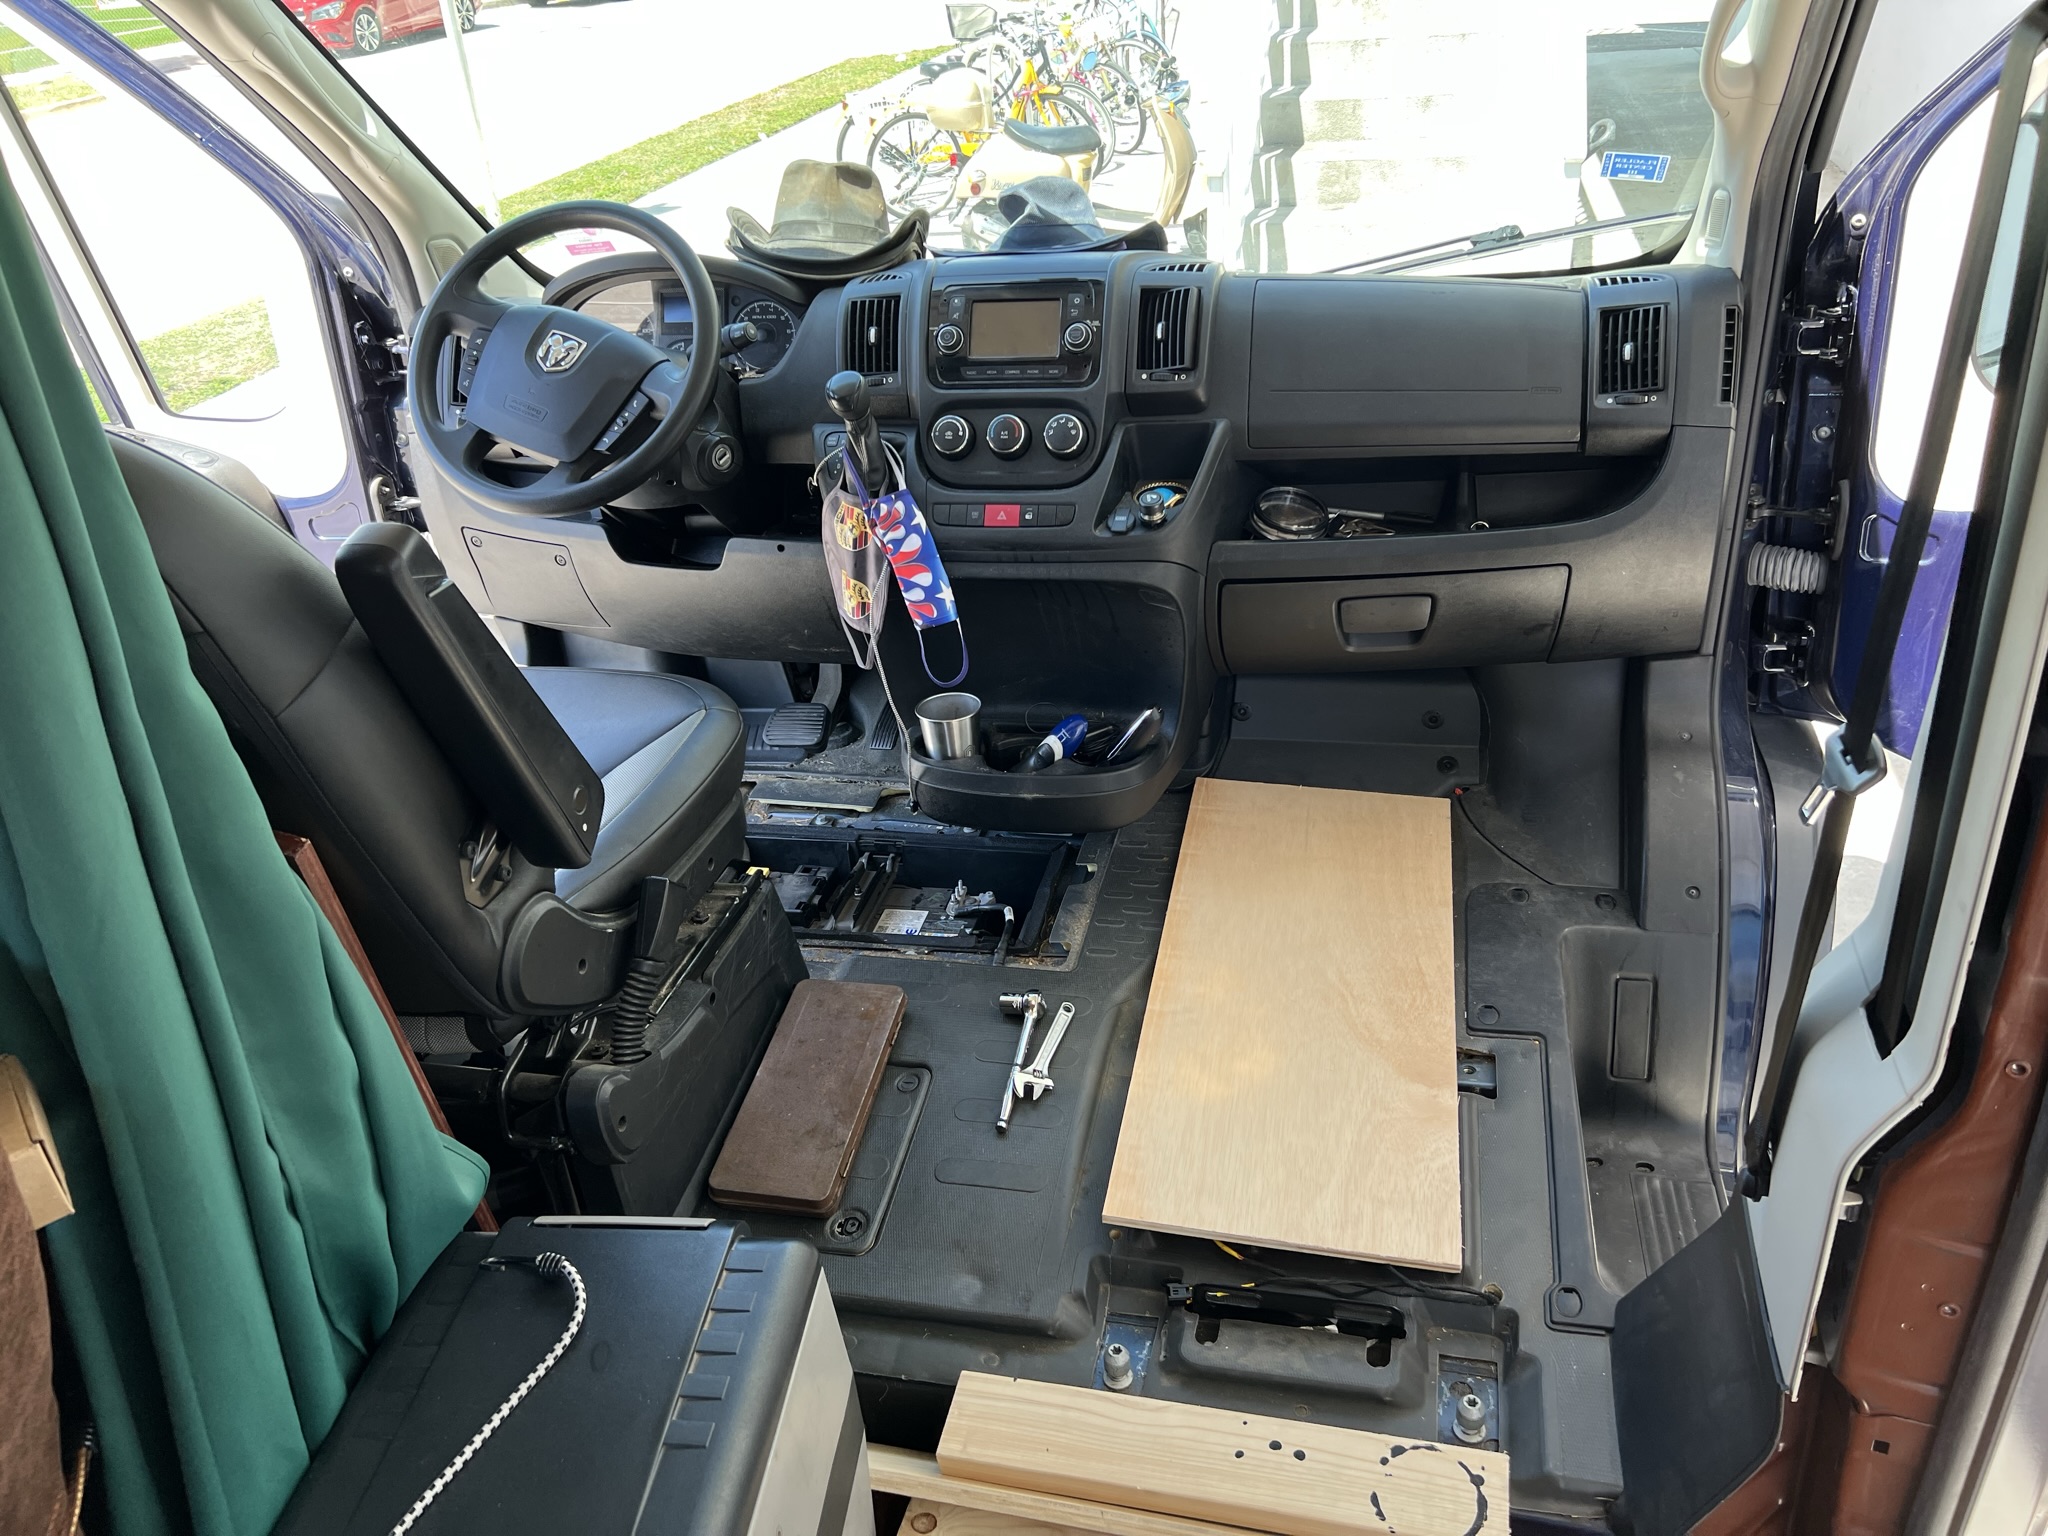
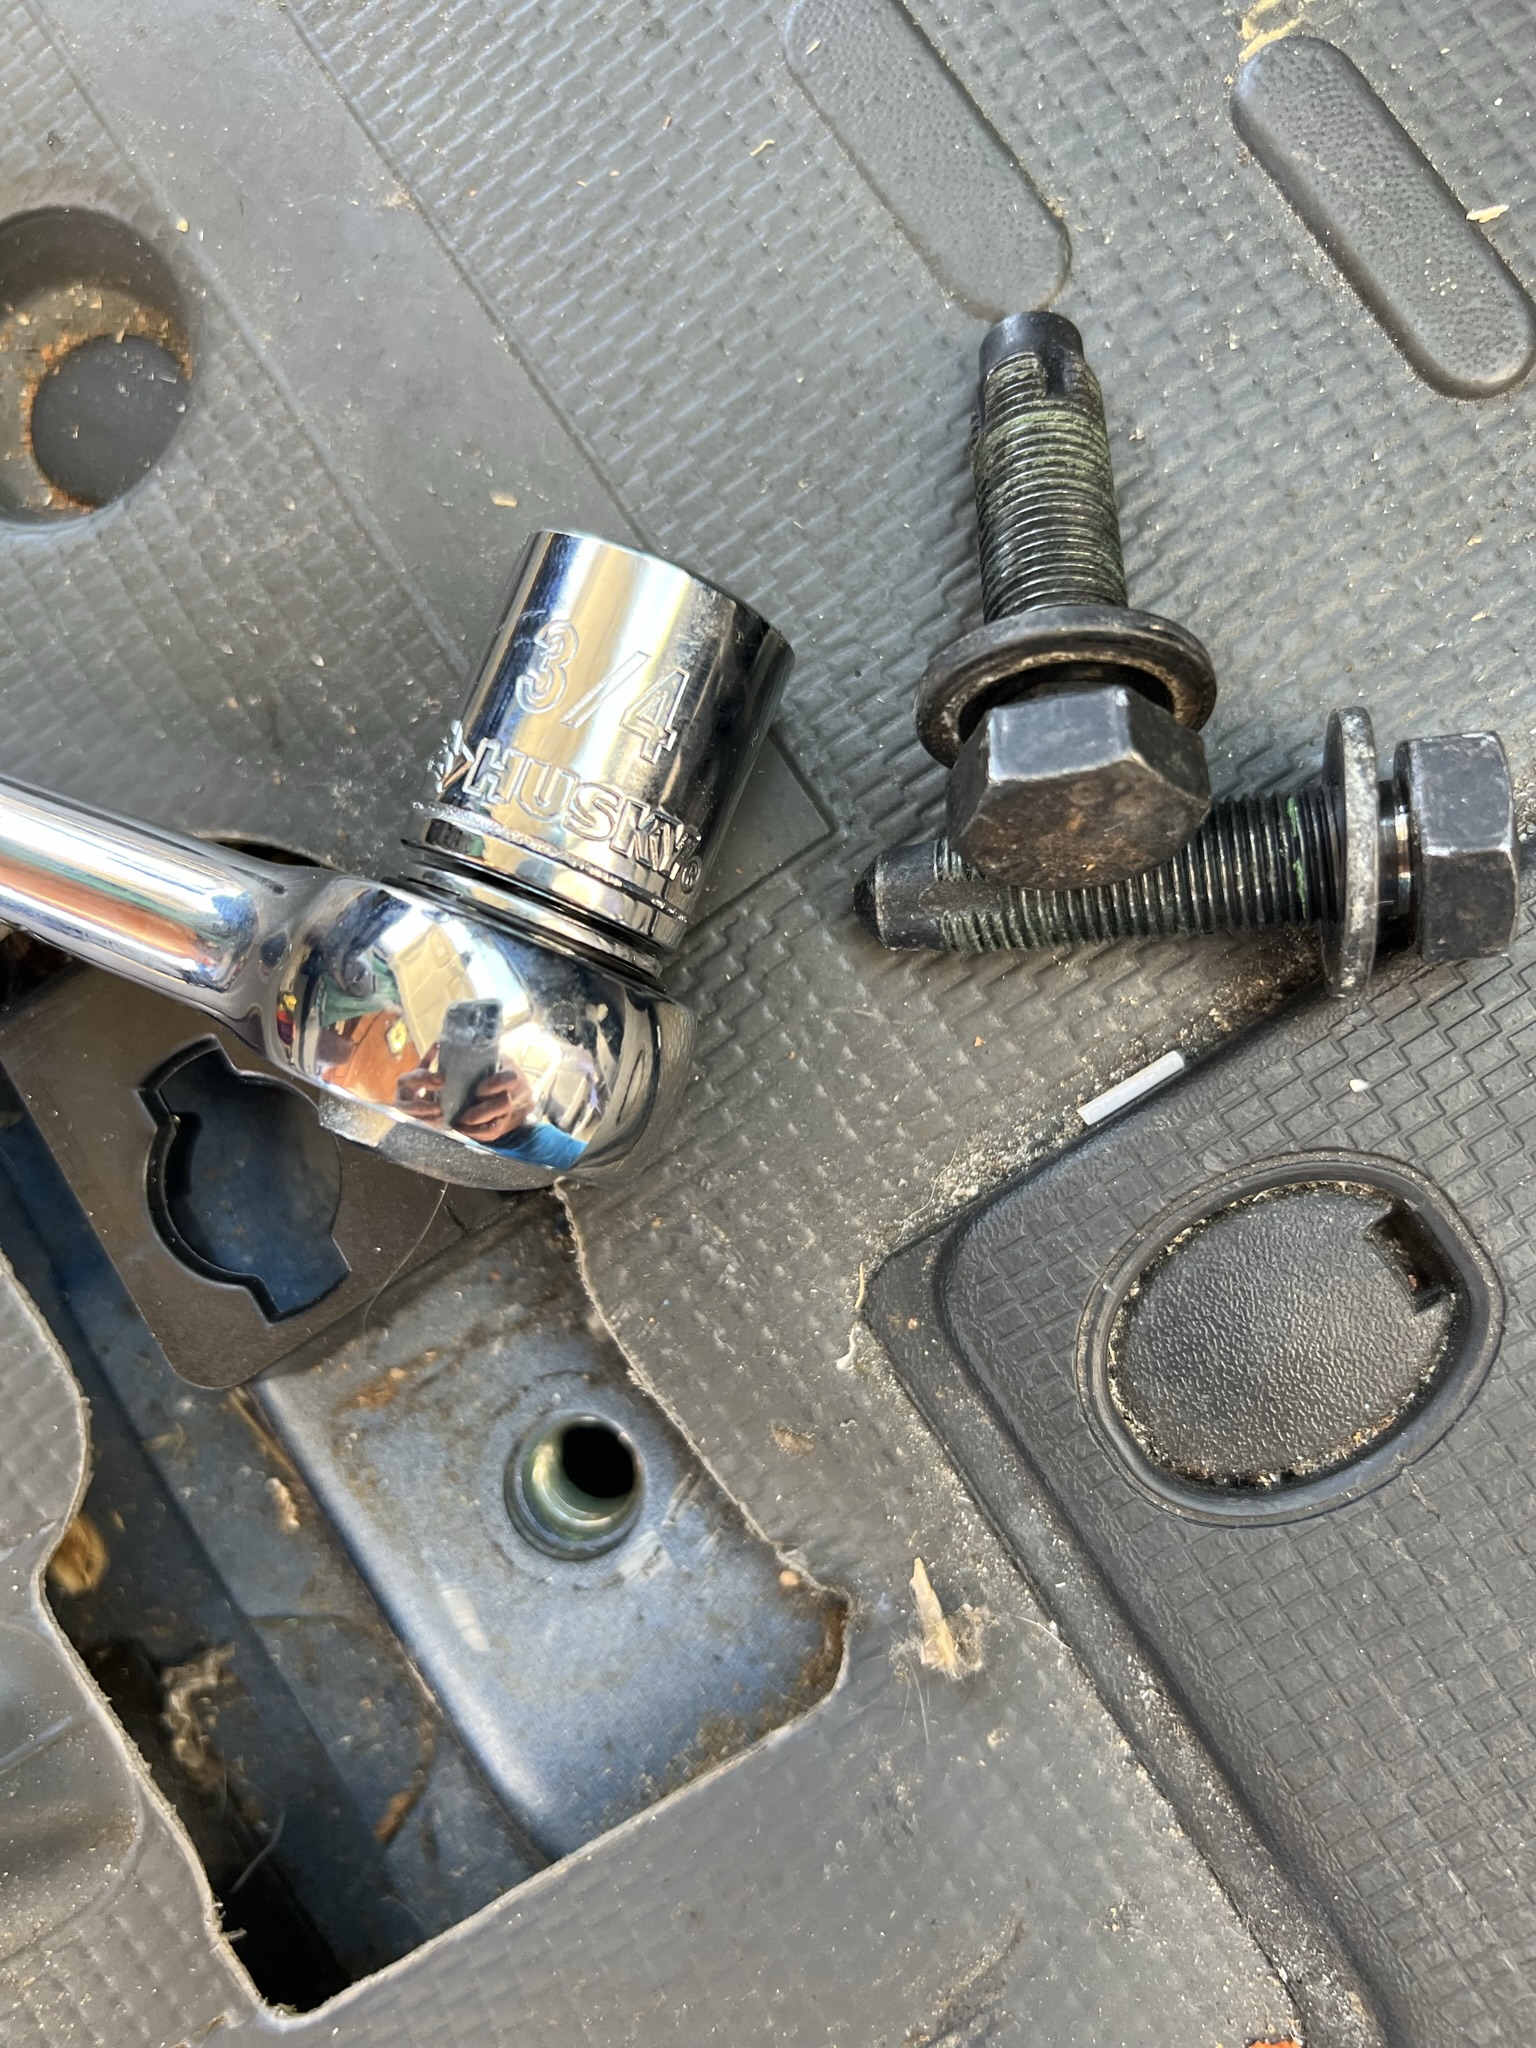
But you ain't sittin' up next to me. With travel companions nowhere in the "definite plans" and driver accessories needed every mobile minute, this was a no-brainer, which is right up my alley. =) YouTube had a few vids about removing this seat. Piece o' cake, really. It's only held in by a few bolts -- two in the front on the floor and two on some odd little “posts” in the back -- which are easily removed with standard wrenches. The only complicating factor, though, is the wires. They disconnect easily too, though; you don't even need tools. But the airbag system is connected to sensors in the seat. When the car is running, they detect certain sudden changes and trigger activation. When those wires are disconnected, the airbag circuit does not close and a light illuminates in the dash. I was concerned there would be an issue beyond that, like the system would no longer work, or some infuriating tone would continuously sound. Fortunately, there is no tone, and I've been assured that the driver's air bags will still work fine and dandy. Not just fine, but dandy as well. There's a YT vid I saw where the dude went through all the trouble to dig the wires out of the seat -- and I mean dig, he ripped that seat apart -- so he could reconnect them and close the circuit. He has a tangled pile of wires that he had to try to stash somewhere, and spent hours doing the extraction, and all he avoided was this little light on the dash. I think it looks amusing, like somebody is holding one of those big exercise balls in their lap, or the passenger is a VERY pregnant woman. So, yah, seat gone ended up not being a problem. STEP 2: DESIGN THE UPPER LEVEL
The most fundamental change was material. Version 1.0 used a top layer of black Starboard, a form of plastic that is widely used in boats, and a lower layer of 1/8” tempered hardboard. I had to bring the Starboard to another sign shop where it could be cut with a CNC machine. DDMD replaced both with ½” plywood, which I could cut precisely with the laser engraver at work. Design-wise, the first change was the tablet position. It had been to my right, instead of being more in front of me, and it faced me directly. That had been my intention (who else should it face??) but, at that angle, it also faced the driver’s door window. Thus, it caught all the reflection and glare from said window, often making the screen unreadable. You know how hard it can be to read your phone on a sunny day? It was like that. So, on DDMD, I changed the angle so that the tablet screen actually faces directly back towards the upper right corner of the driver's seat. I see the screen fine now in all light. The reflection is of the dark green curtain that hangs behind my seat. It would not have been an easy fix, but since I was building a whole new desk, it was simple to include. The slot for my phone was ideal, so I kept that as is. I almost changed it, but I realized I was making it worse, so I undid the change. Drink holders proliferated. Lordy, lordy, I have SEVEN of them now! My primary cup holder – for my 30-ounce YETI tumbler – switched positions with the tablet. This not only made the tablet more readable, but the beverage more reachable. Win-freaking-win. The
seven drink holders are not ALL for drinks, come
on now. One is for my 30-ounce YETI cup,
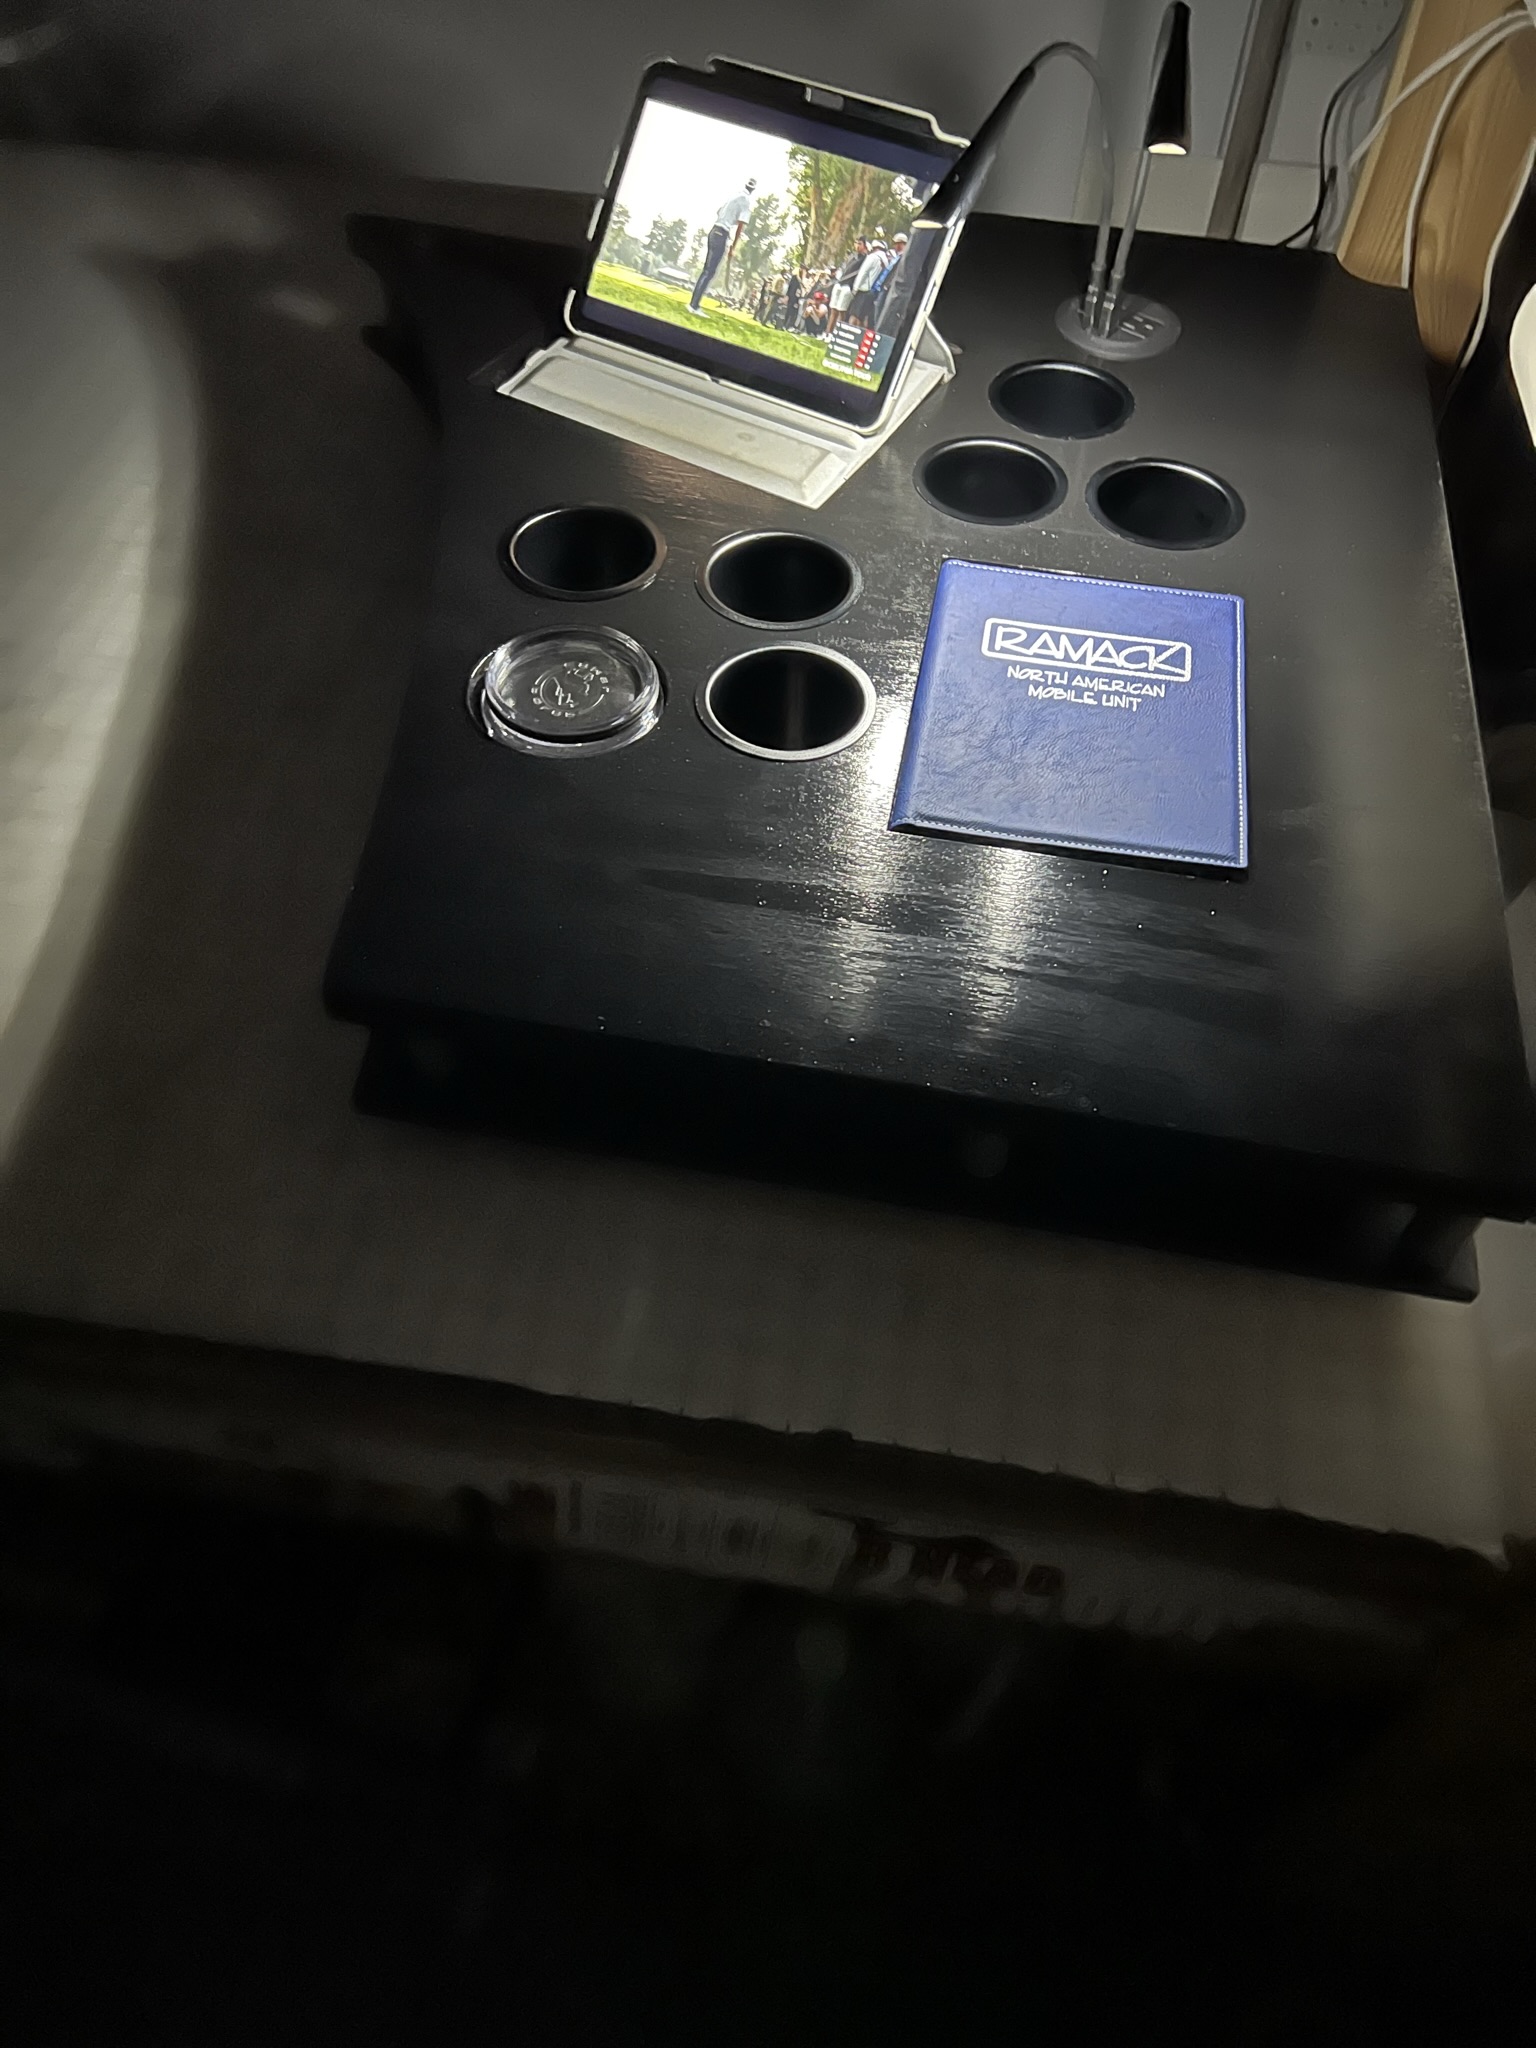
and th One annoyance with the original driver’s desk was that the clear plastic lid of the YETI would slide all around as I drove, and sometimes even fall (gasp!) on the floor. I don't keep it snug ON the cup because (a) I love slurping my Coke directly over the ice, and (b) the lid gets wet and sloppy if I drink through the sip hole. (And, no, I'm not using a freaking straw. Pleeeeeeasee. Come on, a straw?? No. Just no.) So, right beside my YETI holder, I cut a shallow recess that perfectly fits my round YETI lid. Sweeeet, yes? BM's living quarters are earth tones -- browns and greens -- but the flight deck is the factory installed gray and black, so I painted my new driver’s desk all glossy black. Then, I slathered glossy triple-thick polyurethane all over it. This thing freaking shiiiiines.
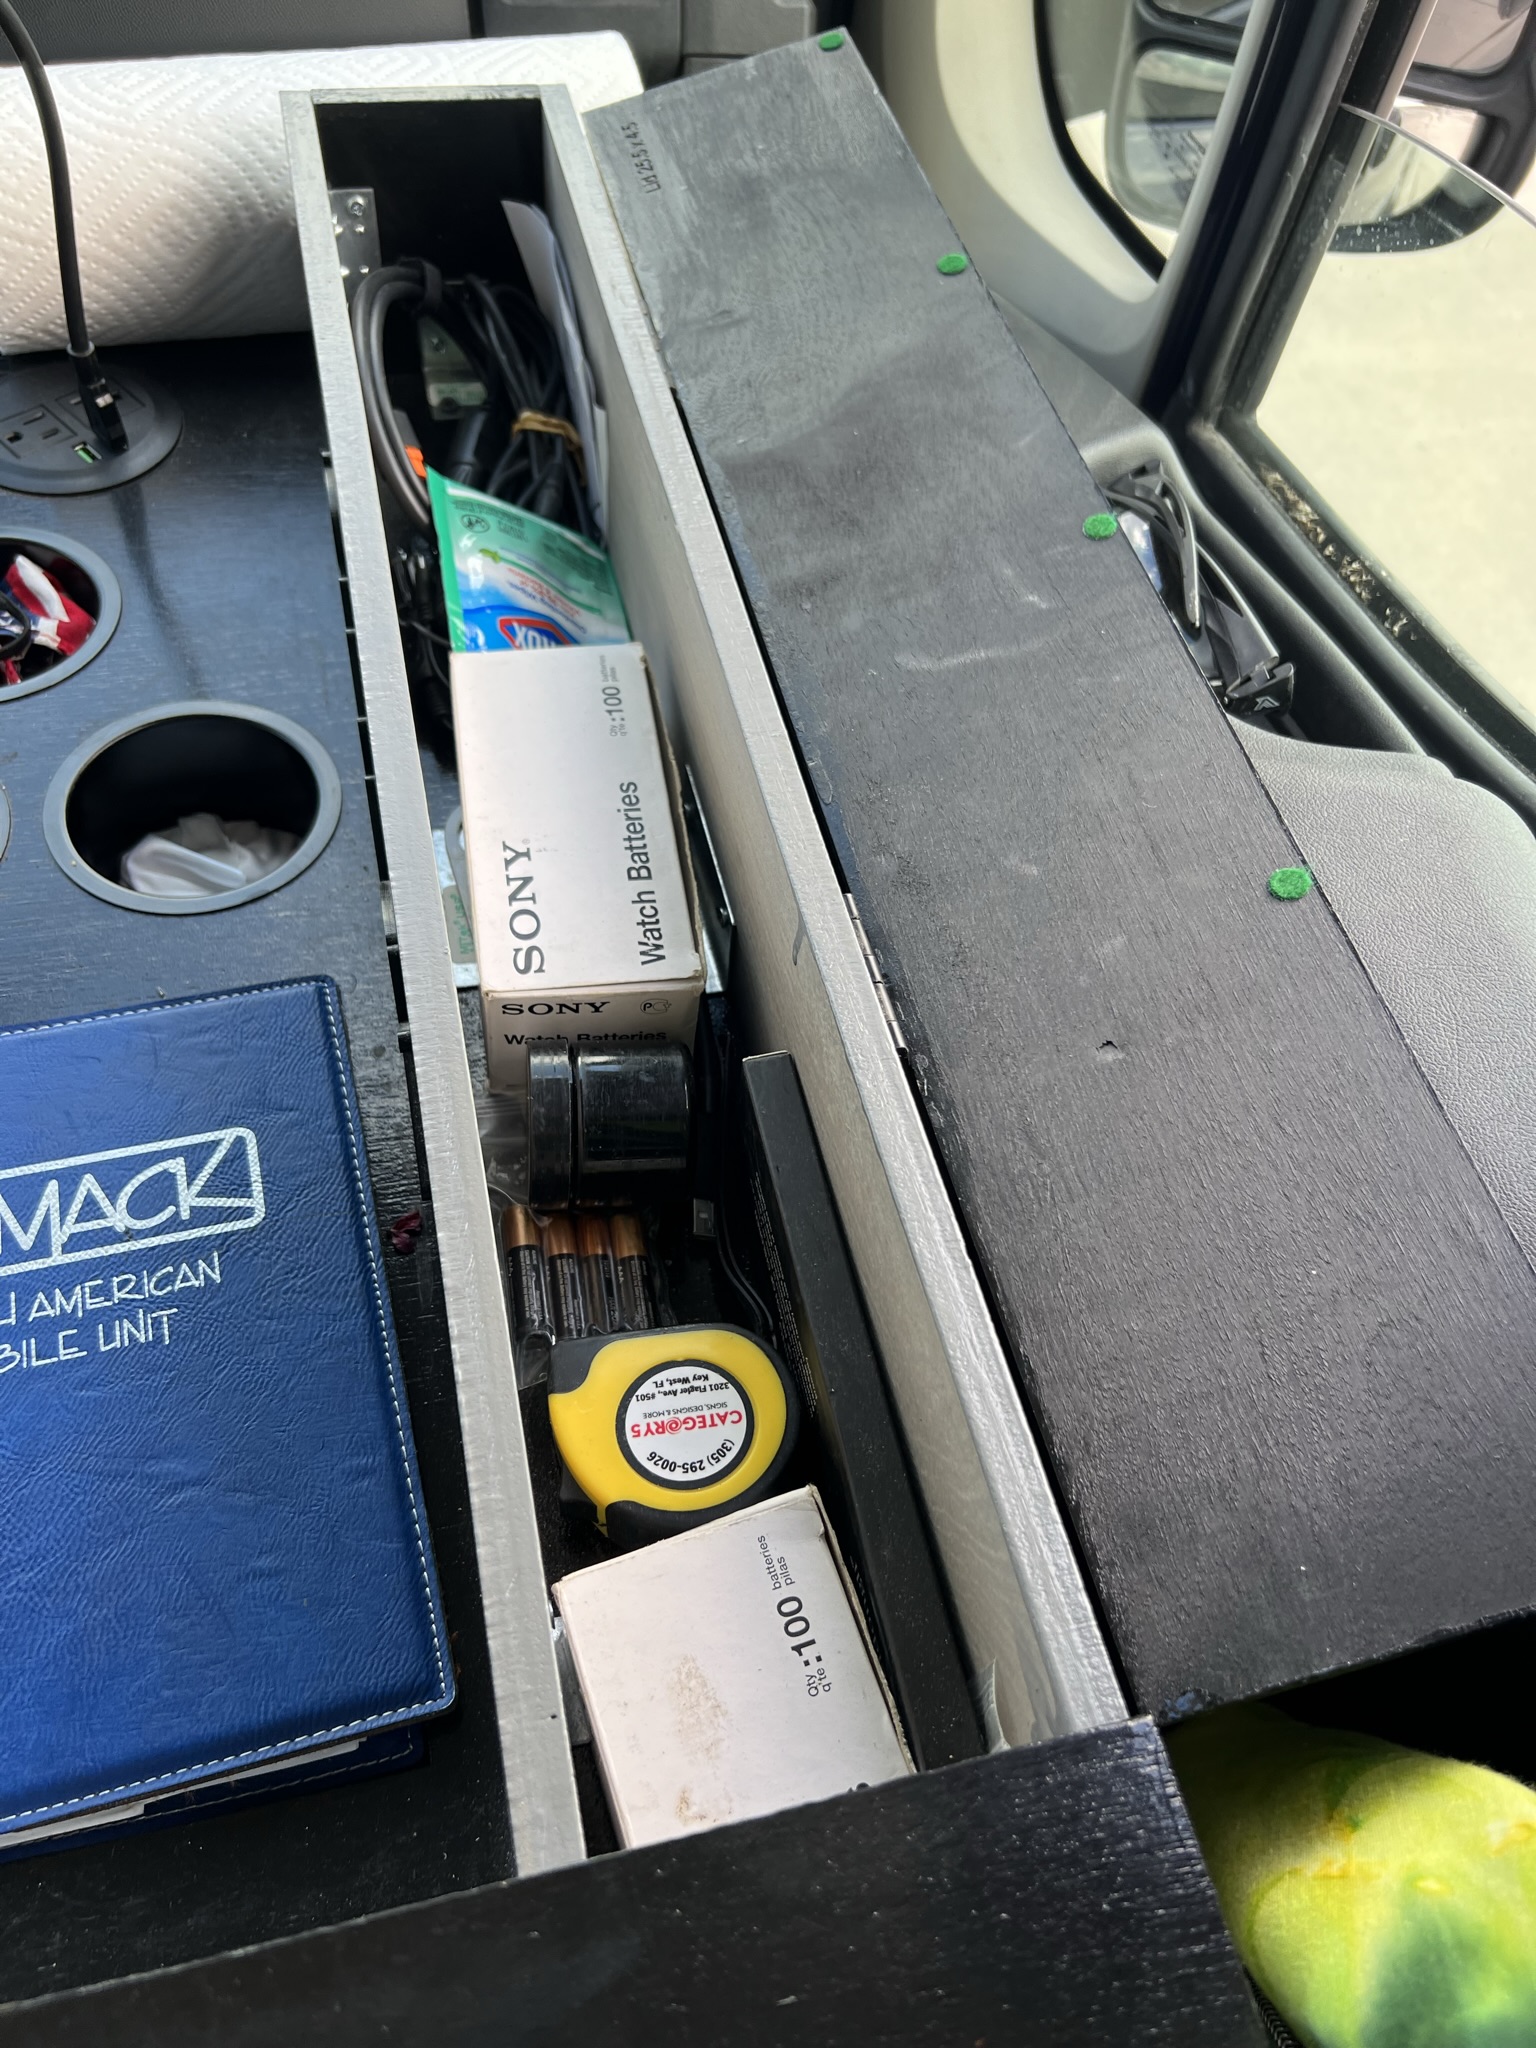
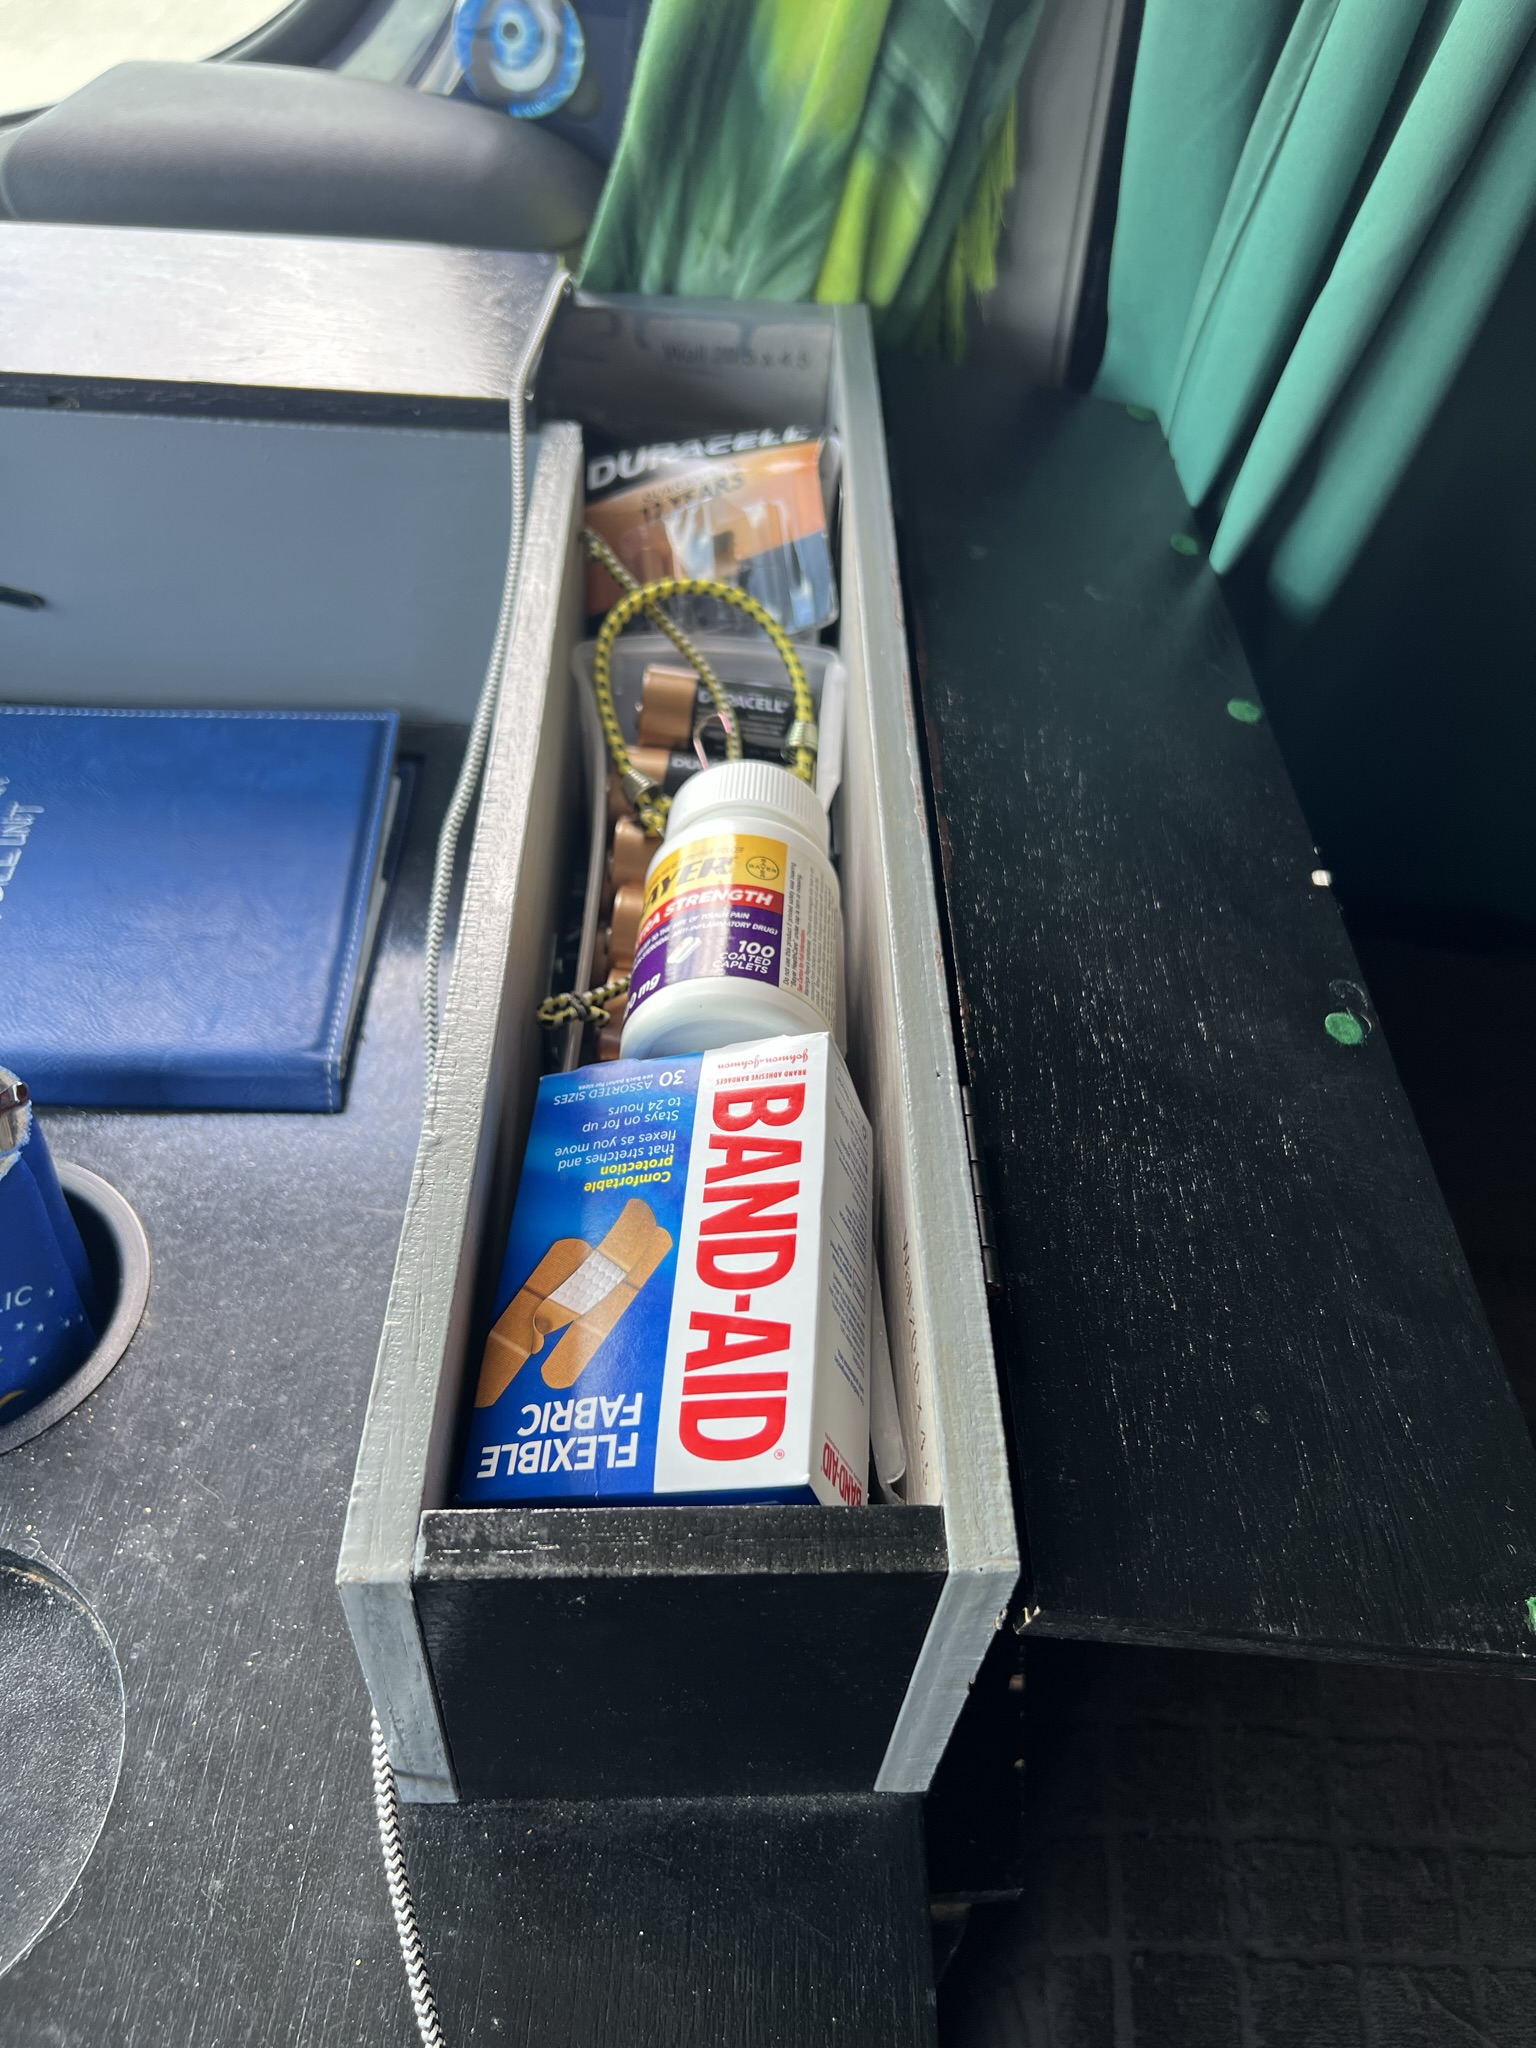
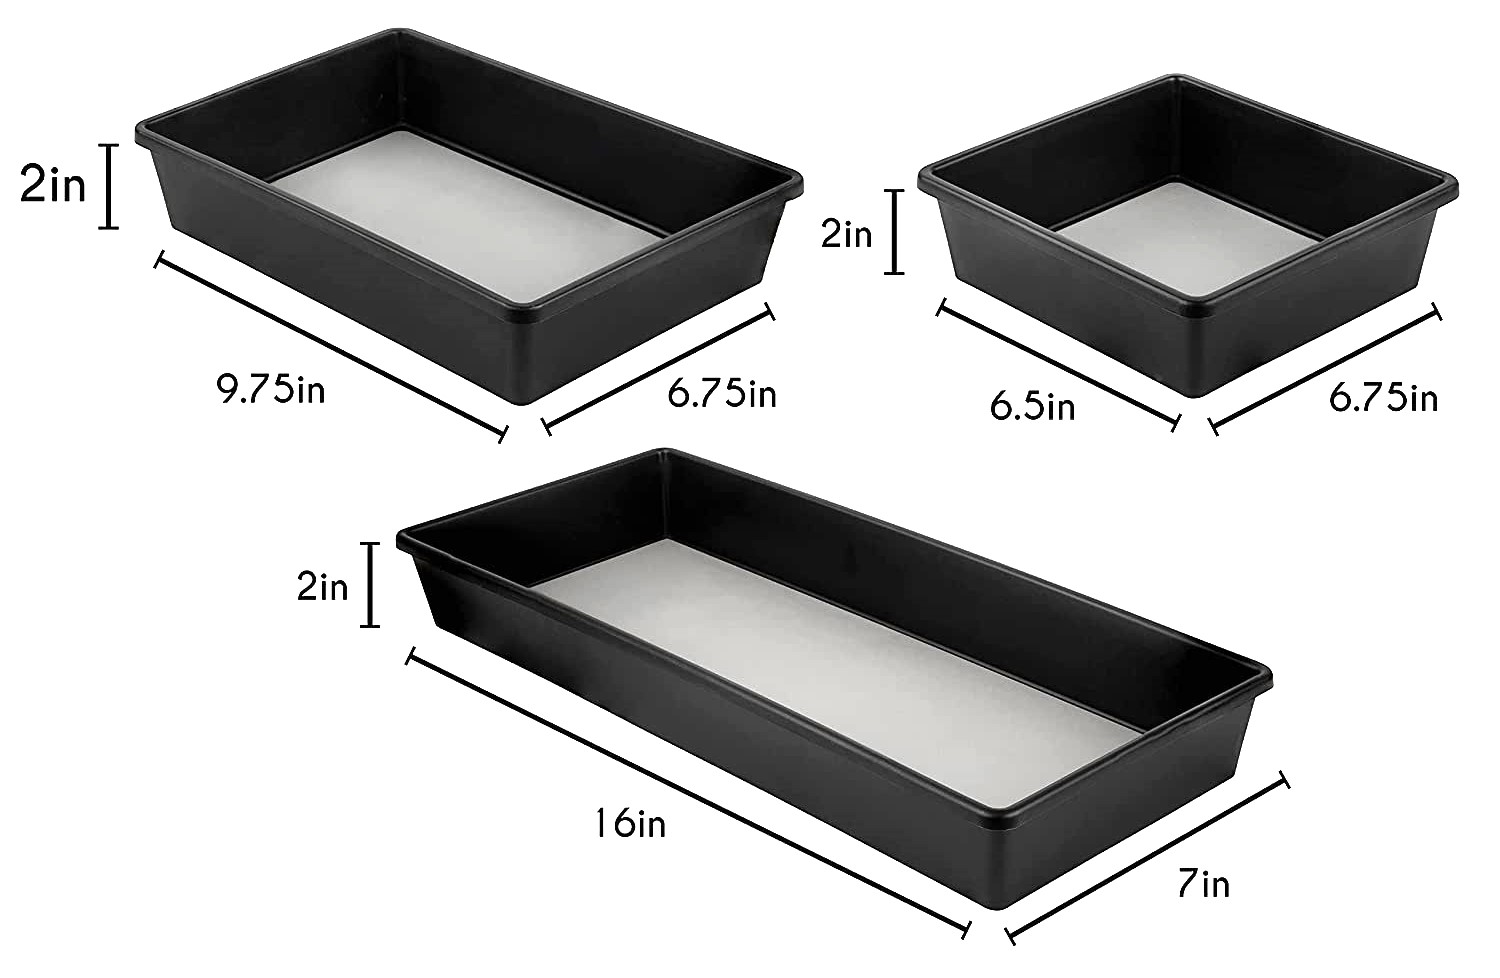
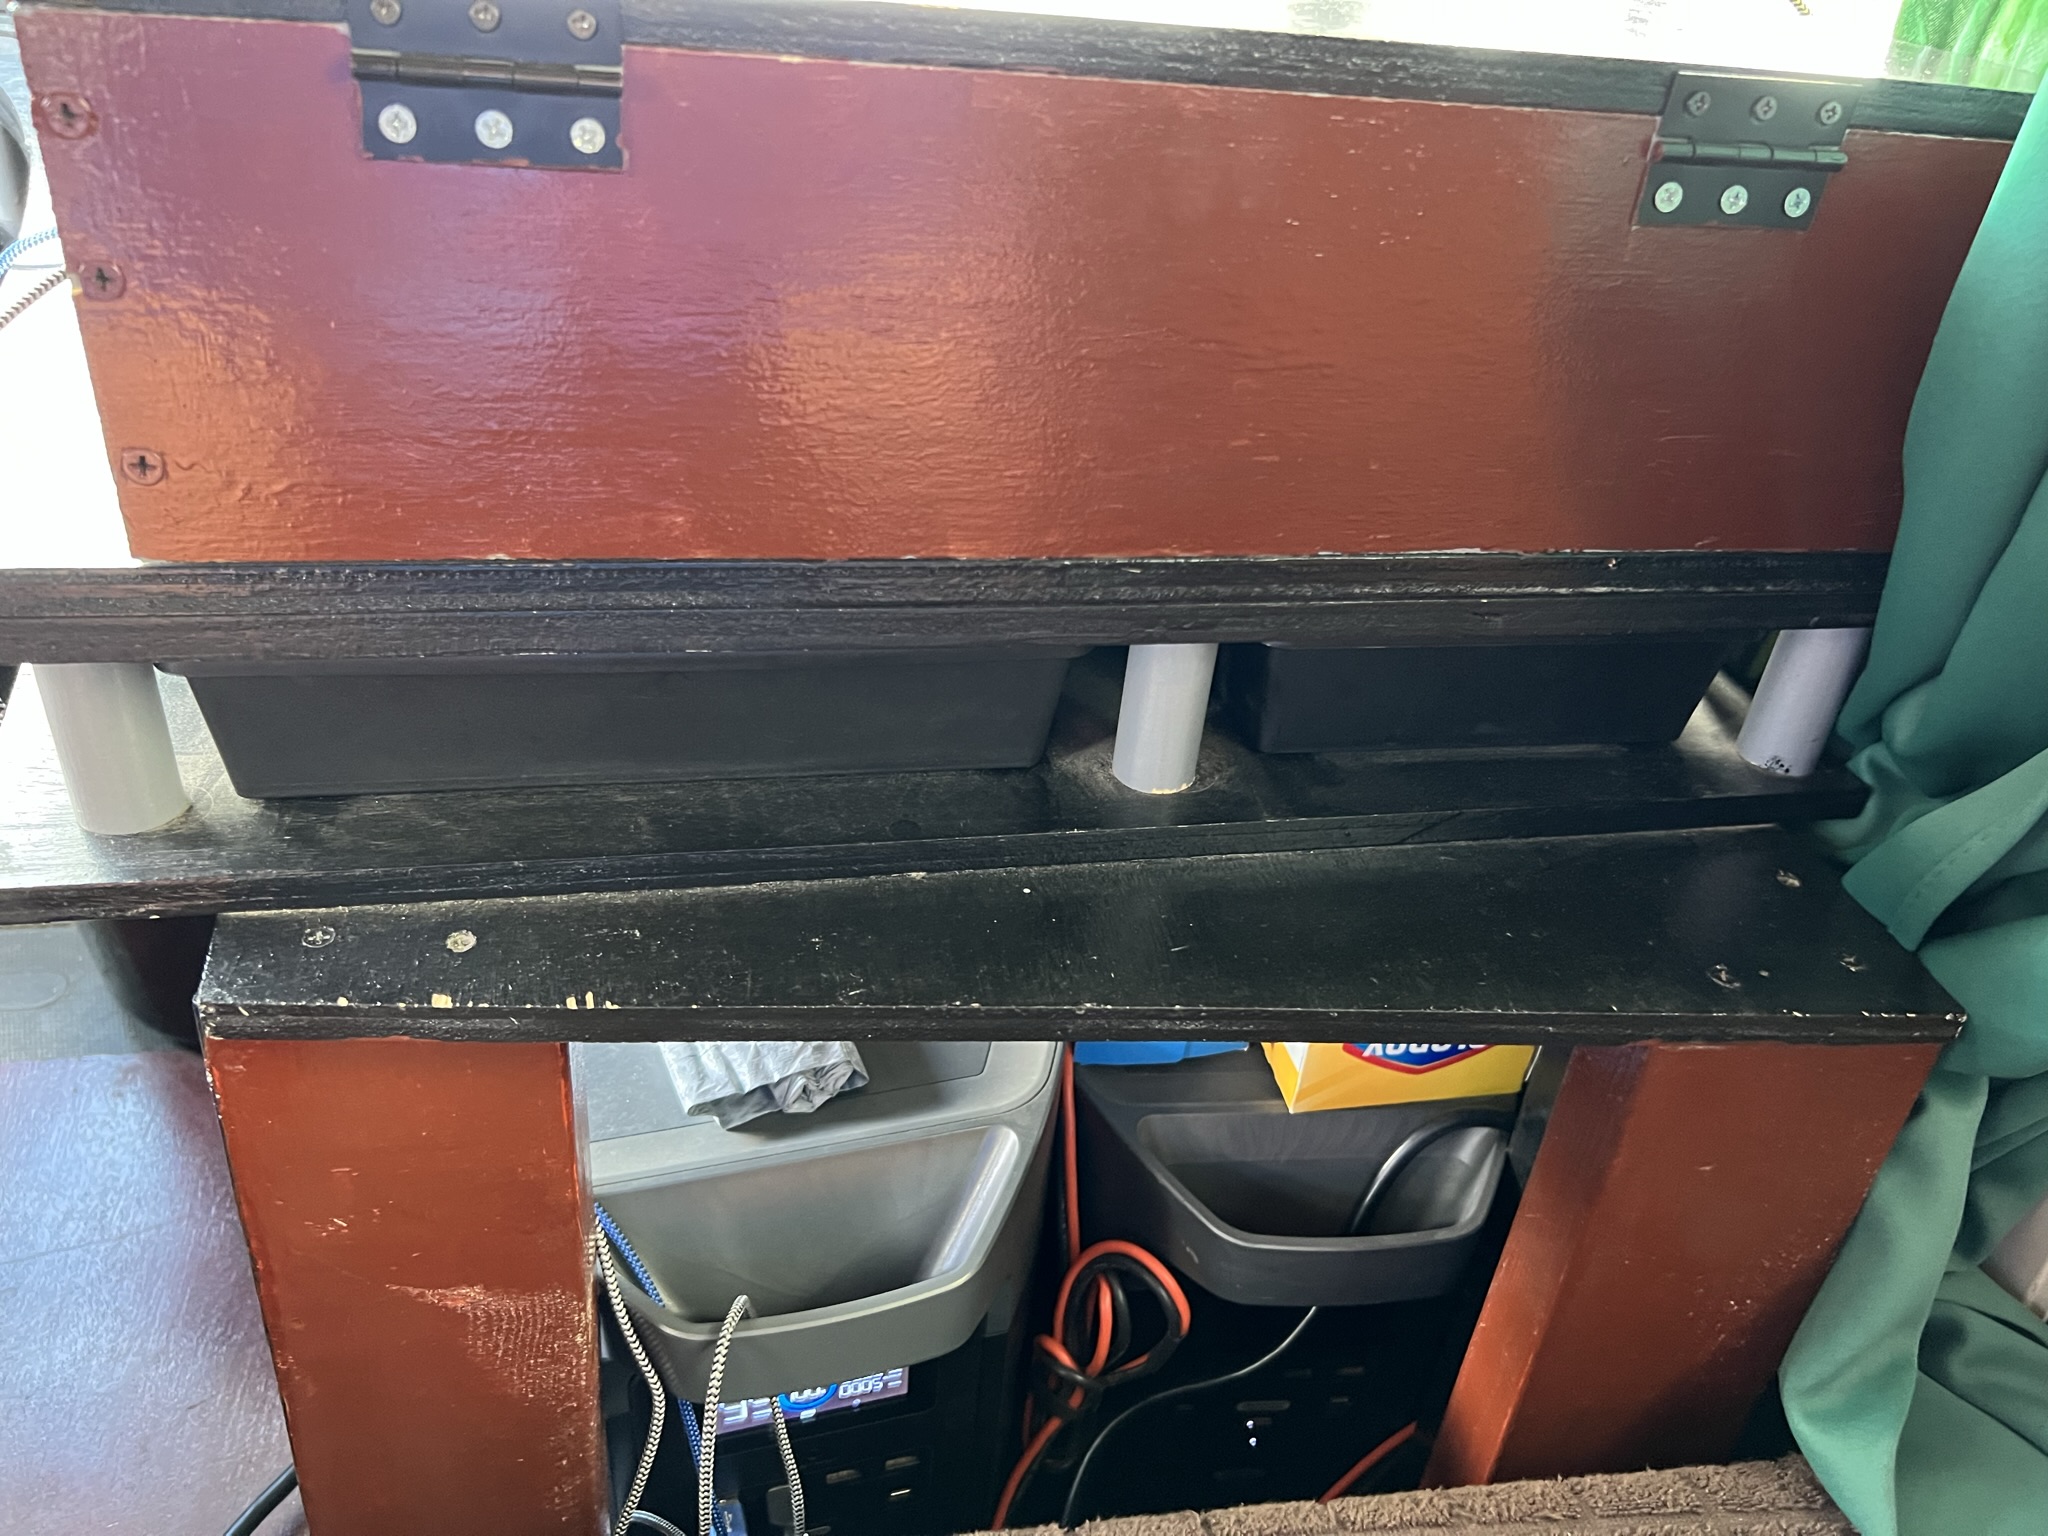
They are not big, and maybe “boxes” is a better word for them since they have hinged lids on top and not doors on the fronts, but they just feel like cabinets to me, so just roll with it. The walls and lids are ½” plywood. The walls are 4.5” high, and the box is 4.5” wide (3.5” wide inside). The box along the back of the desktop is 19.5” long, and the one along the right side is 29.5” long. [They are connected as one L-shaped box and share the 4.5” x 4.5” right-rear corner.] So, ya, long and thin. They hold my stash of batteries (AA, AAA, C, D, 9V, and discs), my array of phone and tablet charging cables, AC cords for a couple of my devices, a first aid kit, and oodles more. (You just don’t see the word “oodles” much anymore, do ya?) (Probably just as well.) \ I painted the lids glossy black as well, and the upright cabinet walls glossy gray. I laser-cut some glossy black acrylic in the shape of the RAMACK logo, and affixed it to the wall facing me. OK, the upstairs was now done. STEP 3: DESIGN THE LOWER LEVEL I kept the pillar approach from version 1.0 -- using 2.125" pieces of 1" dowels as supports and spacers between the two layers -- but I realized that there was a lot of space under there that could be put to use. It was like an underground parking garage with no cars in it. Hmmmm, I could do drawers, right? How hard could that be? The precision of CorelDRAW in mapping this all out was key. The dowel pillars could be placed pretty much anywhere at all in there, as long as there were enough to support the top evenly, but with the concept of drawers being added in, those dowels now had to be carefully arranged to not just be out of the way, but to also act as side bumpers and backstops to keep the sliding drawers in their places.
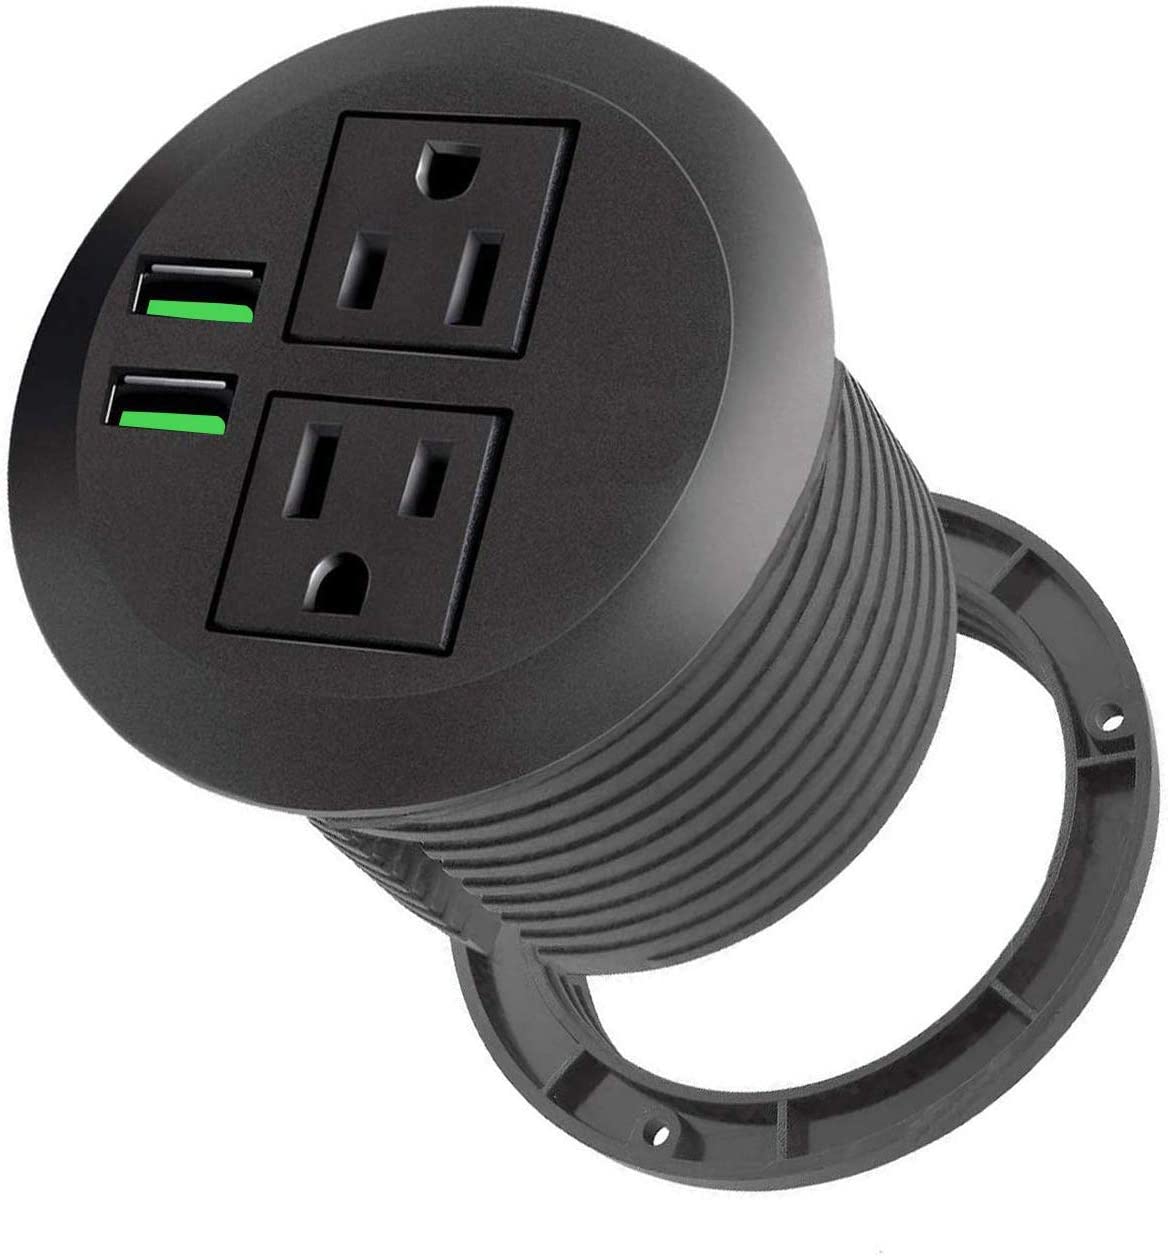
And since there was room, I also installed one more of those drop-in grommet outlet things, the ones with 2 ACs and 2 USBs that I had already used with great success on the sink, the dresser, and the desk.
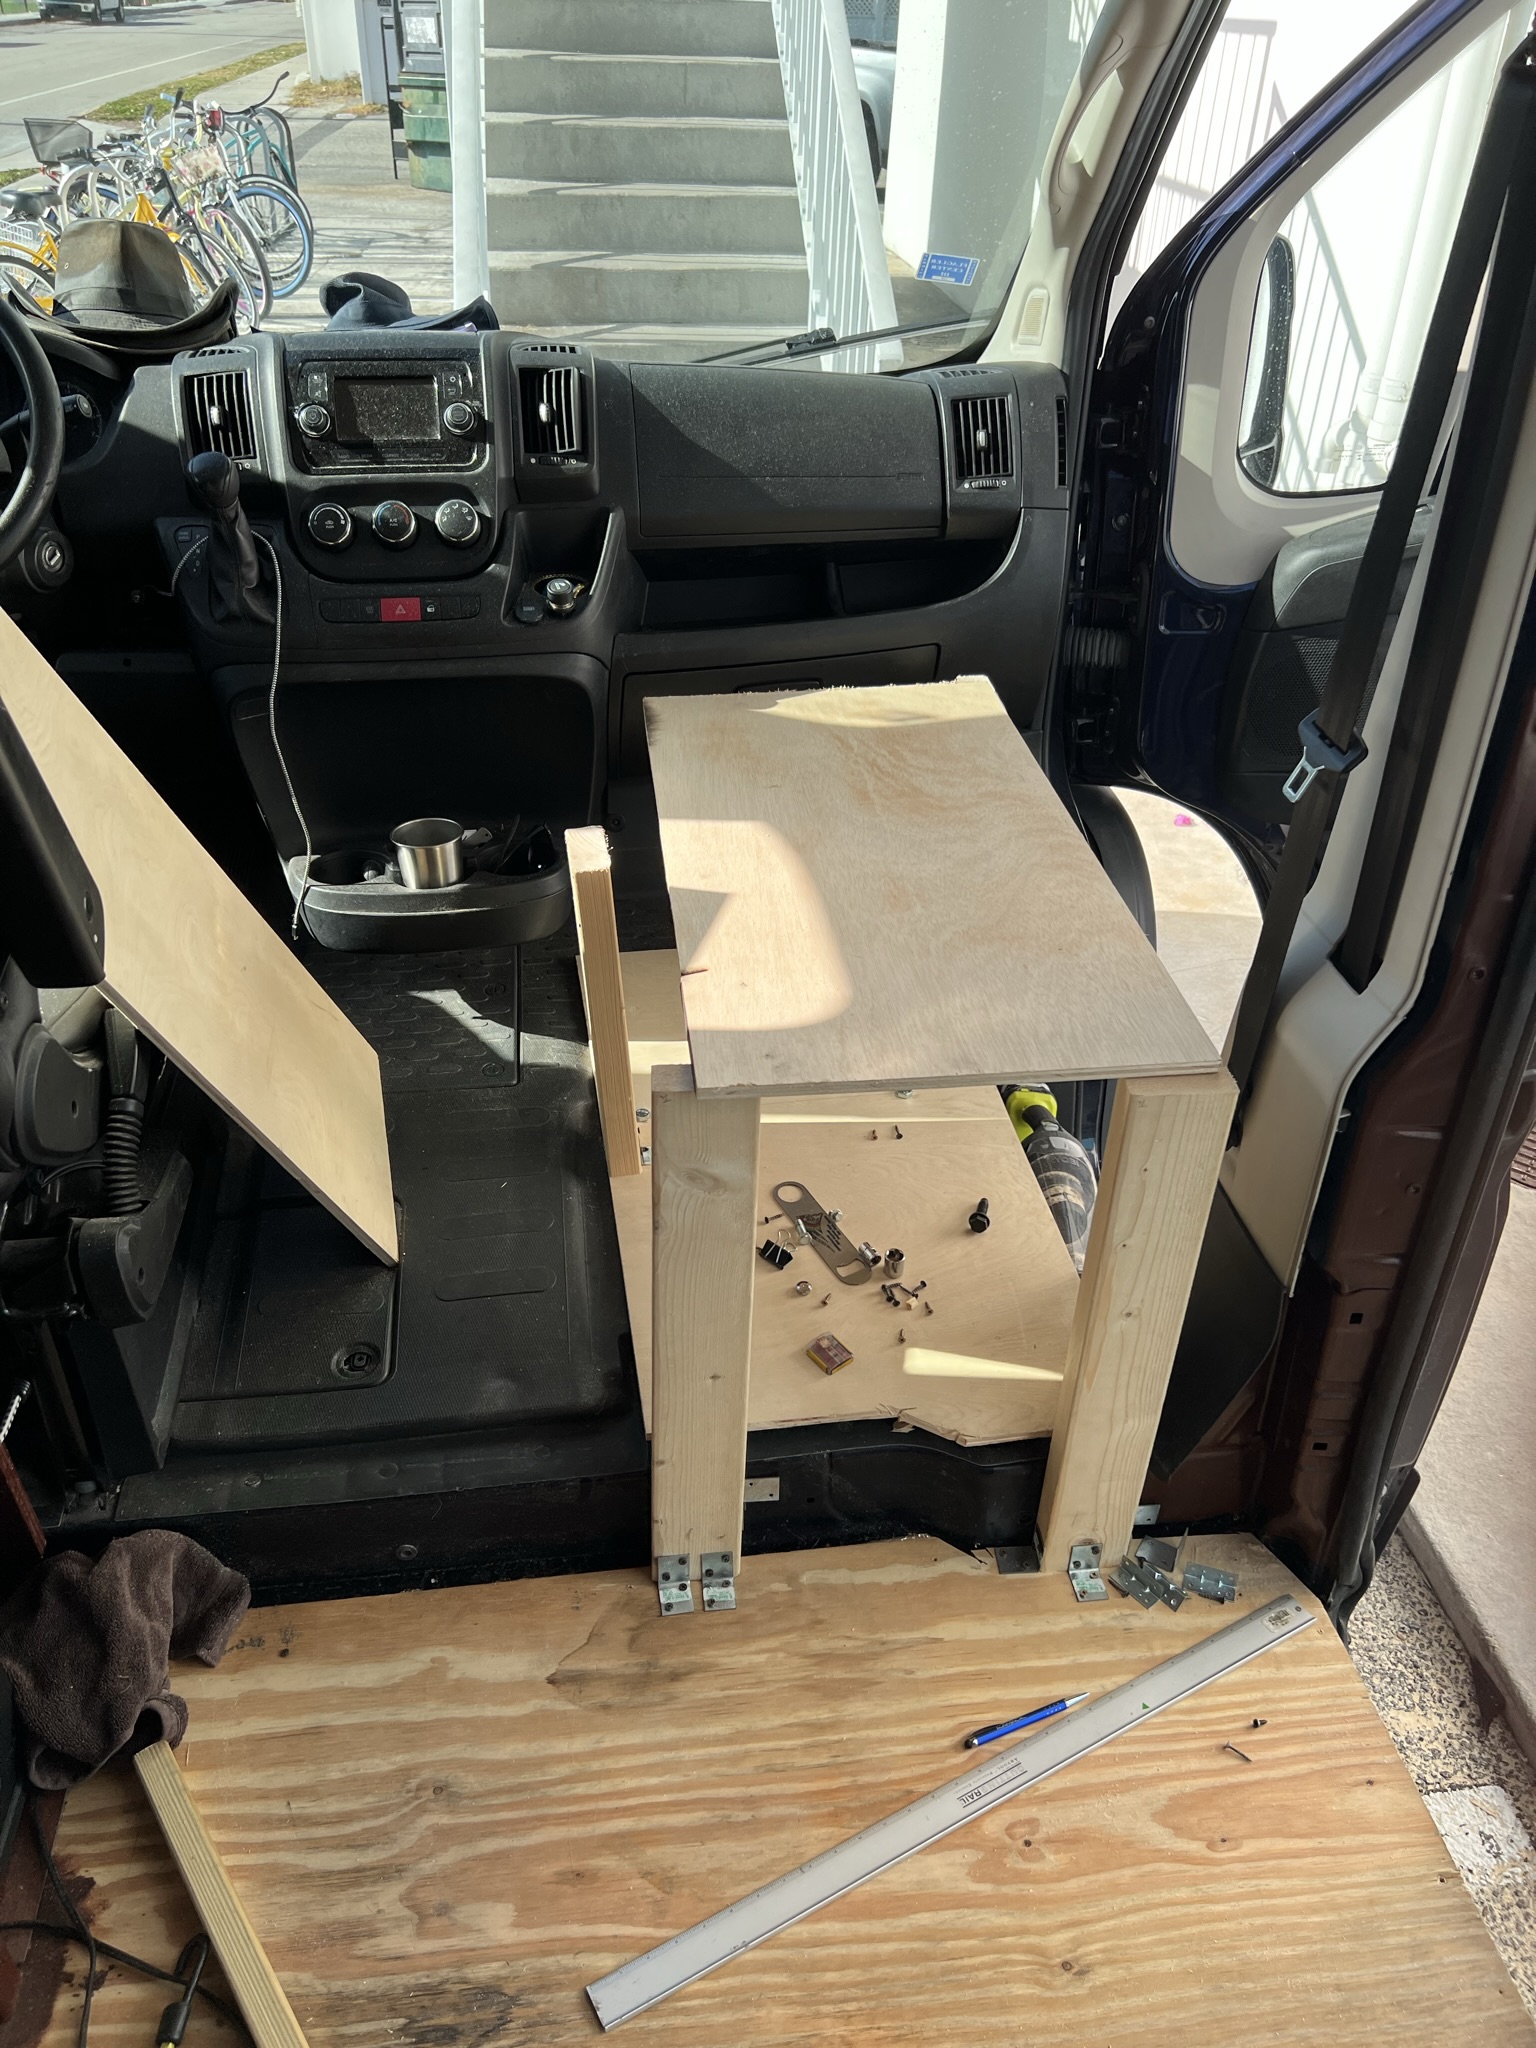
The outlet fits perfectly height-wise, and I run the cord down into the back of the EcoFlow. More on that in a bit. STEP 4: INSTALL THE DESK "Removable" this is NOT. Why would it be? There's no chair there anymore. The possibility of passenger was the only reason that the original one was made that way in the first place.. I wanted this final version to be permanent and sturdy, which called for a few 2x4 studs and a slab of good 3/4" plywood. When I disconnected the seat, the bolts left threaded holes behind. These proved key to the installation. The measurements were a little tricky because the space is sloped somewhat from front to back, but with some patience, that all came together. I had to measure the plywood floor just right so I could drill a hole exactly the size of the bolt's shaft and line that up perfectly with the threaded hole. It all seemed pretty simple: unbolt the seat, remove the seat, and secure the floor by re-inserting the bolt into the same hole. Where’s the problem? Home Depot was not much help. Their hardware guy took one look at the threads and said, “That’s automotive. We don’t have those.” The Discount Auto Parts guy just shook his head, “nope, sorry.”
But the NAPA dude, yeah, he was on the
case. He
took it as a personal challenge to fig “Just two,” I replied with a half-cringe of my own, expecting him to say I had to buy a whole box. “Excellent,” he grinned. “I have just two left.” “Sold!” And there was great rejoicing. I took those suckers
back to Blue Maxx and laid down my plywood. I
shifted it carefully to make sure both holes
were aligned.
When they finally matched up, I spun
that first bolt in there quickly before it could
change its mind. I wrenched it down tight
until that bolt head bit right into the
plywood. Then I repeated the process with
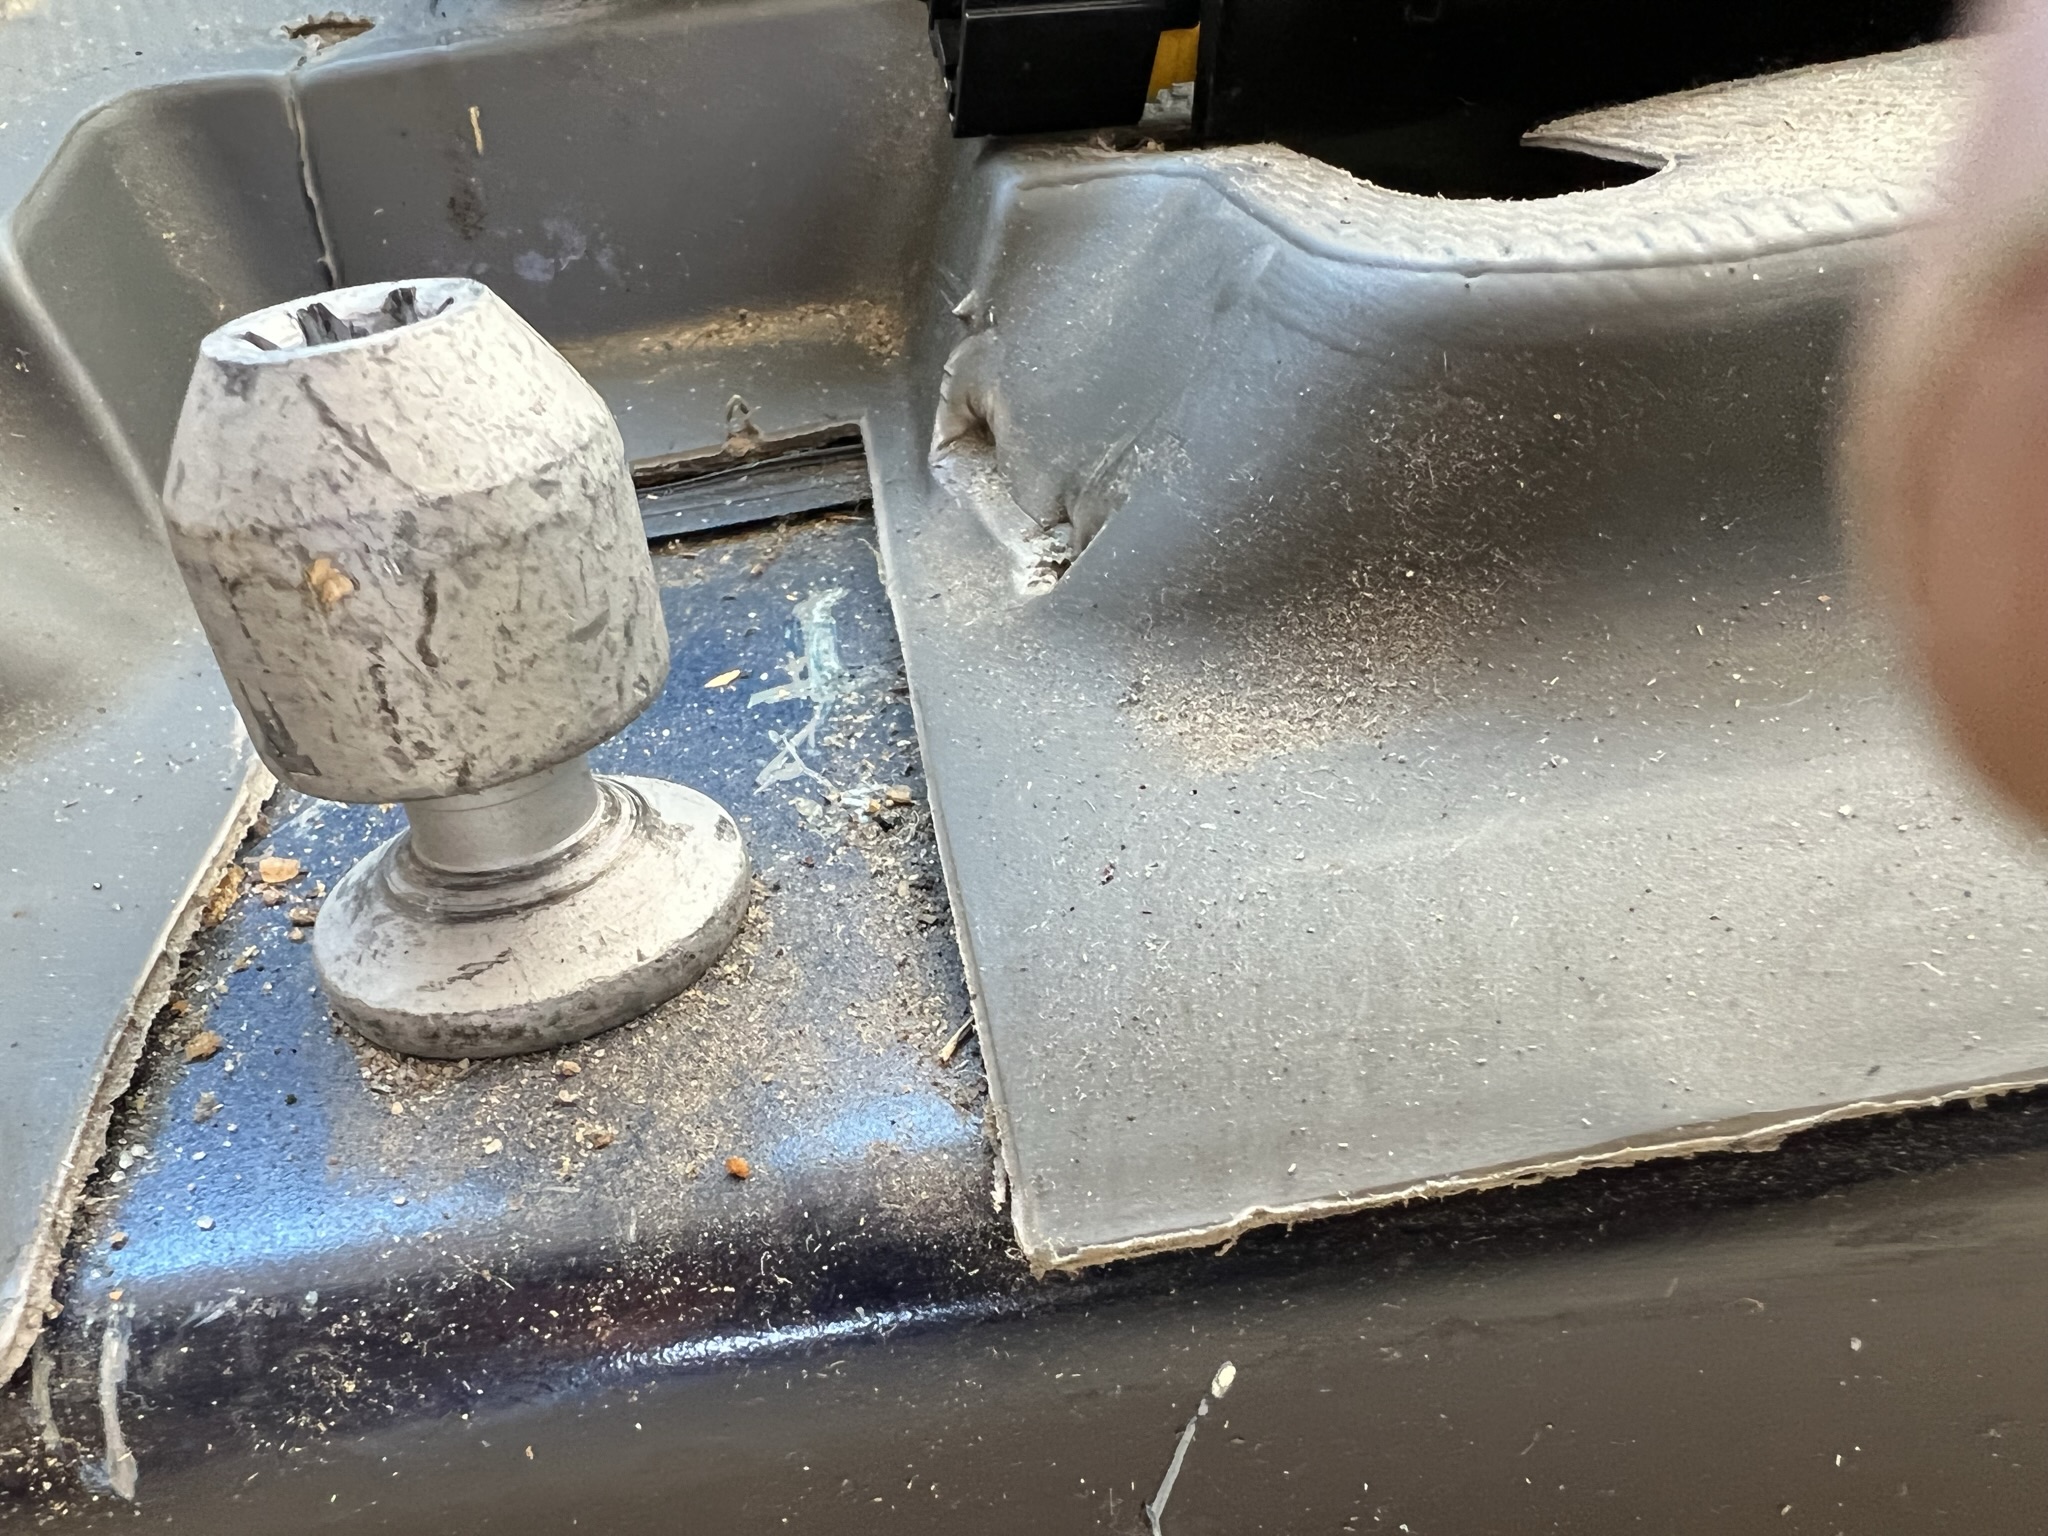
the seco The back part was a bit weird, though, and it took some experimenting. I planned to use U-clamps around those odd little posts that were also left behind after the seat extraction. They were solidly mounted and would be a good base to attach my studs to. Trouble was, the flight desk is raised up about 6” above the living room floor, and that platform is not a straight line all the way across. About 14” from the passenger wall, it juts out and angles back towards the door, making the U-clamp un-U-sable. So, I scrapped that idea, stored my clamps in the Might Need Someday drawer, and opted for simple upright studs Zmax’ed into the front of the wooden living room floor. The front legs were a tad shorter than the back ones, and the left-front was positioned closer to the middle of the left side, so I’d have room to side my kitchen-sized trash bucket in and out from under the desk. The right-front leg is all the way forward, and the top platform of the frame leans right up against the charcoal grey plastic lip that is just above the glove compartment and just below the accessory niche. The glove compartment can still be accessed by just barely, and you have to go outside the van to do it. [One of the nice extras about the ProMaster, though, is that there is another glove compartment up on top of the dash.] Oh,
where are those wires, you ask, the ones that go
to the airbag system?
They are still there, but I lifted the DDMD onto the platform then attached it from underneath with ¾” screws (1” screws might have penetrated the bottom of the desk). Since the contact wasn’t all that deep, I used about two dozen screws. To match the decors, I painted the floor plank, the front legs, and the sides of the left-rear leg glossy black. The back of the back legs, and the back of the back cabinet got stained the same cognac color to match the living room furnishings. Note
how invisible the rear-facing drawers are.
>>>>>
STEP 4: REDEPLOY THE SOLAR GENERATORS
For instance, Delta was parked backwards to allow access to the AC outlets and DC socket -- especially the latter -- so in order to read the power level screens, I had propped a mirror against the side wall of the van and I pulled out the chair, got on my hand and knees, crawled under, and read all the numbers backwards. Once I procured the big Delta Max (see Solar Generators), something better had to be done. I had had my eye on this space for a long time, thinking that some sort of cabinet would be more useful than an always-empty seat, but my apprehension about the airbags held me back. With 3 SG's, that became something to overcome. So, the Maxoak Bluetti (SG #1) remains where it has always been: behind the driver seat and in front of the desk legs. EcoFlow Delta (SG #2) and its bigger brother EcoFlow Delta Max share the space under the Driver's Desk Maximus Deluxus. They both face towards the living space, so it's much easier to read the illuminated controls on the front panels (though the frig blocks the view somewhat). If I do need to adjust something on the back, I can do much of it with a blind reach-around, but some is more easily accessed via the open passenger door -- meaning I have to get out of the van to do it. If I have to, I can feel around and get at anything, but if it's not raining, dark, or buggy out, just stepping out and opening the door is far less arduous. That's still a bit inconvenient, but it's far better than it was. There’s
enough space in front of the back sides of the
SGs to store the extra-long, extra-thick power cords
that I use to connect
to shore power, as well as my drill and a power
tool charger.
Under there, beside all of that, is my trash barrel. It barely fits, so I used my box cutter to cut out a curved hole in the top of the narrow side so I can dispose of any cans or bottles or anything smaller without moving the bucket. If it’s something larger, I just slide the bucket out, dispose of the disposal item(s), and slide the bucket back under the desk. I
have two solar panels on my roof. The
100W panel in the back is dedicated to Bluetti. The
big panel – 370W – is wired down to the Brothers
EcoFlow. I
bought an extension cord with a female yellow
XT60 socket and two short cords, one to run from
each of the Deltas.
That way, I could leave each short
cable perpetually connected to its respective
power box, and have a very easy time connecting
the male XT60 plugs to the aforementioned socket
whenever it’s time to switch them. Since
EcoFlow solar generators charge so quickly, I
swap them out about once a day and keep the
charge level high.
   The extension also
has a few more wires, one of which can feed
Bluetti a dose 50% higher than he gets from
shore power. That's like giving him pure
oxygen to breathe, baby. But he only
gets it once in a while. The cord can
only feed one branch a time, so Blue only gets
his happy hour when the Delta Boys are burping
and saying, "no, thanks, I'm freaking full." All
in all, this Drivers Desk Maximus Deluxus is
AWESOME! Might be the best thing I have
ever done in my whole life! (Though I hope
it's actually not.)
|