|
THE D.I.Y. VAN
CONVERSION
Extras
KEQIAOSUOCAI
Forest Green Blackout Curtains, Grommetted, 52"
x 63" -- 2
panels for $28 (3 sets)
YGO
Forest Green Blackout Curtains, Grommetted, 24"
x 24" -- 2
panels for $22
Once the windows were in, curtains became a
necessity. I had had several sarongs draped
over bungee cords, so I could close off the front
(i.e., behind the seats) and cover the back
windows, and, short-term I used the same approach
on the sides.
Sarongs have been my go-to curtain material since
I moved to the Keys in 2001. Prior to that,
bed sheets had done the trick, usually hung
loosely over a 1/4" aluminum rod that spanned the
width of the windows.
Those vans all had the thin, translucent folding
blinds that are so common in vans. They are
a good look, for sure, but they don't fill the
bill for stealth. If you have any lights on,
the outside world can see that you have lights
on. Laptop or TV, forgetaboutit.
The bed sheets were pretty good for that, and I
usually had them tied back around the middle, so
they looked kinda like actual curtains, but there
were inevitably a few wrinkle gaps when they were
untied.
The sarongs are a lighter material so they did not
get those stubborn creases of they had been tied
back for a few weeks; they just flopped right down
in to place and overlapped easily.
 Plus, they were colorful. In Moby, with his
beige/tan and polished wood interior, I had
leopard-pattern sarongs. Hung double --
i.e., hung over a rod or cord in the middle so
that 36"-42" hung down on each side -- they were
pretty good at blocking discreet light, but very
good at letting just the right amount of morning
daylight in.
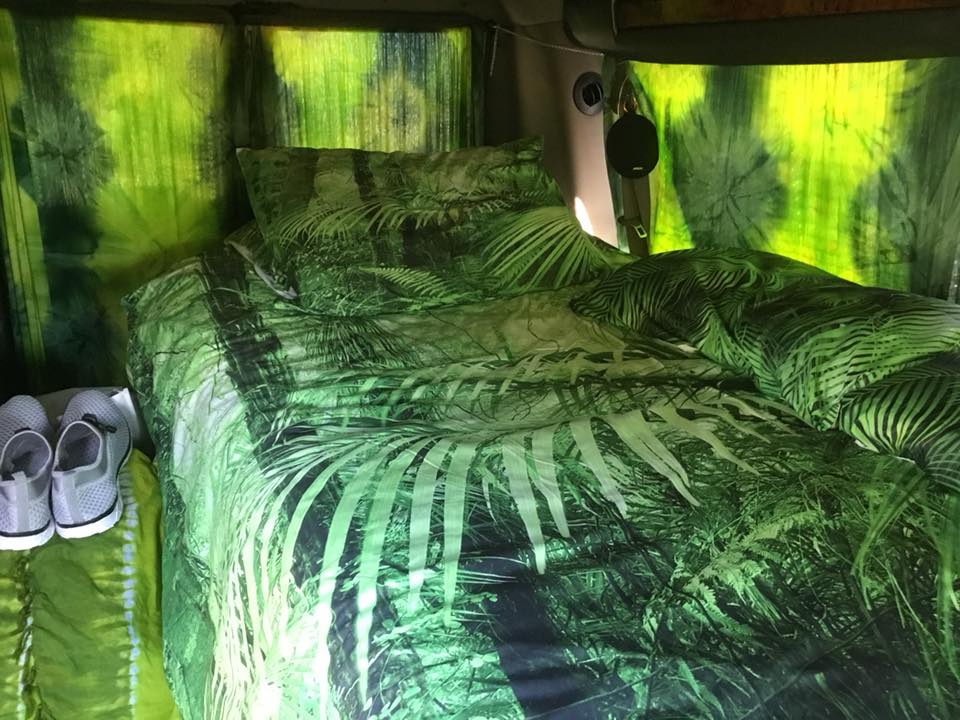
In Zdog, a dozen green-and-yellow tie-dye sarongs
covered every window. The green glow in
there was great -- like
being in a rain forest on a sunny day --
especially with the jungle-pattern duvet and
pillows. It was a good look to wake up
to.
But, since Blue Maxx is next level, the window
treatments need to be next level as well.
There will be many, many times when I'll pull in
somewhere well before bedtime and need to do some
writing, some photo editing, or some eating --
without the outside world knowing about it.
And for that: Blackout. Several
companies sell thick, lined curtains that might as
well be a wall. No light gets through.
I suppose if you had a big LED flashlight and you
pressed it against the fabric, you'd see it from
the other side. But they would not see you.
So I got a couple at a time: two for the
back first, then two for the front. Forest
Green, said the label, but they look a shade or
two lighter. WTF, though, as long as they
all match.
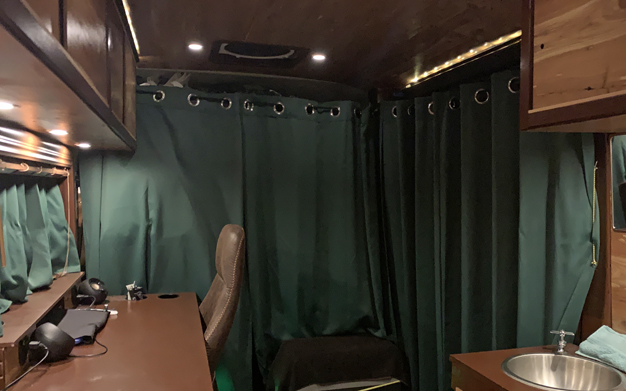 The 63" top-to-bottom length is perfect. In
the front, they hang from the height of the bottom
edge of the overhead compartment (OC), to within
an inch or two of the floor. Even if I have
all my lights on -- and there are 16 of them now
-- nothing will be visible from the front, even at
the very bottom, which, conveniently, is obscured
by the single step from flight deck to living
room.
The two 53"-width curtains are way more than the
6-foot-wide van needs. I chose grommeted
curtains. Bungee cords are my "curtain rods"
and their hooks need something wide to slip
through. If I had a narrow aluminum rod,
like I did in other vans, I could get the kind
with the closed sleeve on top. But with
bungees, they don't work.
Also, because of the grommets, and the need to
alternate front-back with the cord, a nice soft
ripple occurs in the curtain. The panels
have an even number of grommets, so you begin with
a front-facer and end with a back facer.
Because of this, you get a dandy overlap where the
right-hand panel and the left-hand panel meet in
the middle. This is important. With
curtains on rods, you can't overlap them, and that
can leave a slim gap that will betray you.
I added the same size for the slider
doorway. The front-slider panel tucks nicely
up against the right-front one, then overlaps with
the back-slider. I tuck the back edge of the
back-slider panel under the skinny bungee that I
also use to hold it open, and it is light-tight
(kinda like watertight, but not wet on one side).
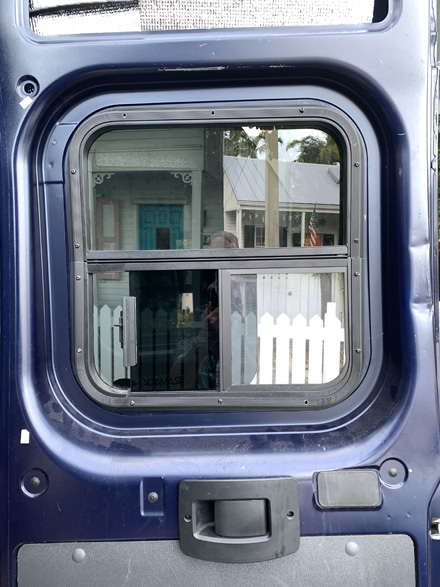
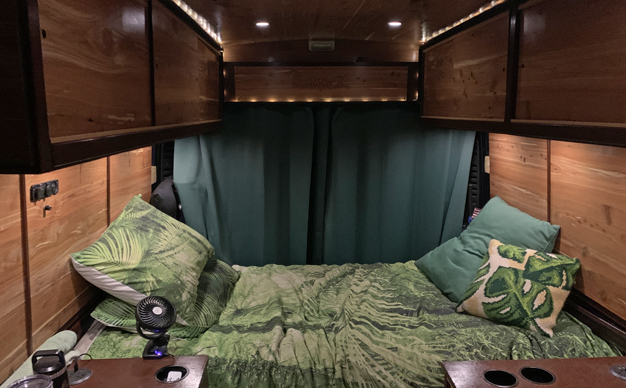 The back curtains, like those at the slider door,
were measured up from the floor to find the proper
hanging level. While the bungee cord at the
slider stretches across the very upper part of the
opening, the back doors actually open all the way
to the roof, a full 74" high. The windows,
though, are just above the halfway point of those
doors, and they are what the curtains need to
cover, so bungee-cording across at about 66" from
the floor -- hidden nicely behind the "logo board"
-- works out perfectly. no light can be seen
over the top of the curtains. and none shows below
the bottom (largely because the bed blocks it).
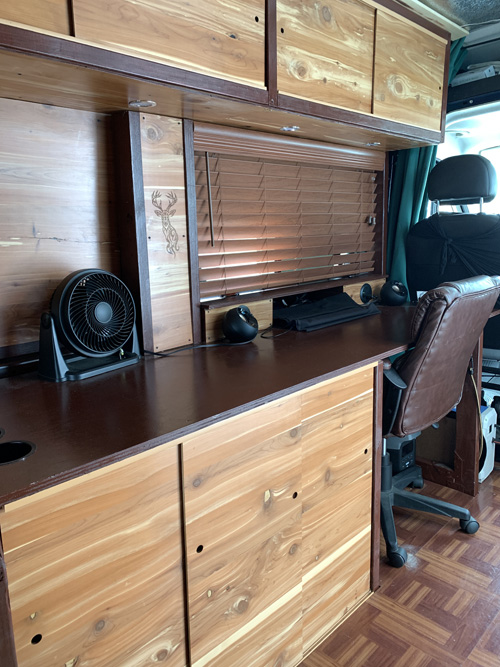
A pair of much shorter curtains were required for
the office window. I had had sarongs there
that hung from a rod and they went all the way to
the desk top. Once I add the upper shelf of
the desk, those looked sloppy. So I got the
24" length, with grommets. They hung a
teench too long, but WTF, better than too short.
They do fill the window space fully and give the
needed blackout, but I found, as I was sitting at
the desk, that they also cut off any breeze that
might otherwise pass through that open screen and
onto my face. This was irksome enough to be
the catalyst for the purchase of blinds for that
window...
... which you can read about immediately below!
------------------------------------------------------------------------------------------------------------------
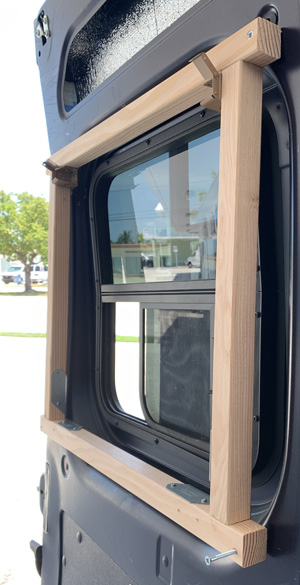
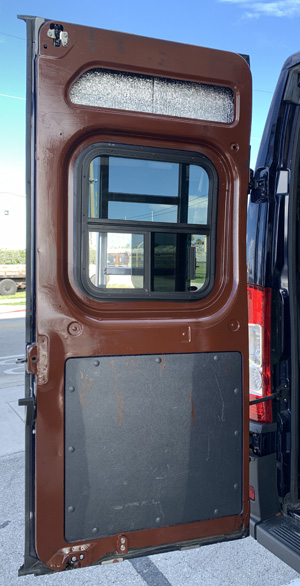
THE BLINDS JustBlinds.com Faux Wood Blinds, 44” x 22” ($176) JustBlinds.com Faux Wood Blinds, 22” x 22” (2 sets for $176) Whitewood Studs, 2” x 4” x 96” -- 2 @ $9 Douglas Fir SRS Mixed Grain Board, 2” x 2” x 96” -– 3 @ $11 = $33 Since I already have thick forest green curtains all around, blinds might seem superfluous, and I suppose they are. But the blinds do serve a purpose beyond the basic aesthetics. I love the look of faux wood blinds, so that might be enough of a reason – I’m building this exclusively for me, after all -- but they also let some light in – a little or a lot, depending on how you manipulate your wand. Even more importantly, though, they let some air in. The MaxxFan in the ceiling serves primarily as an exhaust fan, pulling out stale air and drawing in fresh air from outside. It can only do that, though, if at least one window is open. This is where blinds will be an advantage over blackout curtains. The curtains block out all light – and do it very well – but they block out all air flow too. The blinds, even when almost fully closed, will afford me the privacy I crave while allowing my coveted breeze. My original notion had blinds on all windows. (My original notion also had very large side-back windows.) It wasn’t until I actually tried to put blinds on a window that I realized how freaking tricky it would be. Several months ago, I bought a pair of small ones (22” x 22”) from JustBlinds.com, figuring they would be a quick install on the back doors. But not so, Jojo. The windows sit in a very rounded recess, and the square frame that the blinds require … well, the old square-peg-round-hole thing. Over the span of a few months, I made occasional attempts at fashioning a frame that would attach to the flatter metal outside the recess. I even built a reasonable prototype out of some medium-quality 2x2’s that I had left over from a previous step. I kept waiting for the solution to present itself, but the square-in-round aspect was proving to be too much to overcome. My prototype sat in a remote corner at work for a few moons as I waited out my budget issues. Work resumed, but I moved onward to the paneling, the floor and (most of) the ceiling. The blinds sat out-of-sight and almost out-of-mind. When I finally turned my attention back to this task, it was not the back of the van that would get blinded, but the large side window, over the desk. I had ordered a 44” x 22” cedar-toned blind, with 2” slats, and it arrived a week or so ahead of schedule. This was an easy install. I had to add an upright 2x4, screwed into the frontmost side of the upper desk, right behind the driver seat. I made it just tall enough to touch the bottom few millimeters of the cabinet’s side. I didn’t want to screw it to the side panel – or make it tall enough to block it -- in case something went wrong with the dimmer switch that was embedded therein and I would have to remove it.
Damn, that was too easy. Hmmm, maybe I can get some blinds mojo going here. I had a notion that a partial frame would work for the back door blinds: maybe just a top crosspiece and two small side blocks on which to anchor the brackets. Maybe? Maybe?? Nope. Wouldn’t fit. Not even close, in fact. The recess was just too damn round. But I now had the prototype back in hand. It sent vibes through my arm and up to my brain. It said, “Hang meeee, hannnnng meeeeee.” I had recently acquired a fresh supply of the same Douglas Fir 2x2’s that I used for the skeleton of the upper cabinets. Home Depot sells them, but they take about two weeks to be delivered to the store. They are exactly 1.5” by 1.5” and are almost perfectly straight – unlike the aforementioned medium-quality 2x2’s (1.25” x 1.25”, with a bit of a warp) I got at the store.
With new resolve, I set to the task by
dismantling the prototype and
rebuilding it with the new fir.
The frame was really simple: 27”
horizontals top and bottom, and 21”
verticals.
The blinds fit nicely, but a couple of modifications were necessary. I tell myself that I’ll always raise and secure them when I drive, but I know myself too well. I will forget and end with them being tossed chaotically on some bumpy road.
The back sleeve-panels had to be affixed first, of course, since there would be no way to screw them in once they were on the door. I was working solo as usual, so there was no third hand to hold the square in place while I worked the drill. Bracing it with my head was awkward and impractical at best (stupid and injurious at worst), so I needed a new option. Way back when I was considering taping the solar panel to the roof – yeah, remember that nutty idea?? -- I bought some strips of VHB (Very High Bond) tape. I cut four 1” squares of it, stuck those in the very corners of the frame, and pressed it in place on the door. I held it for several seconds to help it grab on, then tentatively released it. It stayed on! I needed to drill a hole through each corner and into the steel behind it. Lower right was first and I was happy that the extra long drill bit ate right through the fir and metal. I pulled the drill back out, started to reach for a screw annnnnd quickly caught the frame as it fell off the damn door. Very High Bond, my ass. I stuck it back up and quickly drilled through the upper left corner and vroomed in a 2” screw. A second 2-incher in the lower right stabilized it. The other two corners were cake. Likewise for the other door.
The blinds fit in just right.
So, I called it a day.
I called it Sunday, in fact,
and went I drove around for a couple days to make sure they wouldn’t rattle or shake loose. All was well, so it was time for some cognac. Stain, that is. And, no, not on the frame. All of that fir would be hidden behind cedar panels, so the stain would be a waste. I did hit them up with a good coat of polyurethane, though; they will inevitably get a little wet at times. The cognac stain went on the metal. It’s all about the décor, mate. I love the True Blue Pearl exterior – it is one of the main reasons that I bought Blue Maxx – but the interior scheme is brown and green. Any blue metal just looks like a spot I was too lazy to cover. I did the first coat on Thursday morning before work, then added the second coat on Friday morning. On Saturday, I cut all the small cedar panels, then remounted the frames on the back doors. A few screws attached the panels to the frames and The Blinds were done! To be honest, this is the least good looking of any step so far. There is nothing about these things that says, “skilled work.” They look like scraps thrown together, which, well, is what they are.
But, considering that the blinds were
sitting idle for so many months, just
getting them up and functional is a
huge victory. 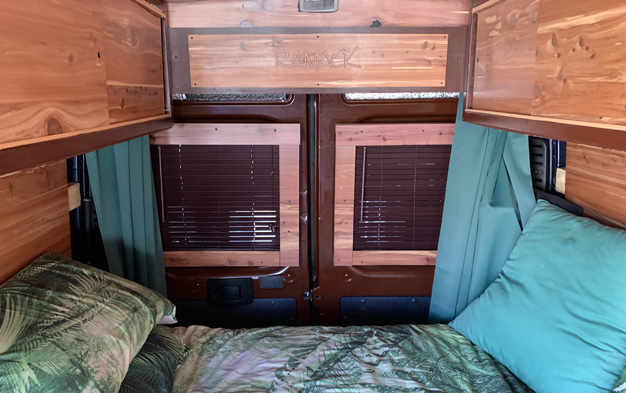 But I would be remiss if I did not give a big thumbs-up to JustBlinds.com. Their website is crazy easy to use, they have tremendous selection of items and options, and their ordering page is user-friendly. The products are well-made, with a sturdy feel, annnnnnd there is a 2-year warranty on everything. Makes me wish I needed more blinds.
Hey, I hear ya, I know, put blinds on the slider door! Doncha think I've thought about that? A set identical to the Office Blinds would look awesome on that door, but there is no way to attach them where they would not interfere with the opening and sliding of the door itself. The door doesn't pop open very far at all, so there is a very narrow clearance. Too bad...
Anyway, just wanted to give a big Hoorah to
JustBlinds. Buy some blinds from them,
even if you don't need them. Thanks.
----------------------------------------------------------------------------------------------------------------------------------
Amazon
Basics Utility Handle, 6.5-inch Length -- 2
for $10
Huh? The doors came without handles?
What?
Almost true. They all have some kind of
latch or flip-plate that you use to release the
mechanism holding the door closed, and there are
things to hold onto pull the front and back doors
shut from within.
But I felt the need to add two: the Yank-Me
and the Gravity Assist, both at the slider door.
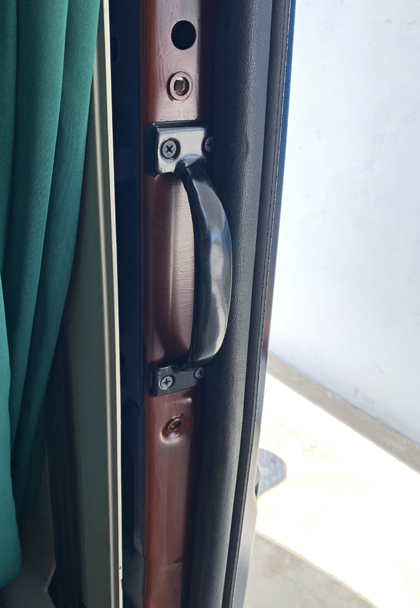 The Gravity Assist is -- I'll admit it -- a
concession to age. Don't read that
wrong. Gravity does not need an
assist;
I do. The
step up into Blue Max from level ground is
significant. The front leg has to bend
acutely to heft my carcass upward and
inside. As a collegiate triple jumper, this
would have been laughable: all ankles and
bounce right up.
That was "a while ago" now, though, so to keep my
knees from waking up the neighborhood with their
screams of anguish, I installed the Gravity Assist
handle on the inside of the door jamb, somewhere
between a yard and a meter above the van
floor. The metal is just barely wide enough
to accommodate the 1.25" wide screw-base.
The handles came with black screws to match the
black metal, but I eschewed them in favor of my
favorite dark-grey 1" pointy drywall screws.
No pilot hole needed, just hold it in position,
start the power screwdriver (i.e, drill with
Philips head bit) slowwwwly, lean on it a bit, and
let that little devil chew its way through.
Takes no more than 12 seconds. Took less
than two minutes to get The GA installed.
So now, I grab hold on my way out of the van and
ease my self groundward, and I grab it on the way
in and give an easy pull to help out the ol'
legs. VERY nice touch. I highly
recommend it.
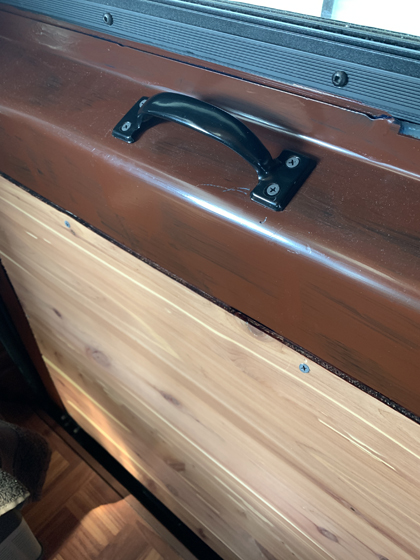 The other one -- the Yank-Me -- is mounted
horizontally on the sloped metal just under the
window. The slider door needs to be pulled
shut firmly to avoid getting an error message on
your dash: SIDE DOOR OPEN. Grrr.
How insulting.
Before I installed the cedar panel on the top part
of the door, I simply grabbed hold of that lip and
pulled the door forward-then-in firmly. I
quickly realized though, once that panel was in
place, that a new strategy would be
necessary. Pulling it forward by the front
edge was good, but I was not able to consistently
pull it inward into the official Closed Position.
The black utility handles came in a pack of two,
so this seemed to be the perfect place to use the
second one.
I positioned it about 10" front of center and
applied the drywall screws. I had to be a
little extra careful because sometimes the screw
will topple before it sinks its teeth into the
steel, and I did NOT want to clunk my drill into
the slider window. I don't want to ever
break one of those, but especially not by doing
something dumb.
The four screws went in without any such trouble,
though. Now, I just grab that handle
underhanded (i.e., palm up), pull it forward and
yank it inwards. PERFECT closure.
--------------------------------------------------------------------------------------------------------------------------
THE
LADDER
Yvan
Telescoping Ladder,12.5 FT -- $140
Wait. Blue Maxx already has a
ladder. It got in the way when the
back window had to be installed,
remember? Of course I do.
But there's a serious
limit to that ladder now. I can still
use it to climb up onto the roof, but, well,
what then? There's this long, wide
solar panel in the way. It doesn't go
fully side-to-side; there is about a foot
available on either side. Now, if this
was on level ground, and I had to walk a
foot-wide stripe, well, no problem.
But this one is basically ten-feet off the
ground, meaning that my head is almost 16
feet up.
Ya,
I know, 16 whole feet. Whoaaa.
But, to someone with mild acrophobia, it's a
tad daunting. Falling would be like
dropping out of a second story window.
I mean, if I lost my balance, but could
control my fall enough to land on my feet,
I'd probably be OK, as long as knees don't
explode. If I went sideways, though,
that's high enough to break some things,
maybe even my precious little head.
It's funny, I'm not particularly scared of
really high heights. If I fall from
way up there, I'm just gonna die (and pretty
much instantly, and hence painlessly), so
might as well enjoy the flight. Just
ask Thelma and Louise. But surviving
with injuries (and accompanying medical
expenses) is far more scary.
So,
ANYWAY, I decided that it might be pretty
handy to have a ladder I could use to access
the front of the roof, for those times
when I need to go up and wash off the solar
panel, or in case the MaxxFan ever needs
anything, or if I ever want to slop some
more waterproofing stuff around the feet of
the solar panel.
[I got a roll of
black Flex Tape. That stuff is
crazy! You cut it with scissors and
then you can barely get it pulled off the
scissors. And you better get it
placed right first time, cuz it's a bitch
to try to peel off. Gives me
confidence that it will do what it claims,
though.]
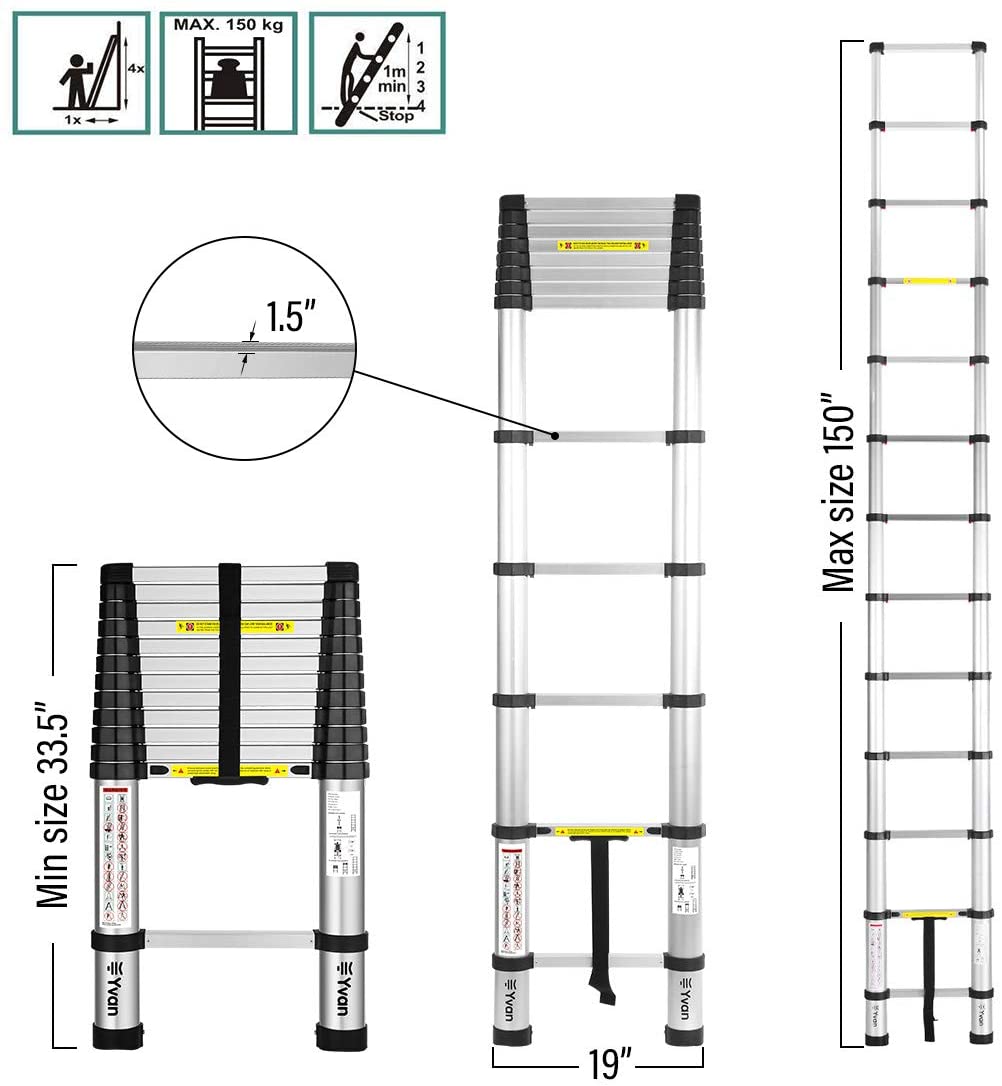 So,
ANYWAY, I had seen a telescoping ladder on a
Facebook ad and thought it might be just the
ticket. Buying off Facebook often
leads to a rip-off, though, so I did not
pull the trigger. Quite a bit later, I
looked one up on Amazon. The price
gave me pause. The FB ladder was about
$40; the real ones were $120 and up.
So, ya, ripoff. So,
ANYWAY, I had seen a telescoping ladder on a
Facebook ad and thought it might be just the
ticket. Buying off Facebook often
leads to a rip-off, though, so I did not
pull the trigger. Quite a bit later, I
looked one up on Amazon. The price
gave me pause. The FB ladder was about
$40; the real ones were $120 and up.
So, ya, ripoff. I
picked out a 10.5-footer. I didn't
care about brand; they all looked virtually
identical. Just before I went to
the payment page, I saw that I could get a
12.5-foot ladder for not much more. I
took it. The van is 9'6", so climbing
back down will be a lot easier if I can grab
the top of the ladder before putting my foot
on a step. Negotiating that on the
back door ladder, which barely reaches the
edge of the roof, was a trip: nothing
to grab onto, needing to reverse body
position, and trying to find a step without
catching the leg of my shorts on the top of
the ladder (happened almost every damn
time).
So,
the ladder works jusssst fiiine. It
extends upward easily, feels very sturdy
when I'm on it, and it closes slowly and
silently.
But
where to keep it? Folded up, it's
33.5" high and 19" wide. It won't fit
standing under the desk, or between the
counter and the bed. Even lying on its
side, it will stick out too far. And
it will take up too much space between the
bed and back doors where the bike will
be. Hmmmm.
As
I was looking under the desk with an "are
you sure it won't fit under here?" attitude,
I looked at the space behind the
dresser. There's about a 3" gap
between the upright studs and the sheet
metal wall. I angled the Yvan this way
and that, and finally slid the narrowest
part (the top) as far as it would go behind
the dresser. It fit quite well, even
finding a snug niche to rest in. The
legs stick out to be easily grabbed if
needed, but comfortably out of the way of my
legs behind the floor-level stud of the
desk.
I
had to be careful because there are a few
wires and a power strip in that area, but I
was able to use some nift and avoid
them. The EZ Cool insulation on the
wall even keeps the ladder from rattling as
a I drive.
Success!
--------------------------------------------------------------------------------------------------------------------------
THE DESK CHAIR ovios
Ergonomic Office Chair -- $200
I
liked my old desk chair.
I bought it less than two years ago, as a
functional piece of furniture for my suddenly
large mobile room.
All I had had in Zdog was a folding
stool, about a foot in diameter.
Pretty lame, right?
Right, but it was all I could fit.
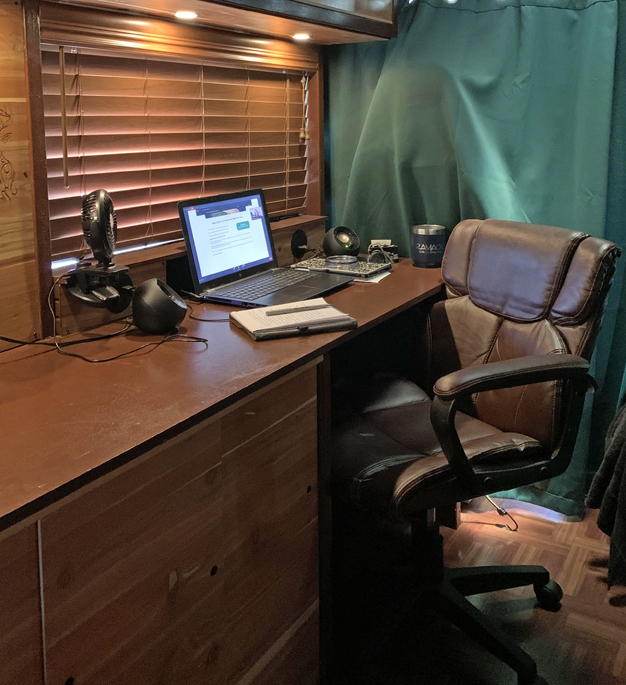
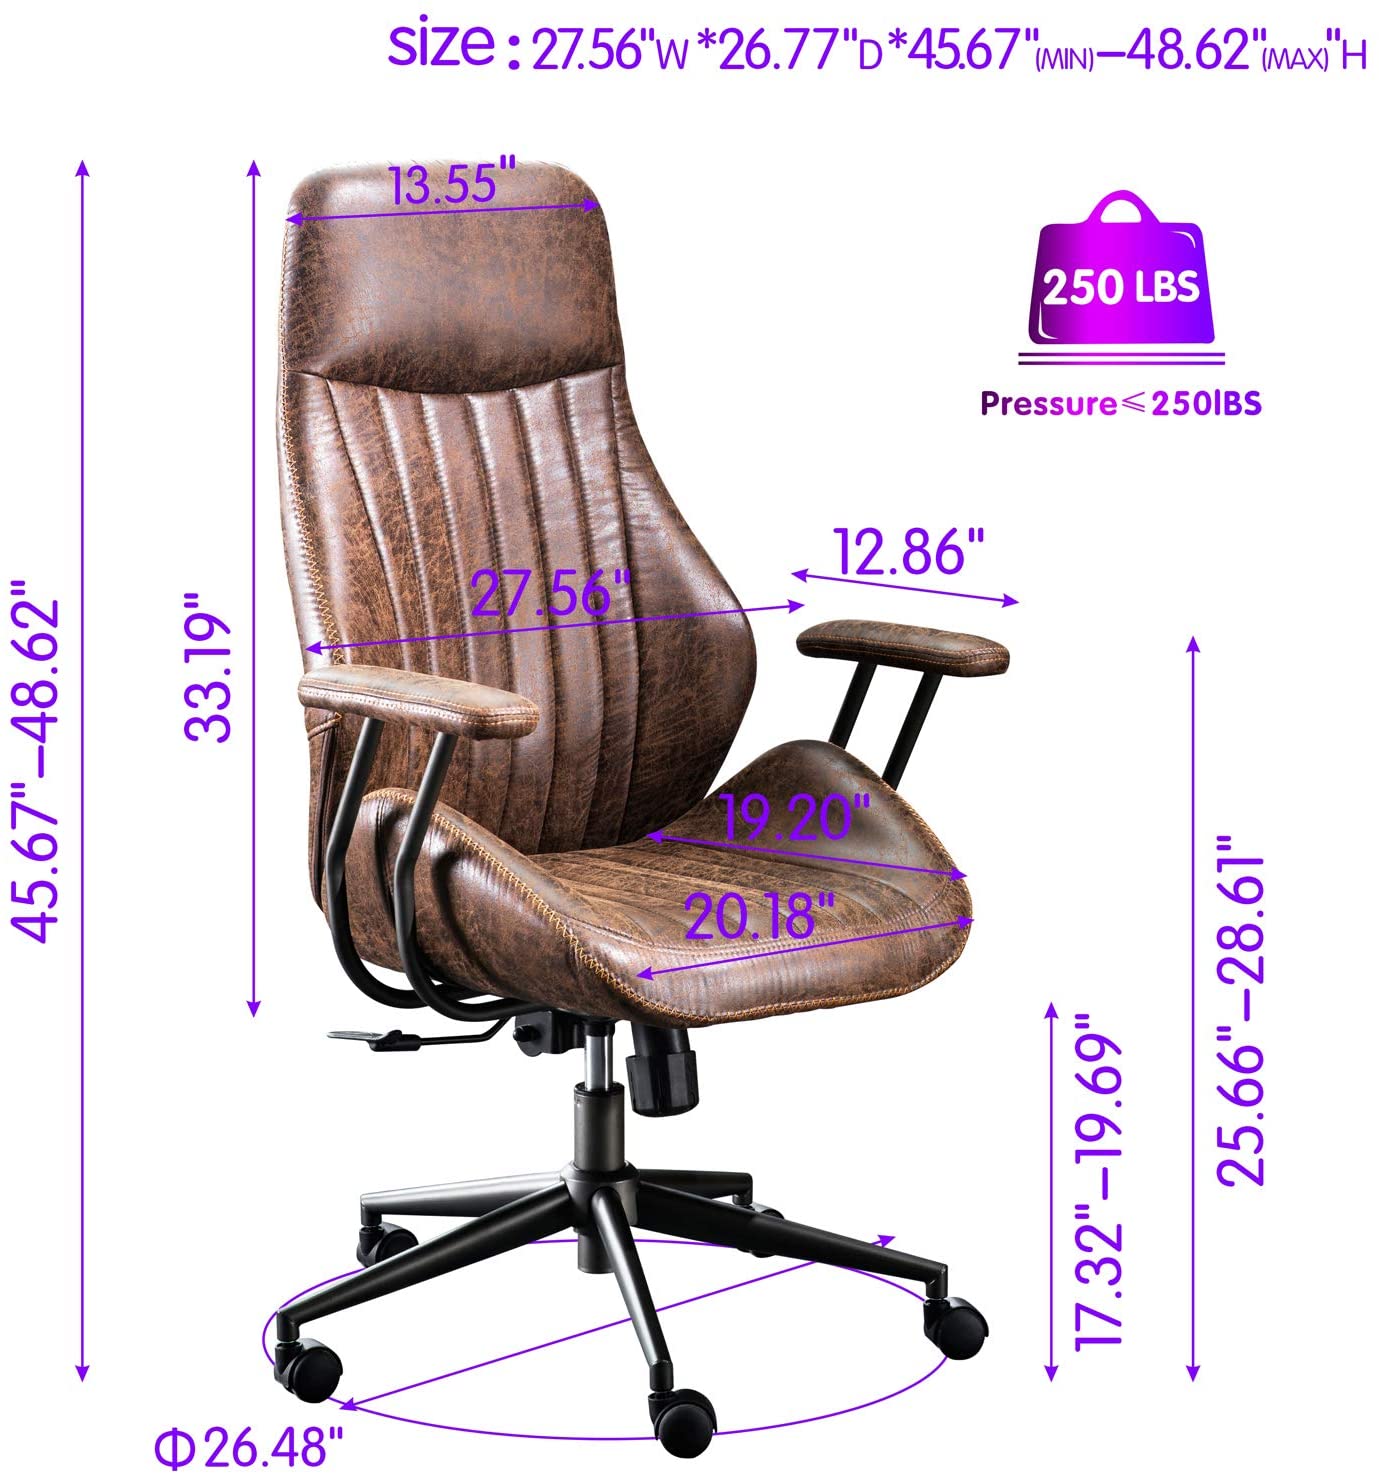
It was a rock-and-roll (and swivel) chair, not overly cushy, but cushy enough. Nice shade of brown, too. When set at its highest height, the arms fit right under the tabletop. I named it Rocky because, well, what else would you name a rocking chair? There was almost nothing wrong with that chair. While at the table working on my laptop, I sat in efficient and productive comfort, having myself a relaxing rock when I paused, spinning and rolling for whatever lay beyond arm’s reach. ‘Twas a fine chair indeed. But it had to go. As Blue Maxx’s new identity took shape, it became clear that one thing was lacking: a Lounge Chair. With full days and full nights to be spent in the van, there would need to be lounging time. I could lounge on the bed, certainly, but that’s a different kind of lounging. You don’t want to overdo your on-the-bed time. You want that mattress to feel special and welcoming when you crawl off to zzzz-ville. Too many hours on it in Lounge Mode will undercut that. Plus, you need to build a pillow-pile backstop for yourself, and the cabinets keep me from sitting up straight. And you still can’t help but slide down again and again, messing up your covers bigtime. So, a Lounge Chair was a necessity. Being on wheels was a good trait. Having arms was another. Swivel, yes. Rocking would be nice. But the one trait that would make for a successful Lounge Chair – the one that Rocky lacked – was a high back, high enough that I could lean my head on it. Rocky came up to about my shoulder blades, so even if I rocked back, I had to hold my head up. That’s a lot of work -- at least when compared to laying it back on a cushion. So, Rocky would get reassigned to actual office duty – as befits an office chair, yes? – when my extensive Amazon search would finally find its mark. I looked at high-back, body-fitting gaming chairs, but I didn’t like the gaudy accent colors and spaceship style, and I was not sure the arms would fit under the desk, which was a must. Some of the candidates had recline mode with fold-out leg rests. These were very tempting options. But to be honest, those leg rests all looked a bit flimsy. They also looked too short for my legs. That’s why I’ve been saying “leg rests” instead of “foot rests” as the ads themselves said. I pictured the bulk of my calves resting on that cushion, and I just didn’t think that would be crazy comfortable. I also had to wonder if the folded-in leg rests would clang into the EcoFlow Delta solar generator under the desk, nixing the tidy stowaway position that worked so well with Rocky.
The color and texture really sold me though. Dark Coffee is what it’s called: kind of an antique, aged look, with a suede-like finish. Excellent match for Blue Maxx’s cedar and cognac décor. Charley seemed like a good name for him: Charley Chair. You probably thought that Ovios would be the obvious choice, but, well, no. The assembly was easy and I wheeled my new lounger out to Maxx for a test fitting. At full height, the arms are a tad too high, but with the seat lowered about an inch, it slides right in. The wheels straddle the corner of EcoFlow nicely, and the bungee cord wraps perfectly around the back to secure it in its home position. I did a test lounge in it, and it passed with high colors and flying grades. On Rocky, the seat and back were a unit, and the whole thing rocked back. Charley’s seat stays level and the back reclines from, officially, Comfortable Work Mode, through Reading Mode and into Watching Movie Mode. For quality lounging, I can put my feet up on the dresser or sink. Ahhhhhhh…. --------------------------------------------------------------------------------------------------------------------------
YoungPower
Battery Operated LED Rope Lights, Warm
White, 40ft -- $14
Outwater
Plastics
Styrene Moulding, 1/2" x 1/2"
x 3/64", 18 72" Pieces -- $100
All
the puck lights came out great. They
really did. When this whole thing
started, I put the pucks in the plan and
figured I concoct some kind of Plan B when I messed 'em
up. But I didn't mess 'em up. Yay,
me!
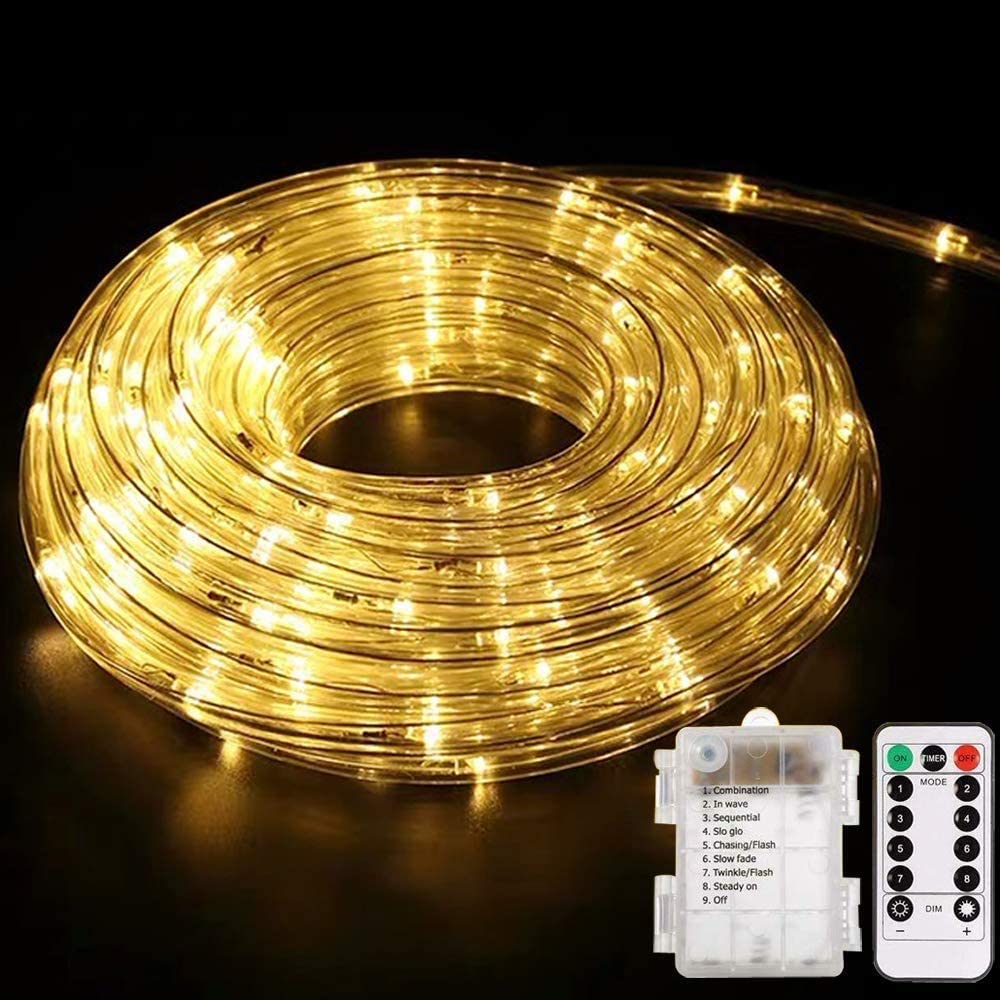 But, the whole time, in the back of my mind, I
knew they would not be the whole story of Blue
Maxx lighting. With three distinct sets
on three different switches, dimmable to
Pretty Dim and brightable to Really Bright,
you'd think I'd have every level of
illumination covered.
Somehow, though, I knew there would be rope
lights up along the top of those
cabinets. Something just right for a a
candlelight mood. Something dim enough
to keep my pupils wide open, but just bright
enough to keep darkness at bay. That is
my soul soothing illumination level.
Anyone who has ever been in my abode knows I
am a huge fan of indirect lighting.
You'll never find a room of mine lit by some
dome light in the middle of the ceiling.
More likely to find a couple of pole lamps in
the corners with all their pods turned to
shine on the walls, floor or ceilings.
You'll never be looking at the light bulb
itself in my nest.
The
puck lights didn't fit that, and it's
fine. They are get-things-done
lights. But when all the things are
done, those will get turned off and the dim,
soothing rope lights will go on.
I
have a set of rope lights on
my front porch at home, strung up among the
laces around the pipes. Glowing green
under the green canvas awning, they create a
great atmosphere. I also have two sets
lining my walkway, casting a white glow
upwards in the the lower palms on each side.
For
this set, though, there had to be "next level"
parameters.
First, I wanted battery-powered lights.
Those ropes come with AC plugs, with USB
plugs, or battery packs. The home string
was AC, plugged into a timer. You might
think that I'd be all over the USB version,
given that I have 22 ports in the van.
But,
no, no, Jojo, me want batt'ries.
Double-A's, three of 'em. I'm thinking
ahead to nights when I'm fatassing in bed,
iPadding myself into sleepy-time-time.
If any DC or USB device is still on (except
the fridge), I'll have to either leave it on
all night, or get up and shut it off.
With the AA-fueled lights, I'll be able to
just click the red button on the Rear Remote
and slip into darkness without putting any
drain at all on my solar stockpile.
And,
yes, there will be a Front Remote as well, so
I can flip on my glow as soon as I park -- or
even while I drive, just for atmosphere.
Having a soft glow behind me as I drive
through the inky night will help ward off evil
spirits. Plus it'll just look dang cool.
Most
of the time, going battery-power only will be
overly thrifty. I think I could leave
all my puck lights on all night and probably
burn just a bar on the Maxoak's 5-bar
gauge. But, still, it might save a tiny
bit on the life cycle of the Maxoak, and
maybe, just maybe, I'll get an extra day or
two at the end of its life. Maybe.
Second, I didn't want the rope lights to be
raw. No raw ropes. That indirect
light thing again. My ropes needed a
gutter.
This
would have been a useful thing to consider as
I built and installed the cabinets,
right? Oh well, maybe next time. I
had to concoct a plan to support and hide the
rope itself, but leave enough space for the
glow to escape -- and do it all in a
1.25"-high space, the height of the top bar of
the cabinets.
Somehow, there had to be a flat vertical
surface to adhere to the wood, a flat
horizontal surface to lay the lights on, and
another flat vertical surface to go straight
in front of the lights. And I needed a
total of about 32-linear feet of it all.
The
plan was easy to concoct, but the details took
their time revealing themselves. It was
clear that it would not be a one-piece thing;
I was going to have to assemble
something. That notion had been in
motion quite a while, though.
When
I got the wood angle-molding for the
slider-side edge of the floor, I thought that
might be the ticket. I could slap two
pieces of that together with little screws,
then use more little screws to connect to the
wood bar. But I took a couple of small
pieces, taped them together and held them up
for a test fit.
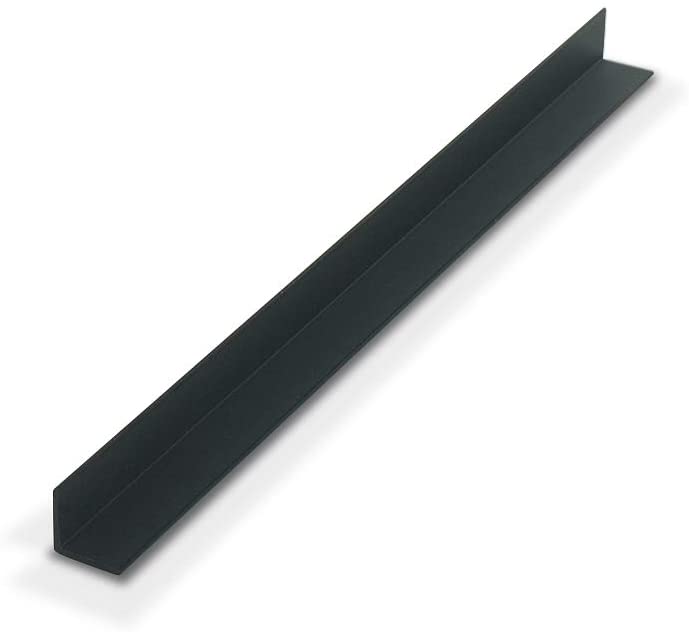 It
was a big No Go. The angle-molding
itself was too thick. The horizontal
part had to be two-layers thick, so if I laid
them outside each other, they went all the way
up to the ceiling, which was useless. If
I laid them inside each other, the gutter was
not deep enough to hide the rope. If I was
going to see the lights, I might as well save
a ton of trouble and staple the rope up there
in plain sight. It
was a big No Go. The angle-molding
itself was too thick. The horizontal
part had to be two-layers thick, so if I laid
them outside each other, they went all the way
up to the ceiling, which was useless. If
I laid them inside each other, the gutter was
not deep enough to hide the rope. If I was
going to see the lights, I might as well save
a ton of trouble and staple the rope up there
in plain sight. But
the notion had a back-up. Before I got
that wood molding, I had bought a sturdy
styrene plastic version of the same
thing. While the wood was 0.75" on each
side, and 3/16" thick, the styrene was only
0.5" high, and just 0.047" thick. I had
purchased it to use on the edge of the floor,
to cover any gaps and to keep the tile edges
from rolling up.
The
floor was aces on its own, though. It
fit great, and it stuck even greater, making
the plastic molding useless. Down there,
at least. Where floor duty bottomed out
for it, a ceiling job might lift it up.
Plus, when I bought it, I had to buy 108 feet
of it; it was only sold in a pack of 18
six-foot lengths. In the side of my mind
-- not all the way back -- I knew I might need
it for gutter time.
Once
I did sample fit of the same two-piece design,
it was clear that the Outwater plastic was the
way to go. It was so lightweight that I
wouldn't even need to use screws; long strips
of 1/4" wide two-sided tape would be plenty
strong enough to hold it up.
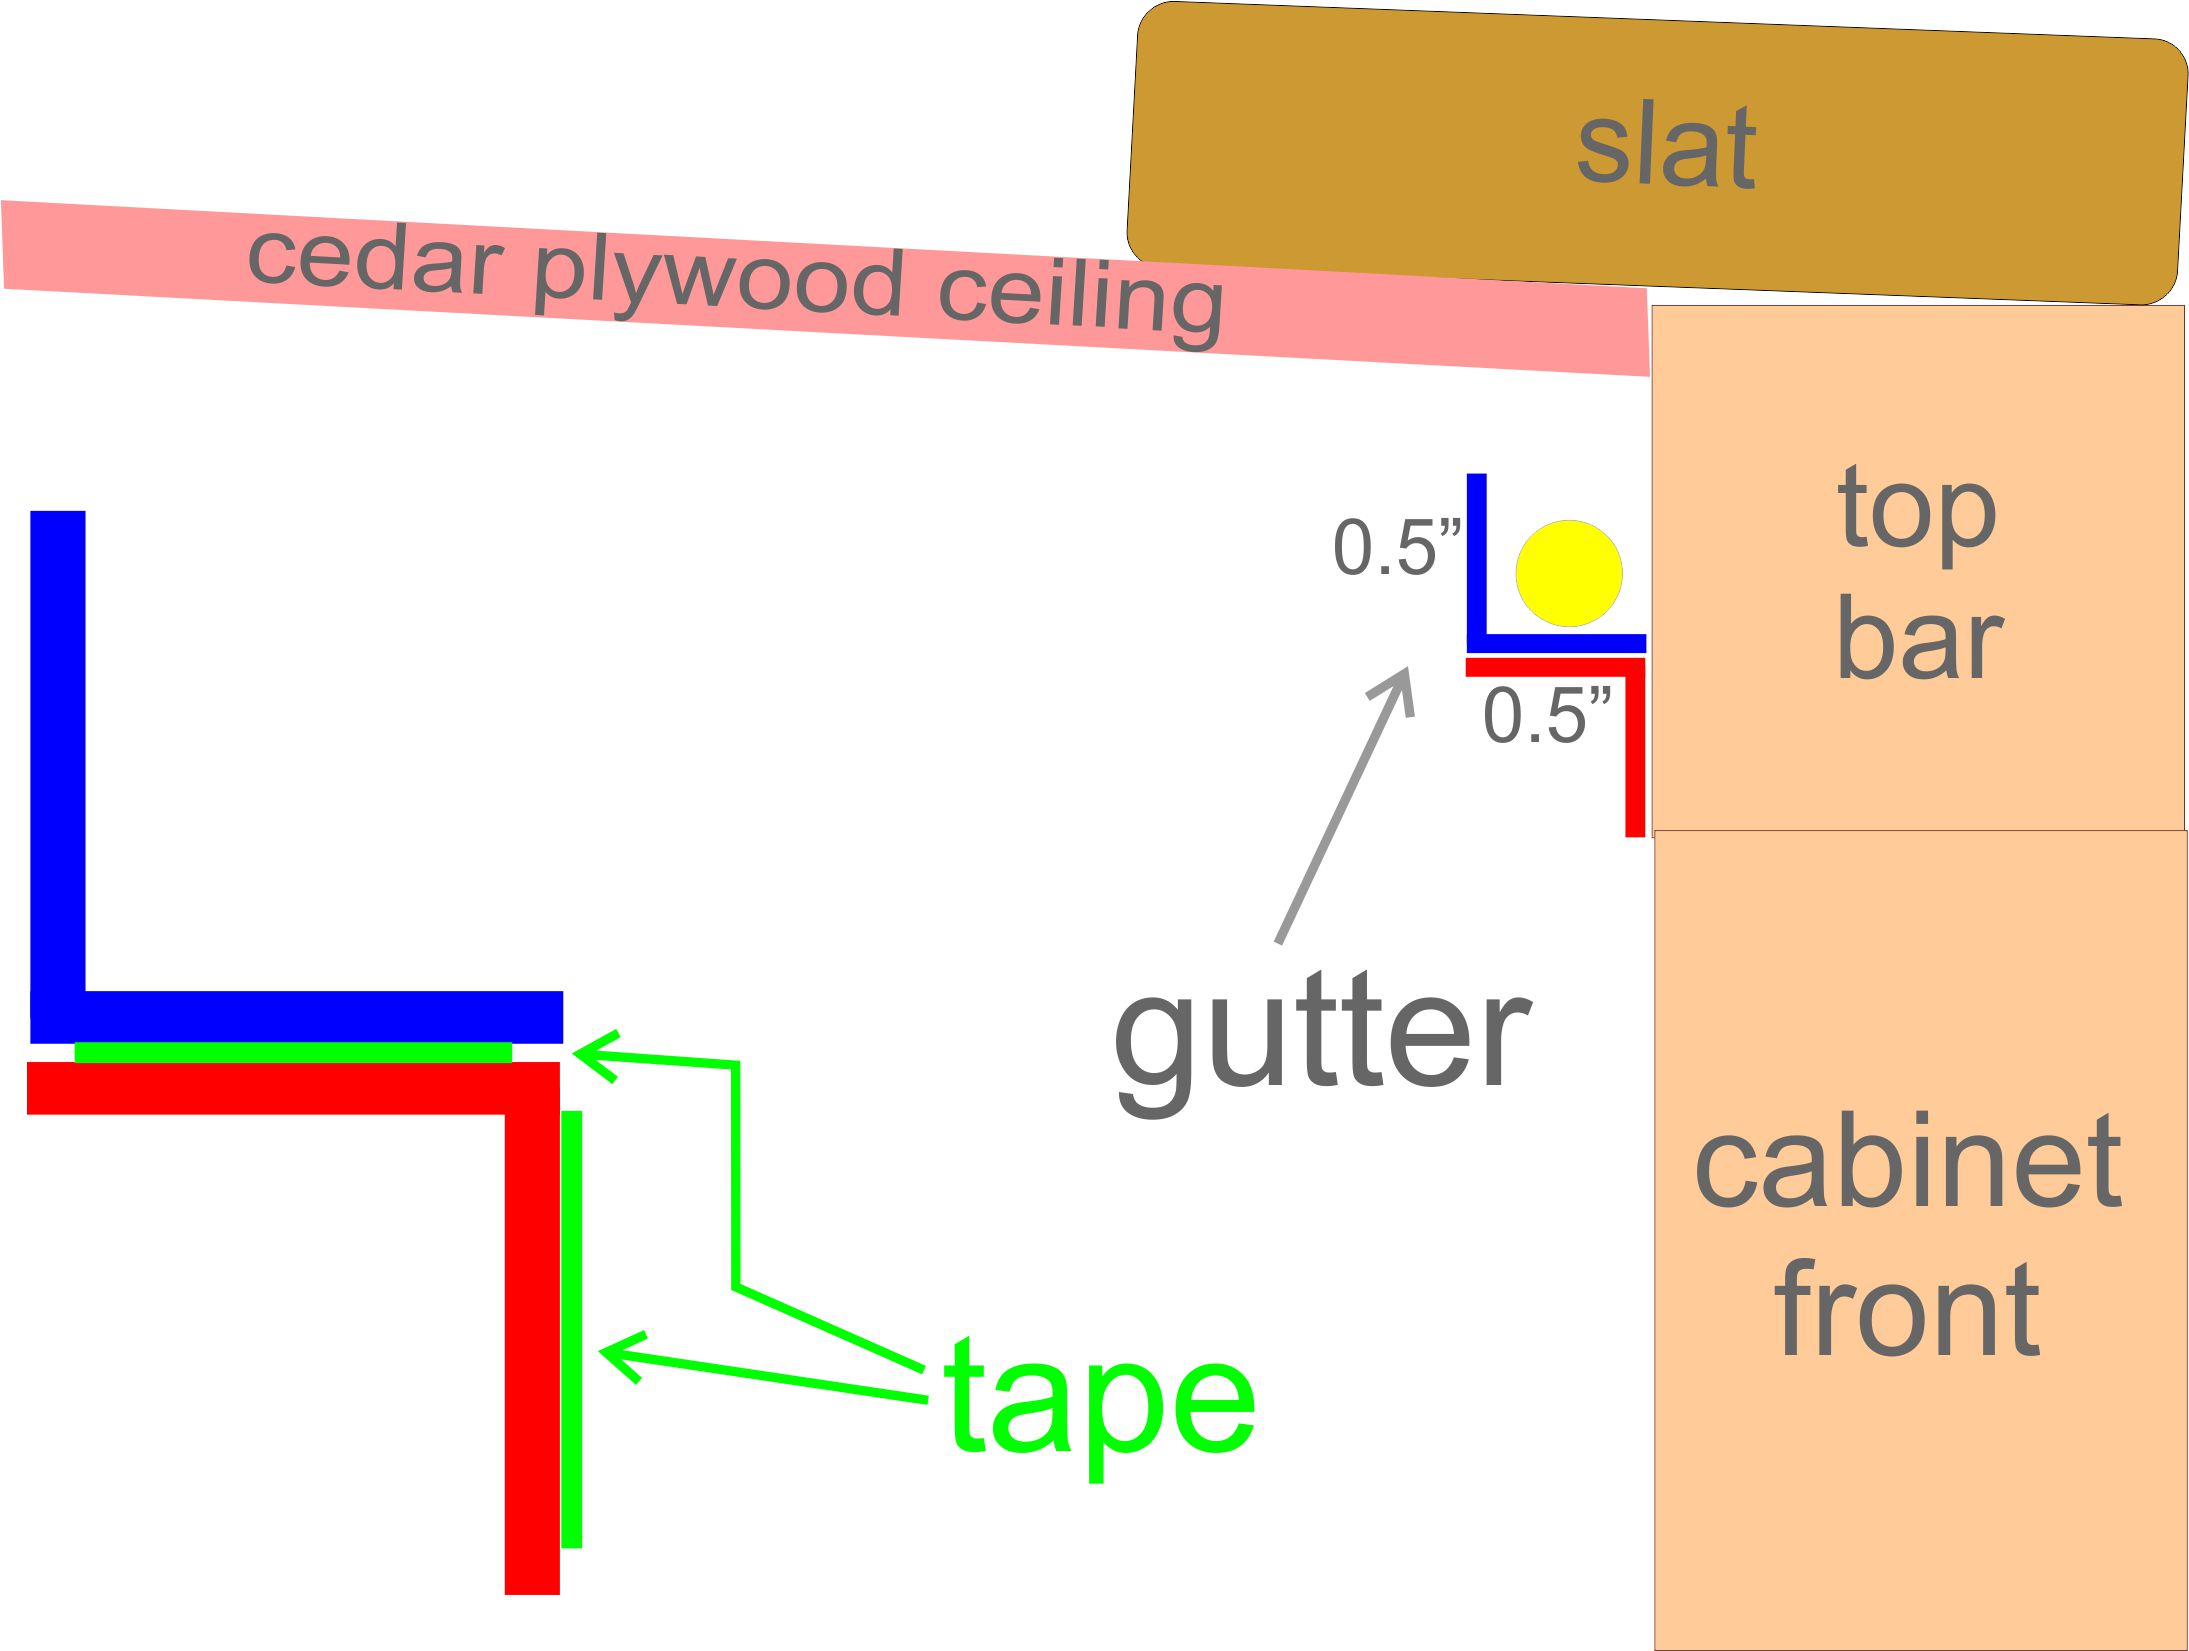 I
wanted as few gaps as possible, so I used 72"
lengths wherever I could. Two 36" strips
of tape got applied to both outer sides of one
of the lengths. I peeled one side and
stuck the naked length to it, in the opposing
direction. Then I peeled the remaining
side and stuck it to the top bar.
The
corner provided a bit of a challenge,
especially the back corners where the cabinets
met the Logo Board. But I took my time,
cut some smaller strips, and assembled them
the same way, even where the gutter went to
vertical orientation.
I
kinda regret no running the lights right under
the RAMACK laser-cut lettering. I could
have done it, but it would have looked
forced. The track would have had to jump
from the cognac layer to the cedar layer, and
it just would have been hack.
Might
have been a bit vain, too. Bad enough
even having it there at all, I suppose, but
fukkit, it's all part of the Stealth
Mode. We'll get to that later.
I
started at the front end of the cabinet on the
driver side and worked backwards. The
rope would follow a crooked U, ending at the
overhead compartment (OC) past the slider
door. I didn't see the need to cross the
OC and complete the loop. For one thing,
there was no reasonable way to do a gutter
across the top, and one across the bottom
would just get in the way of the
curtains. Also, Instead of illuminating
a nice cedar ceiling, a rope there would light
up all the crap I store up there:
raincoat, sweatshirt, first aid kit, toilet
paper supply, umbrella, and I don't even know
what else for sure. So no need for that.
Once
I got U'ed around past the cabinets, the space
above the slider door threw me a curve,
literally. Since it was not flat,
vertical metal, but, rather, rounded and
sloped diagonally, my gutter design seemed
unnecessarily complex. I simply taped
one length of styrene molding up there really
close to the top and the space was perfect.
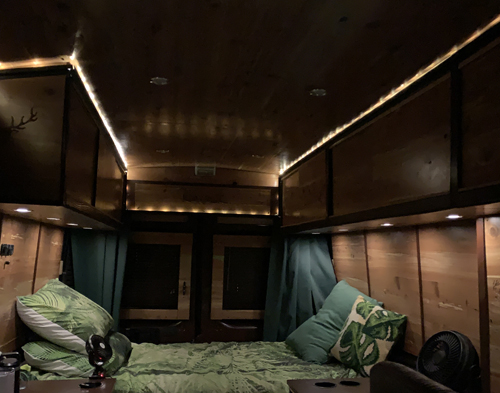 The battery
pack site at the front edge of the OC, near
the slider. There is a six-foot-long
piece of silver wire/cord between the pack and
the lights themselves. This allowed me
to choose exactly where to start the
glow. I worked the U in reverse, tucking
the rope in as I went. The
vertical-horizontal junctures didn't want to
play at first, but I thought "screw them" and secured them with a
drywall screw in each corner to snug them in. The battery
pack site at the front edge of the OC, near
the slider. There is a six-foot-long
piece of silver wire/cord between the pack and
the lights themselves. This allowed me
to choose exactly where to start the
glow. I worked the U in reverse, tucking
the rope in as I went. The
vertical-horizontal junctures didn't want to
play at first, but I thought "screw them" and secured them with a
drywall screw in each corner to snug them in. When
I got to the starting point of the gutter, I
had about 8 feet of lights left. I toyed
with the idea of running them across the top
of the office window, but quickly bagged the
idea. It would have meant creating new
gutters, and it would have looked a tad
obnoxious. So, I rolled them up fairly
tight and stuffed them in a black fabric bag
and rested them in the corner of the OC.
The
glow is perfect. Love it.
--------------------------------------------------------------------------------------------------------------------------
Sande
¾” Plywood 33” x 16” -- $0, left over from dresk
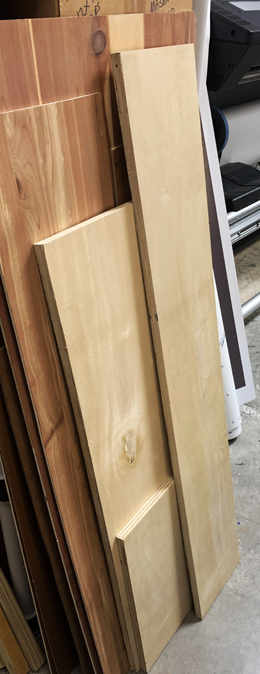
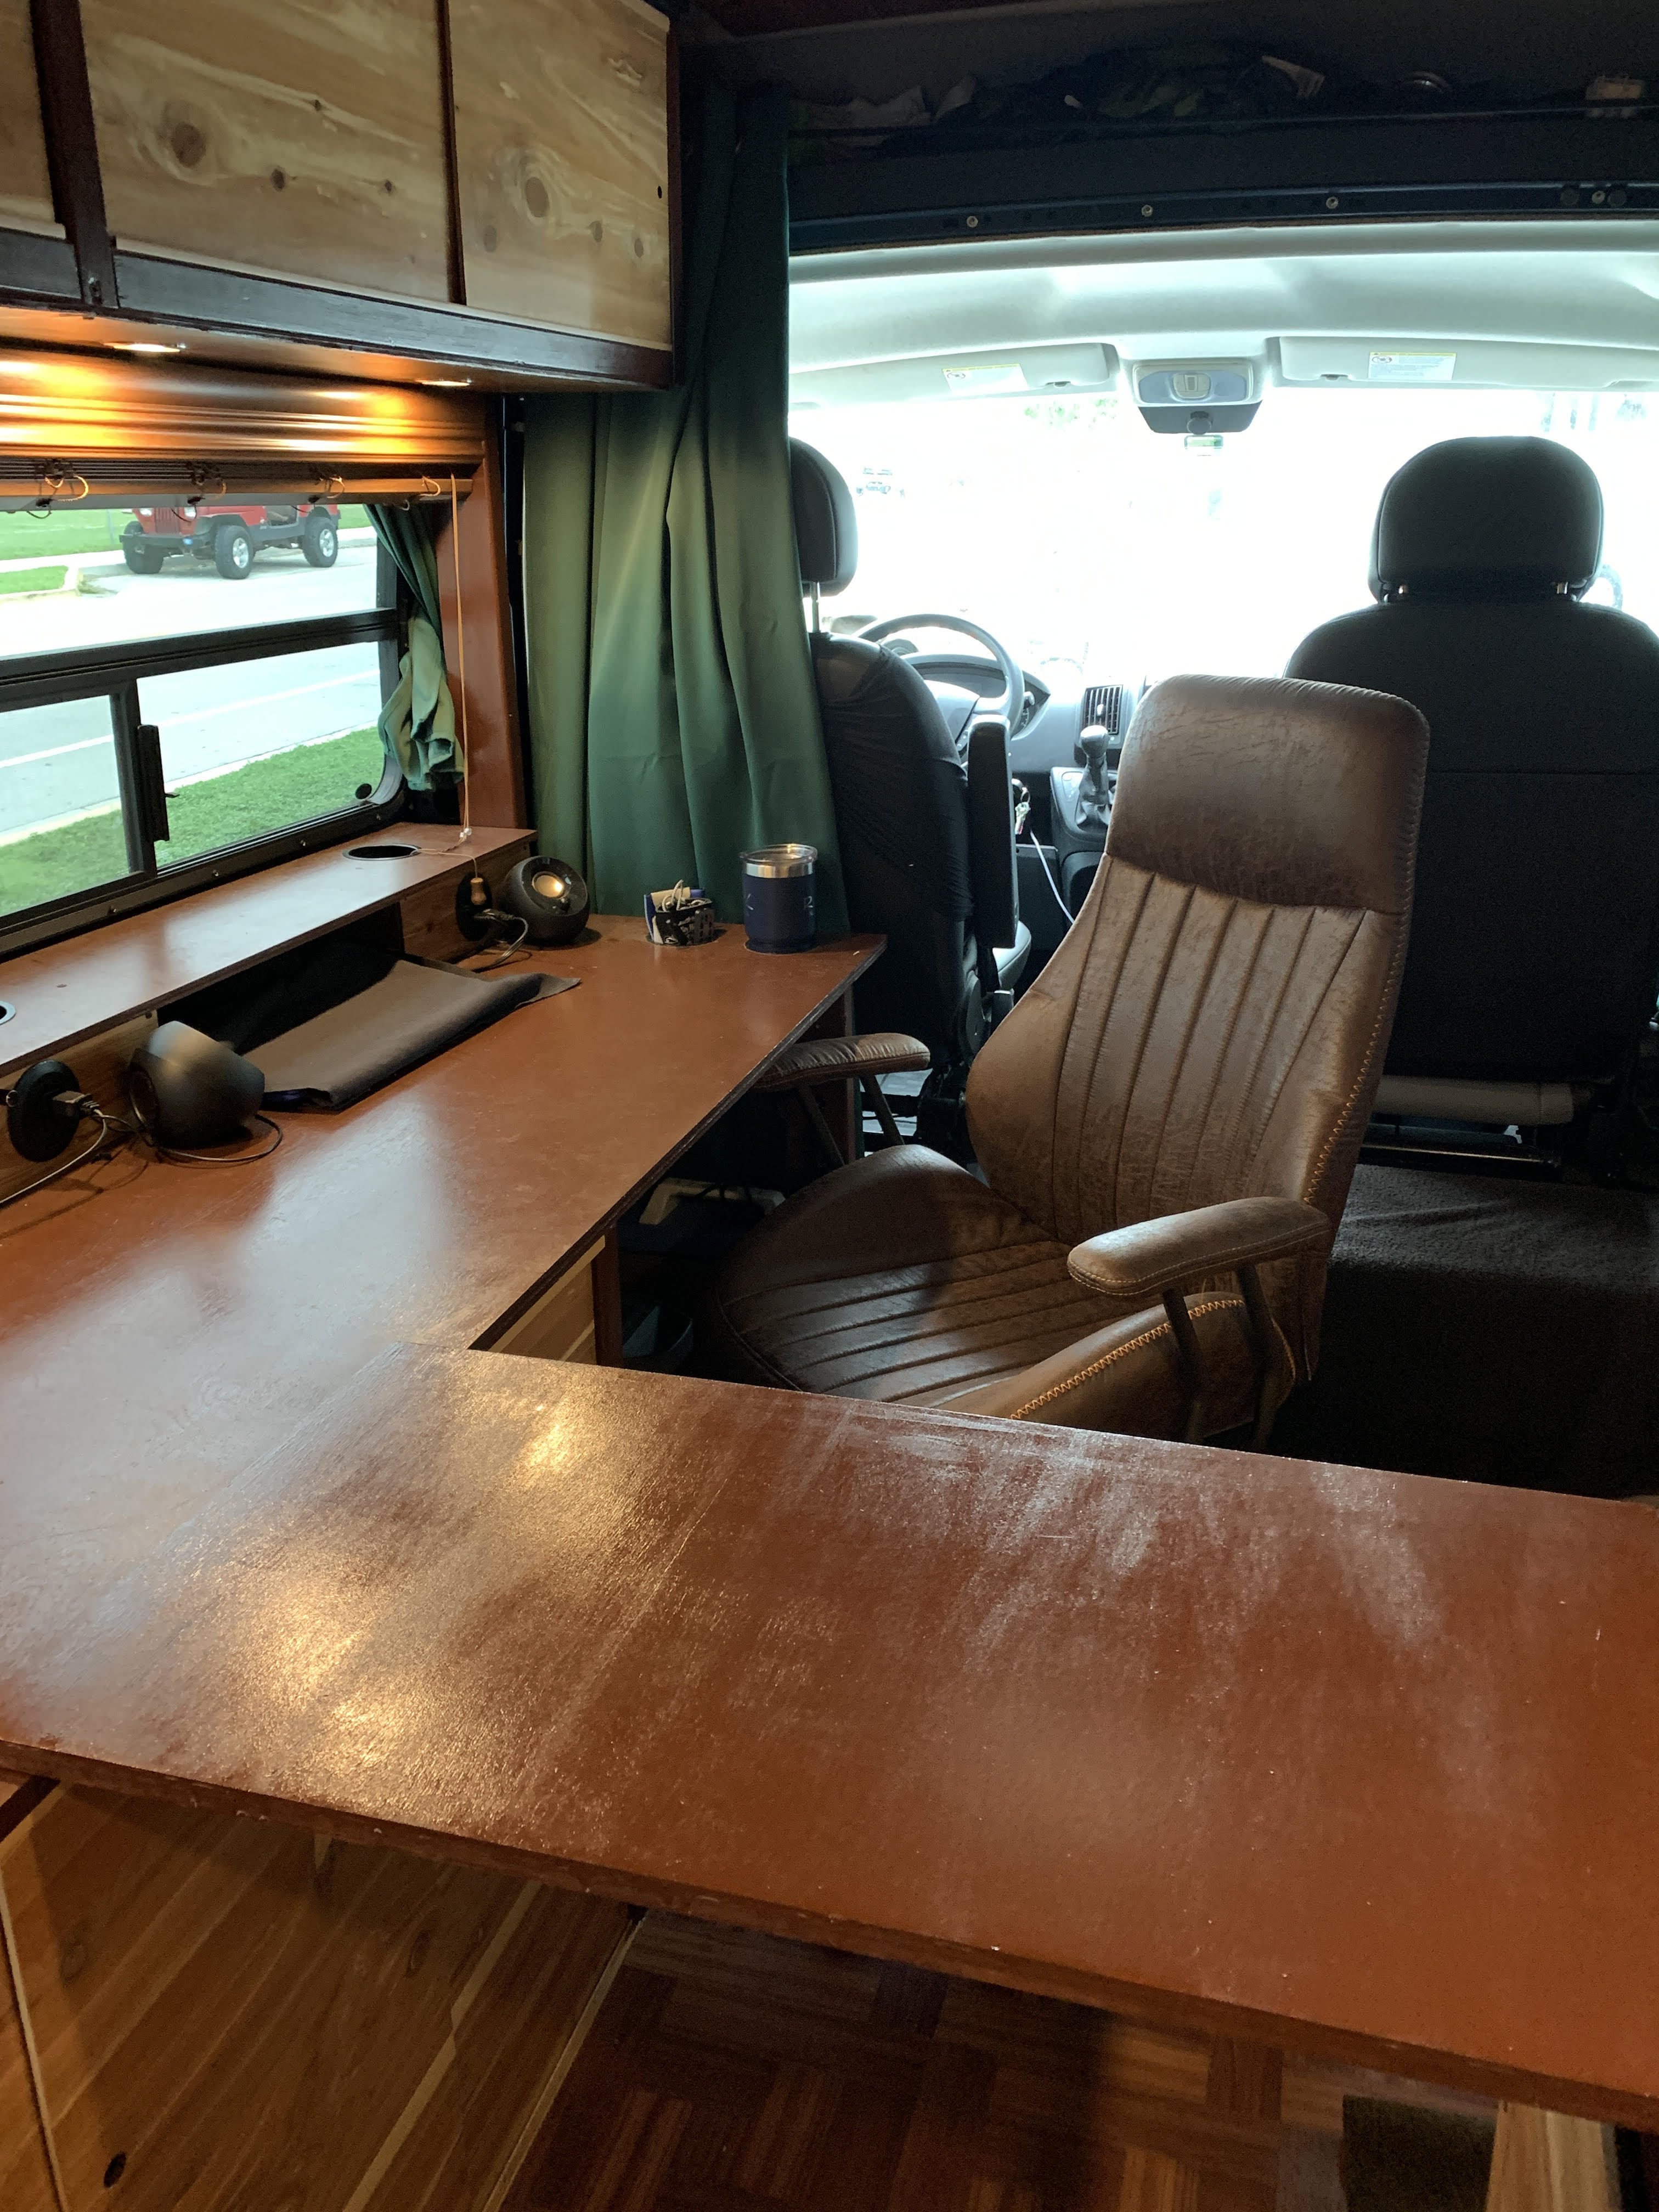
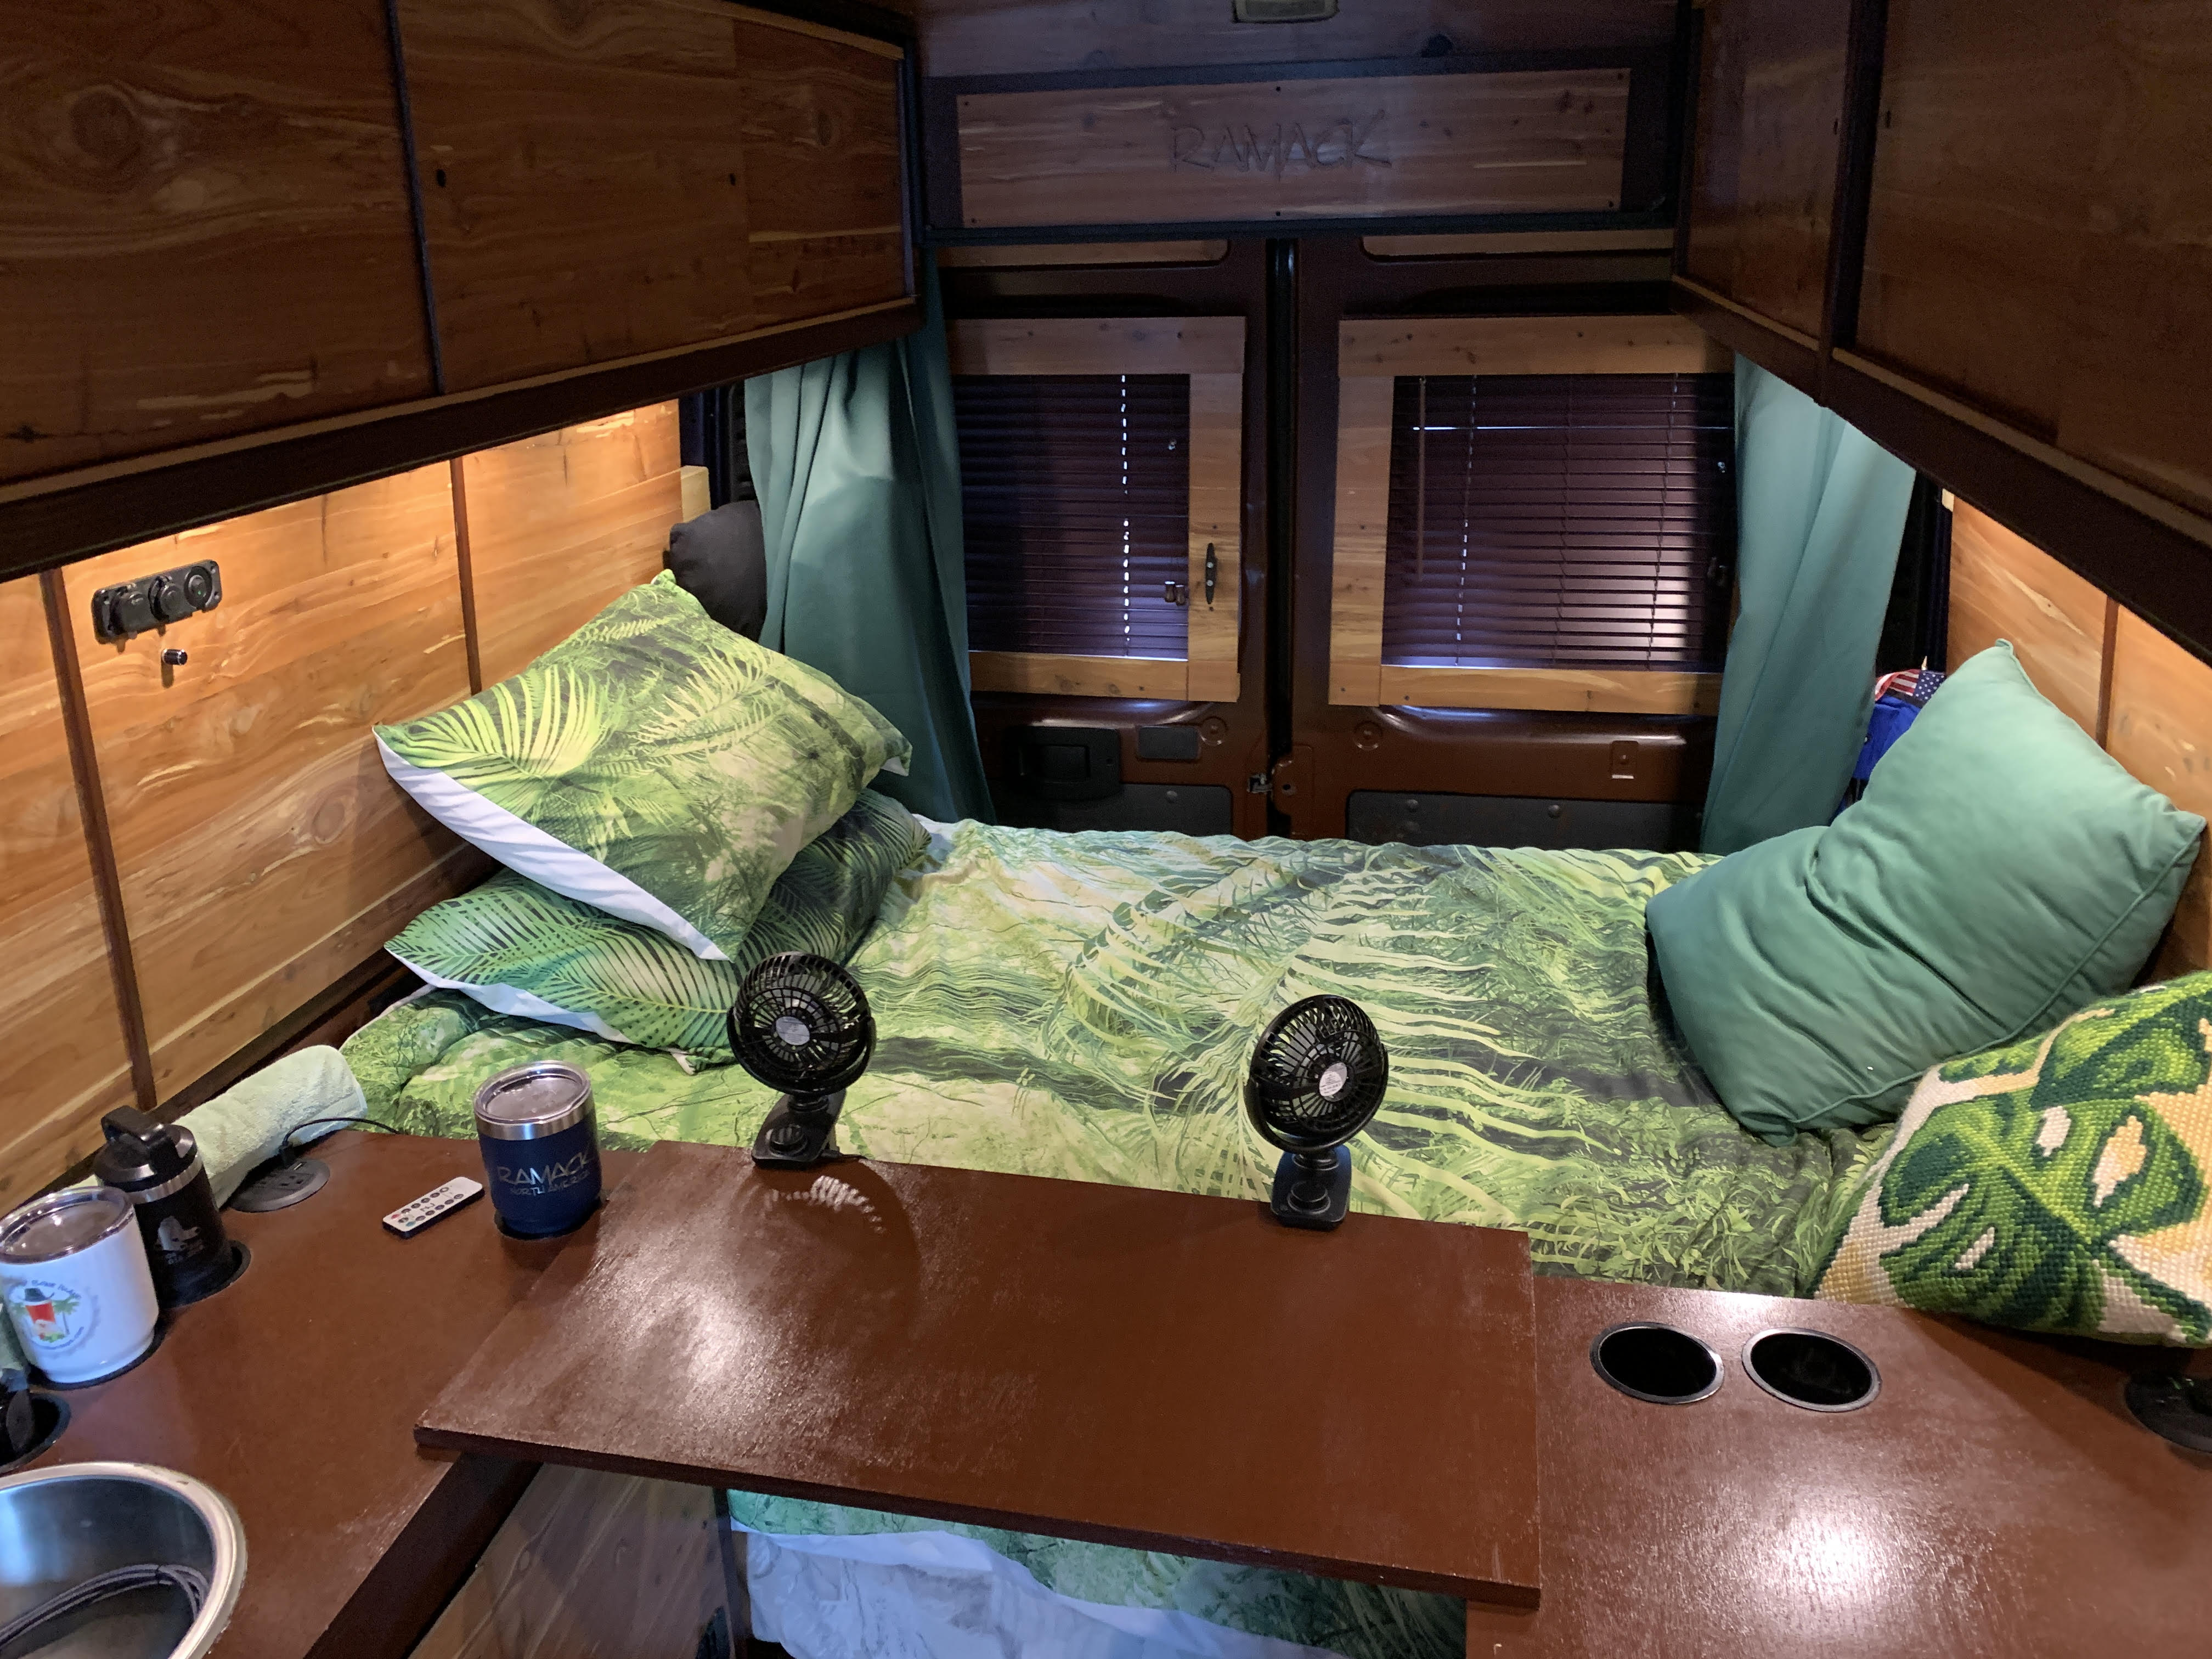
I had started the process of purging my leftovers from the back room at work, lugging a carton of 2x4 pieces, cheap 1x3 scraps, and small slabs of cedar plywood out to the dumpster. I was setting aside a few semi-panels of cedar for “just-in-case” duty, when I looked at the three planks of Sande ¾” plywood that were standing on edge, leaning against the shelf unit. Sande is the wood that I used for the sink countertop, the dresk top, and the bed platform. It is sturdy, it is smooth, and it had not warped even a millimeter in the year-plus that it had been leaning there. It is awesome. I lamented its imminent disposal. Then one of those notions stirred into motion. I picked up the long and narrow plank – about 42” x 9” or so – and took it out to show Blue Maxx and see if he had any ideas. I stood behind the desk chair and set the plank down so I could switch on the Maxoak for some lighting and some fanning. As I stood up, I realized that the plank was doing a most excellent job of spanning the yawning gap between sink and dresk. Hmmm. That might come in handy someday, mightn’t it? I certainly would not want it there all the time, but it would be useful sometimes. It would be The Sometimes Shelf: deploy when needed, stash when not. Top notch! I grabbed the tape measure and marked out a length that would sit sturdily on both sides, yet not impose on the drink holders or sink basin. This 9” wide plank was good for a test, but any worthwhile shelf would need to be almost double that. The medium-sized board won the assignment. I sawed a few inches off one end to bring it to 33” long, kept its 16” width intact, and got out my can of cognac stain. A thick skin had formed inside the third-full can, but a few good pokes with a skinny stick knocked it loose and let the fluid breathe. Two coats of stain, followed by two coats of glossy polyurethane got the shelf ready for duty. Almost. Unlike the Corleone Family, I did not have a lot of buffers, but I did have a roll of 1/4” green felt dots. These are the little things that are often used on the bottoms of some tabletop items to prevent scratches. They are a staple at work for desktop awards. I put a few on the underside of the shelf, right near the ends, the a few more on the outer edge of each shallow block to buff the sides of the counters. Poifect! The primary placement of The Sometimes Shelf would be as a left wing of the desk as I sit there working. It would be wide enough to spread out notebooks, camera stuff, and even food while the laptop fills the desk space. I could also swivel Charley Chair and angle towards the TV screen near the foot of the bed, so I could do dinner and a movie. It might also come in handy placed a couple of feet farther back, as utility shelf as I do stuff at the sink: laundry stuff, or whatever. The Sometimes Shelf can also be set up next to the bed, if ever that need arises. I can leave room for my legs and sit on the edge of the bed, or I can get it right up next to the mattress and line it with fans on a sweltering night. And when it’s idle, it stands almost upright behind the driver’s seat, where it also serves as a stabilizer for the Maxoak in case of hard braking.
So, I feel right proud of this simple
thing.
--------------------------------------------------------------------------------------------------------------------------
|


