|
THE D.I.Y. VAN
CONVERSION
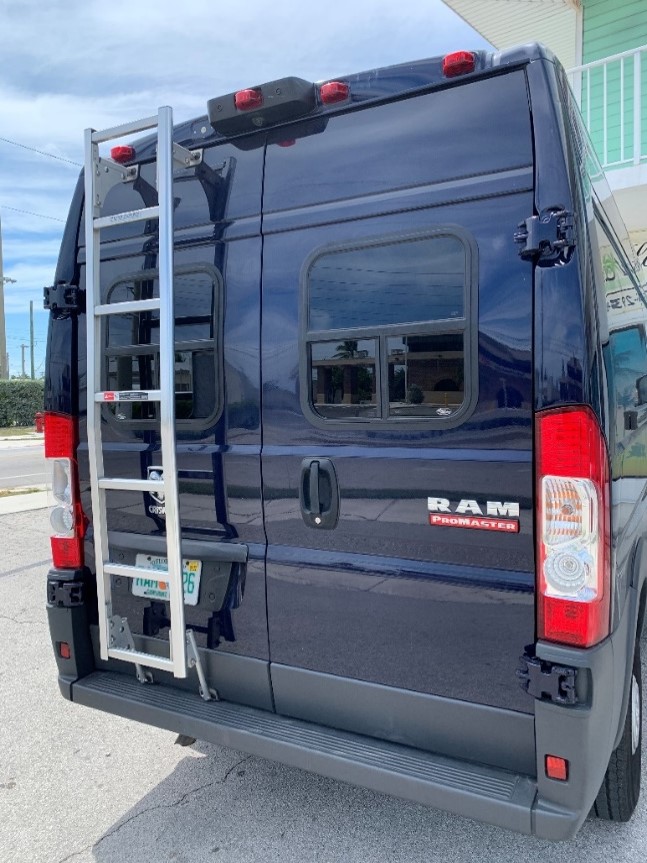
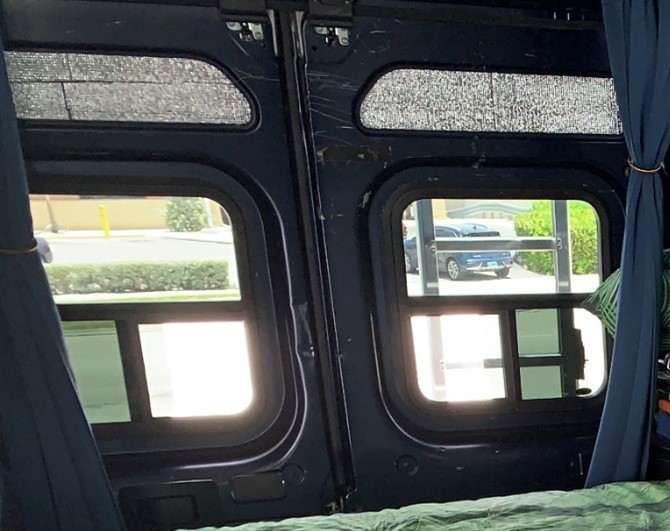
REAR WINDOWS Motion Windows 159-4 (2) $322 each, plus shipping = $755
The MaxxFan, though so far just a vent, was
helpful, but for true air movement, I needed
windows.
So, not just windows, but windows
with screens were a
MUST. Air does not circulate when there is
one hole. If you have a really strong wind
outside, it might create enough of a pull to
suck out a little bit of your stale air, but if
no new air can get in to take its place, 99% of
it will just sit there. But when you can
slide open a back window, now you have flow,
Flo. That air supply will swirl and turn
over, and you'll be so damn happy. The back door windows, being the least pricey and, hopefully, the easiest to install, were selected to go first.
I did not spend much time shopping for
windows. My Google search immediately
pointed me to Motion
Windows, Inc., in Vancouver WA, who
specialize in RV, van, and boat windows.
They make them to order, and ProMaster
windows are one of their extra special
specialties.
These are great windows, too!
Tinted, with both a glass slider and a
screen slider in the bottom half.
The screens are KEY: perfect for
ventilation and bug exclusion.
I hate bugs, although I recognize the
critical role they play in the food chain and
the sustainability of the environment. I
can hate the little suckers all I want
though. Big, tiny, flying or crawling,
go fulfill your role in Nature's Great
Plan, just STAY AWAY FROM ME as you do it!
So where were we? Oh ya, my Motion Windows (MW) windows. I think I looked at two other window vendors and saw less-ideal products and higher prices. MW it would be! So far, I don’t know for sure how many I will get. They are not cheap, but windows are probably something that shouldn't be cheap. Honestly, I thought they would cost more than they do.
These are not the large square panes that you
see side-by-each on ProMaster window vans.
I do love the look of those. They are
probably the main reason that I craved (crove?)
a PM passenger van. Did you know those
big, heavy panes of tinted glass are just glued
onto the body?? Damn, you gotta really
trust your glue. OK, maybe "glue" is the
wrong word. It's not Elmer's Van Window
Glue. It's one of those Very High Bond
cement things. (More about that in Power
Up / Solar Panels). But anyway, those big
beautiful windows do not
open. They are glass walls only, allowing
light through, but not air. In my
book (or on my web site) that makes
the Motion Windows a big notch better.
Function over form, Norm.
MW’s website provides a 20-minute video, showing an actual installation,
step-by-step, with explanations.
I watched it several times, and even
had it running on my iPad as I set to my
task. It was very thorough and made the
job less daunting. I mean, let's face it,
if you screw up a hole in your roof, almost
nobody will know. But, if you mess up a
window, that blunder is On Display.
And I had to do it
right, not just to keep bugs out, but to keep water
out. The way I look at it, water is Public
Enemy #1 to a van liver. Where windows are
concerned, water is pure evil. Leaks will
give rise to the insidious infestation of rust
along the exposed edge of your jigsaw cut, and
cause ugly stains and rot if they furtively
creep in on your interior.
As I told you in the Intro (check your notes), I don’t have a garage or a workshop, and the well-to-do Old Town neighborhood that I somehow get away with living in is not the kind of area where a wailing jigsaw is going to be well-received, so I prudently chose my workplace to be my work place.
I had done the fan install there, in the morning shade on the west side of the building. That was a quickie, though, with only a few minutes of loud power tooling. This job figured to be much more noisy. The holes were more than quadruple the size, and there were two of them to cut.
Condo Association rules prohibit working on your
vehicle on property (so I was told after
the fan install, oops), so I ended up doing the
job in the street to sidestep any complaints
from the upstairs condo residents.
It must have looked odd to people
driving by at 40 MPH, but joke 'em, right?
The passenger side went like clockwork, step by careful step in time with the video: cut out the cardboard template, mark the metal on the inside, drill the guide holes, use those holes -- and the provided corner gauge -- to mark the outline on the outside, jigsaw along said outline, apply the butyl tape to cover the bare metal with a waterproof seam, lift the window into place, attach the interior flange, and wipe it all down! Bing-freaking-go!
BUT, the driver side had a wrinkle:
that dang ladder you see in the photo,
above. Yup,
the old Prime
Design AAL-8008 (retail price $373.33)
was gonna be in the way. Bigtime in the
way.
Great. I
didn’t have those damn screws.
Some plumber or some dealership --
whoever did the install -- had them.
Well, that MW video never mentioned no freaking ladder, so I was on my own to wing this.
But, I figgered, what’s the diff between cutting
from the outside and cutting from the inside? I’ll
just go to the interior and cut from
there. It'll be cooler in there anyway.
And, of course, I quickly found out what the diff is. On the inside, the window is in a deep recess. The guides of the jigsaw are supposed to lie flush on the surface as you cut, but No Way Jose in here; there was almost a 2” gap. But there was no other way, and the jigsaw blades must be 5" long for a reason, so, WTF, have at it.
The saw HATED it! It jammed, it snagged, it growled, it screamed vile curses at me, I had to hold it about a 45-degree angle in spots, metal shavings flew everywhere; I’m amazed the blade didn’t snap. The cut lines were kinda crooked, but nothing so bad that a little extra butyl tape wouldn’t cover it.
I screwed that sucker's interior flange in,
added a bead of silicone around the exterior
frame, and proclaimed the installation complete. And there was
great rejoicing.
Now, even with all that extra time on Window
#2, the whole task only took about 2
hours in all. The windows are water tight
and air tight, with no wobble or rattle at
all. I did not cut myself with the saw or
a sharp metal edge, I did not crack the glass or
put my thumb through the screen, but I did
slightly injure my arm ... patting myself on the
freaking back, Zack. Ha. =)
What would I have done differently? Well, if time had been a non-factor, or if I had foreseen the obstacle, I would have contacted Prime Design to obtain a couple of those Installation Screws. It took 7 weeks for MW to make and ship the windows, so I easily could have gotten the screws in that time frame. As it was, it did not even occur to me that the AAL-8008 was an obstacle until after I finished the first window. Big "Duh" for Ricko on that one. I'm sure it not be the last one of those. |


